在SpringMVC中,一個標準的架構是這樣的:
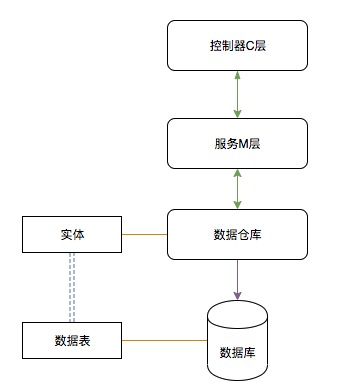
它們間的分工如下:
* [ ] 實體:負責映射數據表結構。
* [ ] 數據倉庫:負責操作數據表完成基本的增查改刪。
* [ ] 服務M層:負責進行邏輯運算。
* [ ] 控制器C層:負責數據輸入、數據轉發、數據輸出。
上一小節的內容明顯地違背了這一原則,這也直接使我們在上一個小節中放棄了更健壯、更具有追溯性的單元測試。本節中,我們引入主要進行業務處理的serivce M層,進而使當前項目結構更加的貼近于生產項目。
## Service初始化
和angular的依賴注入相同,spring也是支持依賴注入的。我們在前面的小節中早早的使用了`@Autowired`注解完成了該依賴注入的過程。在spring項目,spring充當了整個項目的管理者。當我們需要某個功能的服務時,只需要用`@Autowired`注解來進行聲明。spring看到該聲明后,會在需要的時候將符合此聲明的服務傳送給我們。除了使用`@Autowired`注解外,spring的依賴注入也是支持在構造函數中進行聲明的。
在使用spring的依賴注入時,由于java語言相對于typescript語言更加**“呆板”**。我們不能夠像angular一樣聲明某個`類`來做為該服務對象的`規范`,而是應該聲明某個`接口`。這是由于JAVA**“呆板”**的認為`類`是用于創建對象的,而`接口`才是真真切切用來定規范的。
> 實際上我們會越來越多的喜歡上JAVA的這種**“呆板”**
### 規范實始化
新建service包,并在該班中建立KlassService接口:
service/KlassService.java
```
package com.mengyunzhi.springBootStudy.service;
/**
* 班級服務
*/
public interface KlassService {
}
```
```
panjiedeMac-Pro:springBootStudy panjie$ tree
.
├── SpringBootStudyApplication.java
├── config
│?? └── WebConfig.java
├── controller
│?? ├── KlassController.java
│?? └── TeacherController.java
├── entity
│?? ├── Klass.java
│?? └── Teacher.java
├── repository
│?? ├── KlassRepository.java
│?? └── TeacherRepository.java
└── service
└── KlassService.java
5 directories, 9 files
```
### 建立規范
按前面剛剛講過的分工理論,C層不應該進行任何的邏輯運算,它的作用就是接收數據后再將數據進行轉發,那么這個轉發則是通過調用服務層特定方法來實現的。所以C層如果想進行數據轉發,那我們在M層中則應該建立其進行轉發的方法。
```
package com.mengyunzhi.springBootStudy.service;
import com.mengyunzhi.springBootStudy.entity.Klass;
/**
* 班級服務
*/
public interface KlassService {
/**
* 通過ID獲取班級
*
* @param id 班級ID
* @return 班級實體
*/
Klass getById(Long id);
/**
* 更新班級
*
* @param id 預更新的班級ID
* @param klass 新的班級信息
*/
void update(Long id, Klass klass);
}
```
## 嘗試注入
有了規范,我們將此規范注入到KlassController中,然后重新啟動項目看看會發生什么
controller/KlassController.java
```
public class KlassController {
private static final Logger logger = LoggerFactory.getLogger(KlassController.class);
@Autowired
KlassService klassService;
```
啟動項目,在控制臺中我們得到如下錯誤:
```
Description:
Field klassService in com.mengyunzhi.springBootStudy.controller.KlassController required a bean of type 'com.mengyunzhi.springBootStudy.service.KlassService' that could not be found.
```
它的意思大概是說:沒有找到任何一個實現了KlassService所標注功能規范的對象。沒錯,就應該是這樣。`接口`=`規范`,我們說`usb`是個接口一種規范。而用戶實際上需要的卻是實現了`usb接口`規范的`usb鼠標`。
### 實現接口
在spring中,我們如下為spring添加一個`usb鼠標`。
我們來到KlassService,使用快捷鍵來快速的生成了一個實現了該接口規范的實現類。
然后在該類上使用`@Service`來表時該類接受spring的統一管理。
service/KlassServiceImpl.java
```
package com.mengyunzhi.springBootStudy.service;
import com.mengyunzhi.springBootStudy.entity.Klass;
import org.springframework.stereotype.Service;
@Service ?
public class KlassServiceImpl implements? KlassService? {
@Override
public Klass getById(Long id) {
return null;
}
@Override
public void update(Long id, Klass klass) {
}
}
```
* ??該類接受spring的統一管理。當需要?時,使用本類創建對象來提供服務。
此時當KlassController在使用注解`@Autowired`表示需要KlassService時,spring便會依此類來創建一個對象來滿足KlassController的要求。
### 完善代碼
我們將以前存在于C層中的代碼進行遷移:
service/KlassService.java
```
package com.mengyunzhi.springBootStudy.service;
import com.mengyunzhi.springBootStudy.entity.Klass;
import com.mengyunzhi.springBootStudy.repository.KlassRepository;
import org.springframework.beans.factory.annotation.Autowired;
import org.springframework.stereotype.Service;
/**
* 班級服務實現
*/
@Service
public class KlassServiceImpl implements KlassService {
/*班級倉庫*/
@Autowired
KlassRepository klassRepository;
/**
* 獲取某個班級
*
* @param id 班級ID
* @return 班級
*/
@Override
public Klass getById(Long id) {
return this.klassRepository.findById(id).get();
}
/**
* 更新班級
* 獲取數據庫中的老數據
* 使用傳入的新數據對老數據的更新字段賦值
* 將更新后的老數據重新保存在數據表中
*
* @param id 要更新的班級ID
* @param klass 新班級數據
*/
@Override
public void update(Long id, Klass klass) {
Klass oldKlass = klassRepository.findById(id).get();
oldKlass.setName(klass.getName());
oldKlass.setTeacher(klass.getTeacher());
klassRepository.save(oldKlass);
}
}
```
接著重新對C層代碼進行整理:
controller/KlassController.java
```
package com.mengyunzhi.springBootStudy.controller;
import com.mengyunzhi.springBootStudy.entity.Klass;
import com.mengyunzhi.springBootStudy.repository.KlassRepository;
import com.mengyunzhi.springBootStudy.service.KlassService;
import org.slf4j.Logger;
import org.slf4j.LoggerFactory;
import org.springframework.beans.factory.annotation.Autowired;
import org.springframework.http.HttpStatus;
import org.springframework.web.bind.annotation.*;
import java.util.List;
/**
* 班級控制器
*/
@RestController
@RequestMapping("Klass")
public class KlassController {
private static final Logger logger = LoggerFactory.getLogger(KlassController.class);
@Autowired
KlassService klassService;
@Autowired
KlassRepository klassRepository;
@GetMapping("{id}")
@ResponseStatus(HttpStatus.OK)
public Klass get(@PathVariable Long id) {
return this.klassService.getById(id);
}
@GetMapping
public List<Klass> getAll(@RequestParam String name) {
return this.klassRepository.findAllByNameContains(name);
}
@PostMapping
@ResponseStatus(HttpStatus.CREATED)
public void save(@RequestBody Klass klass) {
klassRepository.save(klass);
}
/**
* 更新班級
*
* @param id 要更新的班級ID
* @param klass 新班級數據
*/
@PutMapping("{id}")
@ResponseStatus(HttpStatus.NO_CONTENT)
public void update(@PathVariable Long id, @RequestBody Klass klass) {
this.klassService.update(id, klass);
}
}
```
### 繼續重構
一不做二不休,借此機會,將KlassController中原有的getAll及save方法也轉移到服務層中:
**請自行嘗試后繼續閱讀**
service/KlassService.java
```
package com.mengyunzhi.springBootStudy.service;
import com.mengyunzhi.springBootStudy.entity.Klass;
import java.util.List;
/**
* 班級服務
*/
public interface KlassService {
/**
* 獲取所有班級列表
*
* @param name 班級名稱
* @return
*/
List<Klass> getAll(String name);
/**
* 通過ID獲取班級
*
* @param id 班級ID
* @return 班級實體
*/
Klass getById(Long id);
/**
* 新增
*
* @param klass 班級
*/
void save(Klass klass);
/**
* 更新班級
*
* @param id 預更新的班級ID
* @param klass 新的班級信息
*/
void update(Long id, Klass klass);
}
```
service/KlassServiceImpl.java
```
package com.mengyunzhi.springBootStudy.service;
import com.mengyunzhi.springBootStudy.entity.Klass;
import com.mengyunzhi.springBootStudy.repository.KlassRepository;
import org.springframework.beans.factory.annotation.Autowired;
import org.springframework.stereotype.Service;
import java.util.List;
/**
* 班級服務實現
*/
@Service
public class KlassServiceImpl implements KlassService {
/*班級倉庫*/
@Autowired
KlassRepository klassRepository;
@Override
public List<Klass> getAll(String name) {
return this.klassRepository.findAllByNameContains(name);
}
/**
* 獲取某個班級
*
* @param id 班級ID
* @return 班級
*/
@Override
public Klass getById(Long id) {
return this.klassRepository.findById(id).get();
}
@Override
public void save(Klass klass) {
this.klassRepository.save(klass);
}
/**
* 更新班級
* 獲取數據庫中的老數據
* 使用傳入的新數據對老數據的更新字段賦值
* 將更新后的老數據重新保存在數據表中
*
* @param id 要更新的班級ID
* @param klass 新班級數據
*/
@Override
public void update(Long id, Klass klass) {
Klass oldKlass = klassRepository.findById(id).get();
oldKlass.setName(klass.getName());
oldKlass.setTeacher(klass.getTeacher());
klassRepository.save(oldKlass);
}
}
```
controller/KlassController.java
```
package com.mengyunzhi.springBootStudy.controller;
import com.mengyunzhi.springBootStudy.entity.Klass;
import com.mengyunzhi.springBootStudy.service.KlassService;
import org.slf4j.Logger;
import org.slf4j.LoggerFactory;
import org.springframework.beans.factory.annotation.Autowired;
import org.springframework.http.HttpStatus;
import org.springframework.web.bind.annotation.*;
import java.util.List;
/**
* 班級控制器
*/
@RestController
@RequestMapping("Klass")
public class KlassController {
private static final Logger logger = LoggerFactory.getLogger(KlassController.class);
@Autowired
KlassService klassService;
@GetMapping("{id}")
@ResponseStatus(HttpStatus.OK)
public Klass get(@PathVariable Long id) {
return this.klassService.getById(id);
}
@GetMapping
public List<Klass> getAll(@RequestParam String name) {
return this.klassService.getAll(name);
}
@PostMapping
@ResponseStatus(HttpStatus.CREATED)
public void save(@RequestBody Klass klass) {
this.klassService.save(klass);
}
/**
* 更新班級
*
* @param id 要更新的班級ID
* @param klass 新班級數據
*/
@PutMapping("{id}")
@ResponseStatus(HttpStatus.NO_CONTENT)
public void update(@PathVariable Long id, @RequestBody Klass klass) {
this.klassService.update(id, klass);
}
}
```
### 測試
代碼最怕的就是**不重構**,而重構最怕就是**重構后出錯**,而解決重構后出錯的唯一辦法則是**充分地測試**,在充分的測試中最可靠的便是使用代碼來進行測試的**單元測試**。
此時,我們來到當前唯一我們書寫的測試文件:controller/KlassControllerTest.java
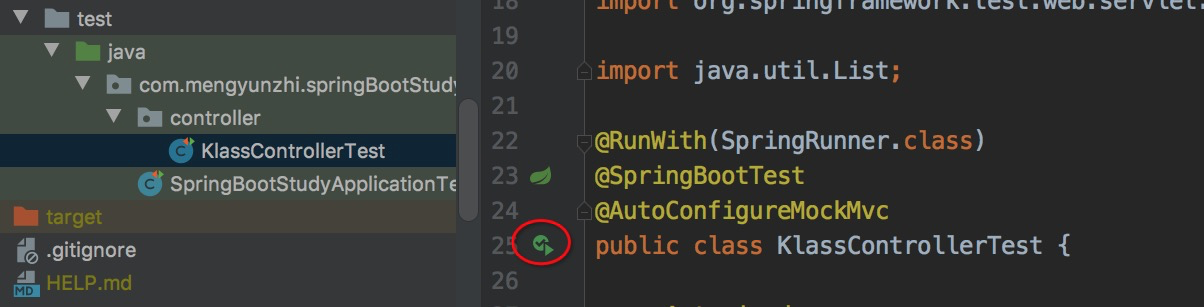
點一下前面的綠色小按鈕,然后等待測試結果:
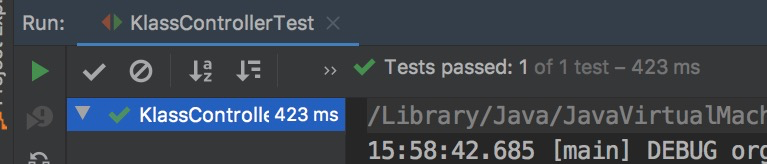
結果通過說明重構過程完美!
> 行百里者半于九十。完了功能性的代碼時,真正的工作才剛剛開始,讓我們一起盡情擁抱偉大的單元測試吧。
# 參考文檔
| 名稱 | 鏈接 | 預計學習時長(分) |
| --- | --- | --- |
| 源碼地址 | [https://github.com/mengyunzhi/spring-boot-and-angular-guild/releases/tag/step3.4.6](https://github.com/mengyunzhi/spring-boot-and-angular-guild/releases/tag/step3.4.6) | - |
- 序言
- 第一章:Hello World
- 第一節:Angular準備工作
- 1 Node.js
- 2 npm
- 3 WebStorm
- 第二節:Hello Angular
- 第三節:Spring Boot準備工作
- 1 JDK
- 2 MAVEN
- 3 IDEA
- 第四節:Hello Spring Boot
- 1 Spring Initializr
- 2 Hello Spring Boot!
- 3 maven國內源配置
- 4 package與import
- 第五節:Hello Spring Boot + Angular
- 1 依賴注入【前】
- 2 HttpClient獲取數據【前】
- 3 數據綁定【前】
- 4 回調函數【選學】
- 第二章 教師管理
- 第一節 數據庫初始化
- 第二節 CRUD之R查數據
- 1 原型初始化【前】
- 2 連接數據庫【后】
- 3 使用JDBC讀取數據【后】
- 4 前后臺對接
- 5 ng-if【前】
- 6 日期管道【前】
- 第三節 CRUD之C增數據
- 1 新建組件并映射路由【前】
- 2 模板驅動表單【前】
- 3 httpClient post請求【前】
- 4 保存數據【后】
- 5 組件間調用【前】
- 第四節 CRUD之U改數據
- 1 路由參數【前】
- 2 請求映射【后】
- 3 前后臺對接【前】
- 4 更新數據【前】
- 5 更新某個教師【后】
- 6 路由器鏈接【前】
- 7 觀察者模式【前】
- 第五節 CRUD之D刪數據
- 1 綁定到用戶輸入事件【前】
- 2 刪除某個教師【后】
- 第六節 代碼重構
- 1 文件夾化【前】
- 2 優化交互體驗【前】
- 3 相對與絕對地址【前】
- 第三章 班級管理
- 第一節 JPA初始化數據表
- 第二節 班級列表
- 1 新建模塊【前】
- 2 初識單元測試【前】
- 3 初始化原型【前】
- 4 面向對象【前】
- 5 測試HTTP請求【前】
- 6 測試INPUT【前】
- 7 測試BUTTON【前】
- 8 @RequestParam【后】
- 9 Repository【后】
- 10 前后臺對接【前】
- 第三節 新增班級
- 1 初始化【前】
- 2 響應式表單【前】
- 3 測試POST請求【前】
- 4 JPA插入數據【后】
- 5 單元測試【后】
- 6 惰性加載【前】
- 7 對接【前】
- 第四節 編輯班級
- 1 FormGroup【前】
- 2 x、[x]、{{x}}與(x)【前】
- 3 模擬路由服務【前】
- 4 測試間諜spy【前】
- 5 使用JPA更新數據【后】
- 6 分層開發【后】
- 7 前后臺對接
- 8 深入imports【前】
- 9 深入exports【前】
- 第五節 選擇教師組件
- 1 初始化【前】
- 2 動態數據綁定【前】
- 3 初識泛型
- 4 @Output()【前】
- 5 @Input()【前】
- 6 再識單元測試【前】
- 7 其它問題
- 第六節 刪除班級
- 1 TDD【前】
- 2 TDD【后】
- 3 前后臺對接
- 第四章 學生管理
- 第一節 引入Bootstrap【前】
- 第二節 NAV導航組件【前】
- 1 初始化
- 2 Bootstrap格式化
- 3 RouterLinkActive
- 第三節 footer組件【前】
- 第四節 歡迎界面【前】
- 第五節 新增學生
- 1 初始化【前】
- 2 選擇班級組件【前】
- 3 復用選擇組件【前】
- 4 完善功能【前】
- 5 MVC【前】
- 6 非NULL校驗【后】
- 7 唯一性校驗【后】
- 8 @PrePersist【后】
- 9 CM層開發【后】
- 10 集成測試
- 第六節 學生列表
- 1 分頁【后】
- 2 HashMap與LinkedHashMap
- 3 初識綜合查詢【后】
- 4 綜合查詢進階【后】
- 5 小試綜合查詢【后】
- 6 初始化【前】
- 7 M層【前】
- 8 單元測試與分頁【前】
- 9 單選與多選【前】
- 10 集成測試
- 第七節 編輯學生
- 1 初始化【前】
- 2 嵌套組件測試【前】
- 3 功能開發【前】
- 4 JsonPath【后】
- 5 spyOn【后】
- 6 集成測試
- 7 @Input 異步傳值【前】
- 8 值傳遞與引入傳遞
- 9 @PreUpdate【后】
- 10 表單驗證【前】
- 第八節 刪除學生
- 1 CSS選擇器【前】
- 2 confirm【前】
- 3 功能開發與測試【后】
- 4 集成測試
- 5 定制提示框【前】
- 6 引入圖標庫【前】
- 第九節 集成測試
- 第五章 登錄與注銷
- 第一節:普通登錄
- 1 原型【前】
- 2 功能設計【前】
- 3 功能設計【后】
- 4 應用登錄組件【前】
- 5 注銷【前】
- 6 保留登錄狀態【前】
- 第二節:你是誰
- 1 過濾器【后】
- 2 令牌機制【后】
- 3 裝飾器模式【后】
- 4 攔截器【前】
- 5 RxJS操作符【前】
- 6 用戶登錄與注銷【后】
- 7 個人中心【前】
- 8 攔截器【后】
- 9 集成測試
- 10 單例模式
- 第六章 課程管理
- 第一節 新增課程
- 1 初始化【前】
- 2 嵌套組件測試【前】
- 3 async管道【前】
- 4 優雅的測試【前】
- 5 功能開發【前】
- 6 實體監聽器【后】
- 7 @ManyToMany【后】
- 8 集成測試【前】
- 9 異步驗證器【前】
- 10 詳解CORS【前】
- 第二節 課程列表
- 第三節 果斷
- 1 初始化【前】
- 2 分頁組件【前】
- 2 分頁組件【前】
- 3 綜合查詢【前】
- 4 綜合查詢【后】
- 4 綜合查詢【后】
- 第節 班級列表
- 第節 教師列表
- 第節 編輯課程
- TODO返回機制【前】
- 4 彈出框組件【前】
- 5 多路由出口【前】
- 第節 刪除課程
- 第七章 權限管理
- 第一節 AOP
- 總結
- 開發規范
- 備用