# JavaFX 畫布
> 原文: [http://zetcode.com/gui/javafx/canvas/](http://zetcode.com/gui/javafx/canvas/)
`Canvas`是可以使用`GraphicsContext`提供的一組圖形命令繪制的圖像。 它是進行繪圖的高級工具。
`GraphicsContext`用于使用緩沖區向`Canvas`發出繪圖調用。
## 簡單的線條
在第一個示例中,我們繪制了簡單的線條。 線是基本的圖形基元。 需要兩個坐標才能形成一條線。
`SimpleLinesEx.java`
```java
package com.zetcode;
import javafx.application.Application;
import javafx.scene.Scene;
import javafx.scene.canvas.Canvas;
import javafx.scene.canvas.GraphicsContext;
import javafx.scene.layout.Pane;
import javafx.stage.Stage;
/**
* ZetCode JavaFX tutorial
*
* This program draws three lines which
* form a rectangle.
*
* Author: Jan Bodnar
* Website: zetcode.com
* Last modified: June 2015
*/
public class SimpleLinesEx extends Application {
@Override
public void start(Stage stage) {
initUI(stage);
}
private void initUI(Stage stage) {
Pane root = new Pane();
Canvas canvas = new Canvas(300, 300);
GraphicsContext gc = canvas.getGraphicsContext2D();
drawLines(gc);
root.getChildren().add(canvas);
Scene scene = new Scene(root, 300, 250, Color.WHITESMOKE);
stage.setTitle("Lines");
stage.setScene(scene);
stage.show();
}
private void drawLines(GraphicsContext gc) {
gc.beginPath();
gc.moveTo(30.5, 30.5);
gc.lineTo(150.5, 30.5);
gc.lineTo(150.5, 150.5);
gc.lineTo(30.5, 30.5);
gc.stroke();
}
public static void main(String[] args) {
launch(args);
}
}
```
該示例繪制了形成矩形的三條線。
```java
Canvas canvas = new Canvas(300, 300);
```
`Canvas`的寬度和高度指定了將畫布繪制命令渲染到的圖像的大小。 所有繪圖操作都被裁剪到該圖像的邊界。
```java
GraphicsContext gc = canvas.getGraphicsContext2D();
```
`getGraphicsContext2D()`返回與畫布關聯的`GraphicsContext`。
```java
drawLines(gc);
```
該圖形委托給`drawLines()`方法。
```java
gc.beginPath();
```
線圖元表示為路徑元素。 `beginPath()`方法開始一個新路徑。
```java
gc.moveTo(30.5, 30.5);
```
`moveTo()`方法將當前路徑的起點移動到指定的坐標。
```java
gc.lineTo(150.5, 30.5);
gc.lineTo(150.5, 150.5);
gc.lineTo(30.5, 30.5);
```
`lineTo()`方法將線段添加到當前路徑。
```java
gc.stroke();
```
`stroke()`方法使用當前的描邊繪圖描邊路徑。
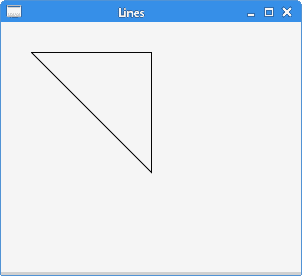
圖:直線
## 描邊和填充
描邊用于繪制形狀的輪廓。 填充用于繪制形狀的內部。
`StrokeFillEx.java`
```java
package com.zetcode;
import javafx.application.Application;
import javafx.scene.Scene;
import javafx.scene.canvas.Canvas;
import javafx.scene.canvas.GraphicsContext;
import javafx.scene.layout.Pane;
import javafx.scene.paint.Color;
import javafx.stage.Stage;
/**
* ZetCode JavaFX tutorial
*
* This program draws an outline of a circle
* and fills an interior of a circle.
*
* Author: Jan Bodnar
* Website: zetcode.com
* Last modified: June 2015
*/
public class StrokeFillEx extends Application {
@Override
public void start(Stage stage) {
initUI(stage);
}
private void initUI(Stage stage) {
Pane root = new Pane();
Canvas canvas = new Canvas(300, 300);
GraphicsContext gc = canvas.getGraphicsContext2D();
doDrawing(gc);
root.getChildren().add(canvas);
Scene scene = new Scene(root, 300, 250, Color.WHITESMOKE);
stage.setTitle("Stroke and fill");
stage.setScene(scene);
stage.show();
}
private void doDrawing(GraphicsContext gc) {
gc.setStroke(Color.FORESTGREEN.brighter());
gc.setLineWidth(5);
gc.strokeOval(30, 30, 80, 80);
gc.setFill(Color.FORESTGREEN);
gc.fillOval(130, 30, 80, 80);
}
public static void main(String[] args) {
launch(args);
}
}
```
該示例繪制了圓的輪廓并填充了圓的內部。
```java
gc.setStroke(Color.FORESTGREEN.brighter());
```
`setStroke()`方法設置當前的筆觸繪圖屬性。 默認顏色是黑色。 `GraphicsContext`的筆觸方法使用該屬性。
```java
gc.setLineWidth(5);
```
`setLineWidth()`設置當前線寬。
```java
gc.strokeOval(130, 30, 80, 80);
```
`strokeOval()`方法使用當前的描邊繪圖描邊橢圓。
```java
gc.setFill(Color.FORESTGREEN);
```
`setFill()`方法設置當前的填充涂料屬性。 默認顏色是黑色。 `GraphicsContext`的填充方法使用該屬性。
```java
gc.fillOval(30, 30, 80, 80);
```
`fillOval()`使用當前的填充顏料填充橢圓形。
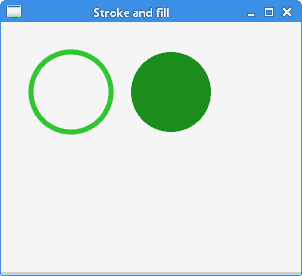
圖:描邊和填充
## 顏色
`Color`類用于處理 JavaFX 中的顏色。 有許多預定義的顏色。 可以使用 RGB 或 HSB 顏色模型創建自定義顏色值。
`ColoursEx.java`
```java
package com.zetcode;
import javafx.application.Application;
import javafx.scene.Scene;
import javafx.scene.canvas.Canvas;
import javafx.scene.canvas.GraphicsContext;
import javafx.scene.layout.Pane;
import javafx.scene.paint.Color;
import javafx.stage.Stage;
/**
* ZetCode JavaFX tutorial
*
* This program draws six circles in six
* different colours.
*
* Author: Jan Bodnar
* Website: zetcode.com
* Last modified: June 2015
*/
public class ColoursEx extends Application {
@Override
public void start(Stage stage) {
initUI(stage);
}
private void initUI(Stage stage) {
Pane root = new Pane();
Canvas canvas = new Canvas(300, 300);
GraphicsContext gc = canvas.getGraphicsContext2D();
drawShapes(gc);
root.getChildren().add(canvas);
Scene scene = new Scene(root, 280, 200, Color.WHITESMOKE);
stage.setTitle("Colours");
stage.setScene(scene);
stage.show();
}
private void drawShapes(GraphicsContext gc) {
gc.setFill(Color.CADETBLUE);
gc.fillOval(30, 30, 50, 50);
gc.setFill(Color.DARKRED);
gc.fillOval(110, 30, 50, 50);
gc.setFill(Color.STEELBLUE);
gc.fillOval(190, 30, 50, 50);
gc.setFill(Color.BURLYWOOD);
gc.fillOval(30, 110, 50, 50);
gc.setFill(Color.LIGHTSEAGREEN);
gc.fillOval(110, 110, 50, 50);
gc.setFill(Color.CHOCOLATE);
gc.fillOval(190, 110, 50, 50);
}
public static void main(String[] args) {
launch(args);
}
}
```
該示例使用預定義的顏色值繪制六個圓。
```java
gc.setFill(Color.CADETBLUE);
```
預定義的`Color.CADETBLUE`顏色設置為當前填充。
```java
gc.fillOval(30, 30, 50, 50);
```
圓形對象的內部填充有當前的`fill`屬性。
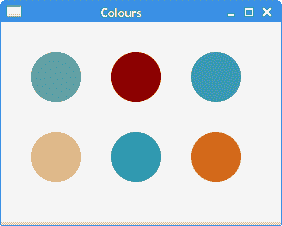
圖:顏色
## 漸變
在計算機圖形學中,漸變是從淺到深或從一種顏色到另一種顏色的陰影的平滑混合。 在繪圖和繪圖程序中,漸變用于創建彩色背景和特殊效果以及模擬燈光和陰影。 有兩種類型的漸變:線性漸變和徑向漸變。
### 線性漸變
線性漸變是沿直線平滑混合顏色。 它由`LinearGradient`類定義。
`LinearGradientEx.java`
```java
package com.zetcode;
import javafx.application.Application;
import javafx.scene.Scene;
import javafx.scene.canvas.Canvas;
import javafx.scene.canvas.GraphicsContext;
import javafx.scene.layout.Pane;
import javafx.scene.paint.Color;
import javafx.scene.paint.CycleMethod;
import javafx.scene.paint.LinearGradient;
import javafx.scene.paint.Stop;
import javafx.stage.Stage;
/*
* ZetCode JavaFX tutorial
*
* This program draws a linear gradient.
*
* Author: Jan Bodnar
* Website: zetcode.com
* Last modified: August 2016
*/
public class LinearGradientEx extends Application {
@Override
public void start(Stage stage) {
initUI(stage);
}
private void initUI(Stage stage) {
Pane root = new Pane();
Canvas canvas = new Canvas(300, 300);
GraphicsContext gc = canvas.getGraphicsContext2D();
doDrawing(gc);
root.getChildren().add(canvas);
Scene scene = new Scene(root, 300, 250, Color.WHITESMOKE);
stage.setTitle("Linear gradient");
stage.setScene(scene);
stage.show();
}
private void doDrawing(GraphicsContext gc) {
Stop[] stops1 = new Stop[] { new Stop(0.2, Color.BLACK),
new Stop(0.5, Color.RED), new Stop(0.8, Color.BLACK)};
LinearGradient lg1 = new LinearGradient(0, 0, 1, 0, true,
CycleMethod.NO_CYCLE, stops1);
gc.setFill(lg1);
gc.fillRect(50, 30, 200, 180);
}
public static void main(String[] args) {
launch(args);
}
}
```
在示例中,我們用線性漸變填充矩形。
```java
Stop[] stops1 = new Stop[] { new Stop(0.2, Color.BLACK),
new Stop(0.5, Color.RED), new Stop(0.8, Color.BLACK)};
```
我們定義漸變的停止點。 它們指定如何沿漸變分布顏色。
```java
LinearGradient lg1 = new LinearGradient(0, 0, 1, 0, true,
CycleMethod.NO_CYCLE, stops1);
```
前四個參數指定漸變繪制所沿的線。 第五個參數是比例參數,它設置坐標是否與該漸變填充的形狀成比例。 第六個參數設置漸變的循環方法。 最后一個參數為停止點。
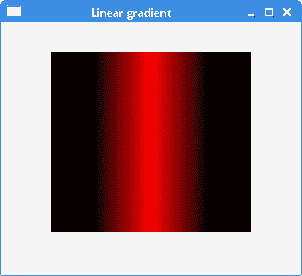
圖:`LinearGradient`
### 徑向漸變
徑向漸變是圓和焦點之間顏色或陰影的平滑混合。 徑向漸變由`RadialGradient`類定義。
`RadialGradientEx.java`
```java
package com.zetcode;
import javafx.application.Application;
import javafx.scene.Scene;
import javafx.scene.canvas.Canvas;
import javafx.scene.canvas.GraphicsContext;
import javafx.scene.layout.Pane;
import javafx.scene.paint.Color;
import javafx.scene.paint.CycleMethod;
import javafx.scene.paint.RadialGradient;
import javafx.scene.paint.Stop;
import javafx.stage.Stage;
/*
* ZetCode JavaFX tutorial
*
* This program draws a radial gradient.
*
* Author: Jan Bodnar
* Website: zetcode.com
* Last modified: August 2016
*/
public class RadialGradientEx extends Application {
@Override
public void start(Stage stage) {
initUI(stage);
}
private void initUI(Stage stage) {
Pane root = new Pane();
Canvas canvas = new Canvas(300, 300);
GraphicsContext gc = canvas.getGraphicsContext2D();
doDrawing(gc);
root.getChildren().add(canvas);
Scene scene = new Scene(root, 300, 250, Color.WHITESMOKE);
stage.setTitle("Radial gradient");
stage.setScene(scene);
stage.show();
}
private void doDrawing(GraphicsContext gc) {
Stop[] stops1 = new Stop[] { new Stop(0, Color.RED),
new Stop(1, Color.BLACK)};
RadialGradient lg1 = new RadialGradient(0, 0, 0.5, 0.5, 0.8, true,
CycleMethod.NO_CYCLE, stops1);
gc.setFill(lg1);
gc.fillOval(30, 30, 150, 150);
}
public static void main(String[] args) {
launch(args);
}
}
```
該示例使用徑向漸變填充圓。
```java
Stop[] stops1 = new Stop[] { new Stop(0, Color.RED),
new Stop(1, Color.BLACK)};
```
我們定義漸變的終止值。
```java
RadialGradient lg1 = new RadialGradient(0, 0, 0.5, 0.5, 0.8, true,
CycleMethod.NO_CYCLE, stops1);
```
創建了一個徑向漸變。 前兩個參數是聚焦角和聚焦距離。 接下來的兩個參數是漸變圓的圓心的 x 和 y 坐標。 第五個參數是定義顏色漸變范圍的圓的半徑。
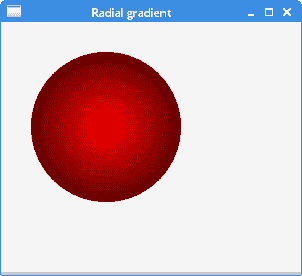
圖:`RadialGradient`
## 形狀
矩形,橢圓形,弧形是基本的幾何形狀。 `GraphicsContext`包含用于繪制這些形狀的輪廓和內部的方法。
`ShapesEx.java`
```java
package com.zetcode;
import javafx.application.Application;
import javafx.scene.Scene;
import javafx.scene.canvas.Canvas;
import javafx.scene.canvas.GraphicsContext;
import javafx.scene.layout.Pane;
import javafx.scene.paint.Color;
import javafx.scene.shape.ArcType;
import javafx.stage.Stage;
/**
* ZetCode JavaFX tutorial
*
* This program paints six different
* shapes.
*
* Author: Jan Bodnar
* Website: zetcode.com
* Last modified: June 2015
*/
public class ShapesEx extends Application {
@Override
public void start(Stage stage) {
initUI(stage);
}
private void initUI(Stage stage) {
Pane root = new Pane();
Canvas canvas = new Canvas(320, 300);
GraphicsContext gc = canvas.getGraphicsContext2D();
drawShapes(gc);
root.getChildren().add(canvas);
Scene scene = new Scene(root, 300, 200, Color.WHITESMOKE);
stage.setTitle("Shapes");
stage.setScene(scene);
stage.show();
}
private void drawShapes(GraphicsContext gc) {
gc.setFill(Color.GRAY);
gc.fillOval(30, 30, 50, 50);
gc.fillOval(110, 30, 80, 50);
gc.fillRect(220, 30, 50, 50);
gc.fillRoundRect(30, 120, 50, 50, 20, 20);
gc.fillArc(110, 120, 60, 60, 45, 180, ArcType.OPEN);
gc.fillPolygon(new double[]{220, 270, 220},
new double[]{120, 170, 170}, 3);
}
public static void main(String[] args) {
launch(args);
}
}
```
該示例使用圖形上下文的`fill`方法繪制了六個不同的形狀。
```java
gc.setFill(Color.GRAY);
```
形狀涂成灰色。
```java
gc.fillOval(30, 30, 50, 50);
gc.fillOval(110, 30, 80, 50);
```
`fillOval()`方法繪制一個圓和一個橢圓。 前兩個參數是 x 和 y 坐標。 第三個和第四個參數是橢圓的寬度和高度。
```java
gc.fillRect(220, 30, 50, 50);
```
`fillRect()`使用當前的填充顏料填充矩形。
```java
gc.fillRoundRect(30, 120, 50, 50, 20, 20);
```
`fillRoundRect()`繪制一個矩形,其角是圓形的。 該方法的最后兩個參數是矩形角的圓弧寬度和圓弧高度。
```java
gc.fillArc(110, 120, 60, 60, 45, 180, ArcType.OPEN);
```
`fillArc()`方法使用當前的填充涂料填充圓弧。 最后三個參數是起始角度,角度擴展和閉合類型。
```java
gc.fillPolygon(new double[]{220, 270, 220},
new double[]{120, 170, 170}, 3);
```
`fillPolygon()`方法使用當前設置的填充涂料用給定的點填充多邊形。 在我們的例子中,它繪制了一個直角三角形。 第一個參數是包含多邊形點的 x 坐標的數組,第二個參數是包含多邊形點的 y 坐標的數組。 最后一個參數是形成多邊形的點數。
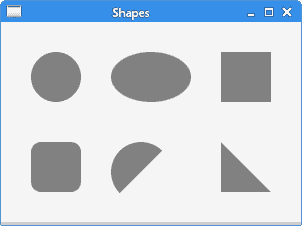
圖:顏色
## 星形
可以使用`strokePolygon()`和`fillPolygon()`方法繪制更復雜的形狀。 下一個示例繪制一個星形。
`StarShapeEx.java`
```java
package com.zetcode;
import javafx.application.Application;
import javafx.scene.Scene;
import javafx.scene.canvas.Canvas;
import javafx.scene.canvas.GraphicsContext;
import javafx.scene.layout.Pane;
import javafx.scene.paint.Color;
import javafx.stage.Stage;
/**
* ZetCode JavaFX tutorial
*
* This program draws a Star shape on
* a Canvas.
*
* Author: Jan Bodnar
* Website: zetcode.com
* Last modified: June 2015
*/
public class StarShapeEx extends Application {
@Override
public void start(Stage stage) {
initUI(stage);
}
private void initUI(Stage stage) {
Pane root = new Pane();
Canvas canvas = new Canvas(300, 300);
GraphicsContext gc = canvas.getGraphicsContext2D();
drawStarShape(gc);
root.getChildren().add(canvas);
Scene scene = new Scene(root, 300, 250, Color.WHITESMOKE);
stage.setTitle("Star");
stage.setScene(scene);
stage.show();
}
private void drawStarShape(GraphicsContext gc) {
double xpoints[] = {10, 85, 110, 135, 210, 160,
170, 110, 50, 60};
double ypoints[] = {85, 75, 10, 75, 85, 125,
190, 150, 190, 125};
gc.strokePolygon(xpoints, ypoints, xpoints.length);
}
public static void main(String[] args) {
launch(args);
}
}
```
該示例繪制了星形的輪廓。 形狀由十個坐標組成。
```java
double xpoints[] = {10, 85, 110, 135, 210, 160,
170, 110, 50, 60};
double ypoints[] = {85, 75, 10, 75, 85, 125,
190, 150, 190, 125};
```
這些是形狀的 x 和 y 坐標。
```java
gc.strokePolygon(xpoints, ypoints, xpoints.length);
```
使用`strokePolygon()`方法繪制形狀。
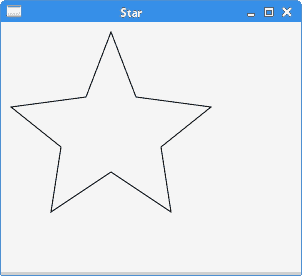
圖:星星 shape
## 透明矩形
透明性是指能夠透視材料的質量。 在計算機圖形學中,我們可以使用 alpha 合成來實現透明效果。 Alpha 合成是將圖像與背景組合以創建部分透明外觀的過程。
`TransparentRectanglesEx.java`
```java
package com.zetcode;
import javafx.application.Application;
import javafx.scene.Scene;
import javafx.scene.canvas.Canvas;
import javafx.scene.canvas.GraphicsContext;
import javafx.scene.layout.Pane;
import javafx.scene.paint.Color;
import javafx.stage.Stage;
/**
* ZetCode JavaFX tutorial
*
* This program draws ten rectangles with different
* levels of transparency.
*
* Author: Jan Bodnar
* Website: zetcode.com
* Last modified: June 2015
*/
public class TransparentRectanglesEx extends Application {
@Override
public void start(Stage stage) {
initUI(stage);
}
private void initUI(Stage stage) {
Pane root = new Pane();
Canvas canvas = new Canvas(600, 300);
GraphicsContext gc = canvas.getGraphicsContext2D();
drawRectangles(gc);
root.getChildren().add(canvas);
Scene scene = new Scene(root, 600, 100, Color.WHITESMOKE);
stage.setTitle("Transparent rectangles");
stage.setScene(scene);
stage.show();
}
private void drawRectangles(GraphicsContext gc) {
for (int i = 1; i <= 10; i++) {
float alpha = i * 0.1f;
gc.setFill(Color.FORESTGREEN);
gc.setGlobalAlpha(alpha);
gc.fillRect(50 * i, 20, 40, 40);
}
}
public static void main(String[] args) {
launch(args);
}
}
```
該示例繪制了十個具有不同透明度級別的矩形。
```java
float alpha = i * 0.1f;
```
在每個`for`周期中計算一個 alpha 值。
```java
gc.setGlobalAlpha(alpha);
```
`setGlobalAlpha()`方法設置當前狀態的全局 alpha。

圖:透明矩形
在本章中,我們在`Canvas`節點上執行了繪制操作。
- ZetCode 數據庫教程
- MySQL 教程
- MySQL 簡介
- MySQL 安裝
- MySQL 的第一步
- MySQL 快速教程
- MySQL 存儲引擎
- MySQL 數據類型
- 在 MySQL 中創建,更改和刪除表
- MySQL 表達式
- 在 MySQL 中插入,更新和刪除數據
- MySQL 中的SELECT語句
- MySQL 子查詢
- MySQL 約束
- 在 MySQL 中導出和導入數據
- 在 MySQL 中連接表
- MySQL 函數
- MySQL 中的視圖
- MySQL 中的事務
- MySQL 存儲過程
- MySQL Python 教程
- MySQL Perl 教程
- MySQL & Perl DBI
- 使用 Perl 連接到 MySQL 數據庫
- MySQL 中的 Perl 錯誤處理
- 使用 Perl 進行 MySQL 查詢
- 在 MySQL 中使用 Perl 綁定參數&列
- 在 MySQL 中使用 Perl 處理圖像
- 使用 Perl 獲取 MySQL 元數據
- Perl 的 MySQL 事務
- MySQL C API 編程教程
- MySQL Visual Basic 教程
- MySQL PHP 教程
- MySQL Java 教程
- MySQL Ruby 教程
- MySQL C# 教程
- SQLite 教程
- SQLite 簡介
- sqlite3 命令行工具
- 在 SQLite 中創建,刪除和更改表
- SQLite 表達式
- SQLite 插入,更新,刪除數據
- SQLite SELECT語句
- SQLite 約束
- SQLite 連接表
- SQLite 函數
- SQLite 視圖,觸發器,事務
- SQLite C 教程
- SQLite Python 教程
- SQLite Perl 教程
- Perl DBI
- 使用 Perl 連接到 SQLite 數據庫
- SQLite Perl 錯誤處理
- 使用 Perl 的 SQLite 查詢
- 使用 Perl 綁定 SQLite 參數&列
- 使用 Perl 在 SQLite 中處理圖像
- 使用 Perl 獲取 SQLite 元數據
- 使用 Perl 進行 SQLite 事務
- SQLite Ruby 教程
- 連接到 SQLite 數據庫
- 在 SQLite 中使用 Ruby 進行 SQL 查詢
- 綁定參數
- 處理圖像
- 使用 Ruby 獲取 SQLite 元數據
- Ruby 的 SQLite 事務
- SQLite C# 教程
- SQLite C# 簡介
- 使用SqliteDataReader檢索數據
- ADO.NET 數據集
- 使用 C# 在 SQLite 中處理圖像
- 使用 C# 獲取 SQLite 元數據
- 使用 C# 的 SQLite 事務
- SQLite Visual Basic 教程
- SQLite Visual Basic 簡介
- 使用SqliteDataReader檢索數據
- ADO.NET 的數據集
- 使用 Visual Basic 在 SQLite 中處理圖像
- 使用 Visual Basic 獲取 SQLite 元數據
- 使用 Visual Basic 的 SQLite 事務
- PostgreSQL C 教程
- PostgreSQL Ruby 教程
- PostgreSQL PHP 教程
- PostgreSQL PHP 編程簡介
- 在 PostgreSQL 中使用 PHP 檢索數據
- 在 PostgreSQL 中使用 PHP 處理圖像
- 用 PHP 獲取 PostgreSQL 元數據
- 在 PostgreSQL 中使用 PHP 進行事務
- PostgreSQL Java 教程
- Apache Derby 教程
- Derby 簡介
- Derby 的安裝&配置
- Derby 工具
- ij 工具
- Derby 中的 SQL 查詢
- 在 Derby 中使用 JDBC 進行編程
- Derby 安全
- 使用 Derby & Apache Tomcat
- NetBeans 和 Derby
- SQLAlchemy 教程
- SQLAlchemy 簡介
- 原始 SQL
- 模式定義語言
- SQL 表達式語言
- SQLAlchemy 中的對象關系映射器
- MongoDB PHP 教程
- MongoDB JavaScript 教程
- MongoDB Ruby 教程
- Spring JdbcTemplate 教程
- JDBI 教程
- MyBatis 教程
- Hibernate Derby 教程
- ZetCode .NET 教程
- Visual Basic 教程
- Visual Basic
- Visual Basic 語法結構
- 基本概念
- Visual Basic 數據類型
- Visual Basic 中的字符串
- 運算符
- 控制流
- Visual Basic 數組
- Visual Basic 中的過程&函數
- 在 Visual Basic 中組織代碼
- 面向對象編程
- Visual Basic 中的面向對象編程 II
- Visual Basic 中的集合
- 輸入和輸出
- C# 教程
- C# 語言
- C# 語法結構
- C# 基礎
- C# 數據類型
- C# 中的字符串
- C# 運算符
- C# 中的流控制
- C# 數組
- C# 面向對象編程
- C# 中的方法
- C# 面向對象編程 II
- C# 屬性
- C# 結構
- C# 委托
- 命名空間
- C# 集合
- C# 輸入和輸出
- C# 目錄教程
- C# 字典教程
- 在 C# 中讀取文本文件
- C# 中的日期和時間
- 在 C# 中讀取網頁
- C# HttpClient教程
- ASP.NET Core 教程
- ZetCode 圖形教程
- Java 2D 游戲教程
- Java 游戲基礎
- 動畫
- 移動精靈
- 碰撞檢測
- Java 益智游戲
- Java Snake
- Breakout 游戲
- Java 俄羅斯方塊
- Java 吃豆人
- Java 太空侵略者
- Java 掃雷
- Java 推箱子
- Java 2D 教程
- 介紹
- 基本繪圖
- 形狀和填充
- 透明度
- 合成
- 剪裁
- 變換
- 特效
- 圖像
- 文字和字體
- 命中測試,移動物體
- 俄羅斯方塊
- Cario 圖形教程
- Cario 圖形庫
- Cario 定義
- Cairo 后端
- Cairo 基本圖形
- 形狀和填充
- 漸變
- 透明度
- 合成
- 剪裁和遮罩
- 變換
- Cairo 文字
- Cairo 中的圖像
- 根窗口
- PyCairo 教程
- PyCairo 簡介
- PyCairo 后端
- PyCairo 中的基本繪圖
- PyCairo 形狀和填充
- PyCairo 漸變
- PyCairo 剪裁&遮罩
- PyCairo 的透明度
- PyCairo 中的變換
- PyCairo 中的文字
- PyCairo 中的圖像
- 根窗口
- HTML5 畫布教程
- 介紹
- HTML5 畫布中的直線
- HTML5 畫布形狀
- HTML5 畫布填充
- HTML5 畫布中的透明度
- HTML5 畫布合成
- HTML5 canvas 中的變換
- HTML5 畫布中的文字
- HTML5 畫布中的動畫
- HTML5 畫布中的 Snake
- ZetCode GUI 教程
- Windows API 教程
- Windows API 簡介
- Windows API main函數
- Windows API 中的系統函數
- Windows API 中的字符串
- Windows API 中的日期和時間
- Windows API 中的一個窗口
- UI 的第一步
- Windows API 菜單
- Windows API 對話框
- Windows API 控件 I
- Windows API 控件 II
- Windows API 控件 III
- Windows API 中的高級控件
- Windows API 中的自定義控件
- Windows API 中的 GDI
- PyQt4 教程
- PyQt4 簡介
- PyQt4 中的第一個程序
- PyQt4 中的菜單和工具欄
- PyQt4 中的布局管理
- PyQt4 中的事件和信號
- PyQt4 中的對話框
- PyQt4 小部件
- PyQt4 小部件 II
- PyQt4 中的拖放
- PyQt4 中的繪圖
- PyQt4 中的自定義小部件
- PyQt4 中的俄羅斯方塊游戲
- PyQt5 教程
- PyQt5 簡介
- PyQt5 日期和時間
- PyQt5 中的第一個程序
- PyQt5 中的菜單和工具欄
- PyQt5 中的布局管理
- PyQt5 中的事件和信號
- PyQt5 中的對話框
- PyQt5 小部件
- PyQt5 小部件 II
- PyQt5 拖放
- PyQt5 中的繪圖
- PyQt5 中的自定義小部件
- PyQt5 中的俄羅斯方塊
- Qt4 教程
- Qt4 工具包簡介
- Qt4 工具類
- Qt4 中的字符串
- Qt4 中的日期和時間
- 在 Qt4 中使用文件和目錄
- Qt4 中的第一個程序
- Qt4 中的菜單和工具欄
- Qt4 中的布局管理
- Qt4 中的事件和信號
- Qt4 小部件
- Qt4 小部件 II
- Qt4 中的繪圖
- Qt4 中的自定義小部件
- Qt4 中的打磚塊游戲
- Qt5 教程
- Qt5 工具包簡介
- Qt5 中的字符串
- Qt5 中的日期和時間
- Qt5 中的容器
- 在 Qt5 中處理文件和目錄
- Qt5 中的第一個程序
- Qt5 中的菜單和工具欄
- Qt5 中的布局管理
- Qt5 中的事件和信號
- Qt5 小部件
- Qt5 小部件 II
- Qt5 中的繪圖
- Qt5 中的自定義小部件
- Qt5 中的貪食蛇
- Qt5 中的打磚塊游戲
- PySide 教程
- PySide 工具包簡介
- PySide 中的第一個程序
- PySide 中的菜單和工具欄
- PySide 中的布局管理
- PySide 中的事件和信號
- PySide 中的對話框
- PySide 小部件
- PySide 小部件 II
- 在 PySide 中拖放
- 在 PySide 中繪圖
- PySide 中的自定義小部件
- PySide 中的俄羅斯方塊游戲
- Tkinter 教程
- Tkinter 簡介
- Tkinter 中的布局管理
- Tkinter 標準小部件屬性
- Tkinter 小部件
- Tkinter 中的菜單和工具欄
- Tkinter 中的對話框
- Tkinter 中的繪圖
- Tkinter 中的貪食蛇
- Tcl/Tk 教程
- Tcl/Tk 簡介
- Tcl/Tk 中的布局管理
- Tcl/Tk 小部件
- Tcl/Tk 中的菜單和工具欄
- Tcl/Tk 中的對話框
- Tcl/Tk 繪圖
- 貪食蛇
- Qt 快速教程
- Java Swing 教程
- Java Swing 簡介
- Java Swing 首個程序
- Java Swing 中的菜單和工具欄
- Swing 布局管理
- GroupLayout管理器
- Java Swing 事件
- 基本的 Swing 組件
- 基本的 Swing 組件 II
- Java Swing 對話框
- Java Swing 模型架構
- Swing 中的拖放
- Swing 中的繪圖
- Java Swing 中的可調整大小的組件
- Java Swing 中的益智游戲
- 俄羅斯方塊
- JavaFX 教程
- JavaFX 簡介
- JavaFX 首個程序
- JavaFX 布局窗格
- 基本的 JavaFX 控件
- 基本 JavaFX 控件 II
- JavaFX 事件
- JavaFX 效果
- JavaFX 動畫
- JavaFX 畫布
- JavaFX 圖表
- Java SWT 教程
- Java SWT 簡介
- Java SWT 中的布局管理
- Java SWT 中的菜單和工具欄
- Java SWT 中的小部件
- Table小部件
- Java SWT 中的對話框
- Java SWT 繪圖
- Java SWT 中的貪食蛇
- wxWidgets 教程
- wxWidgets 簡介
- wxWidgets 助手類
- wxWidgets 中的第一個程序
- wxWidgets 中的菜單和工具欄
- wxWidgets 中的布局管理
- wxWidgets 中的事件
- wxWidgets 中的對話框
- wxWidgets 小部件
- wxWidgets 小部件 II
- wxWidgets 中的拖放
- wxWidgets 中的設備上下文
- wxWidgets 中的自定義小部件
- wxWidgets 中的俄羅斯方塊游戲
- wxPython 教程
- wxPython 簡介
- 第一步
- 菜單和工具欄
- wxPython 中的布局管理
- wxPython 中的事件
- wxPython 對話框
- 小部件
- wxPython 中的高級小部件
- wxPython 中的拖放
- wxPython 圖形
- 創建自定義小部件
- wxPython 中的應用框架
- wxPython 中的俄羅斯方塊游戲
- C# Winforms Mono 教程
- Mono Winforms 簡介
- Mono Winforms 中的第一步
- Mono Winforms 中的布局管理
- Mono Winforms 中的菜單和工具欄
- Mono Winforms 中的基本控件
- Mono Winforms 中的高級控件
- 對話框
- Mono Winforms 中的拖放
- Mono Winforms 中的繪圖
- Mono Winforms 中的貪食蛇
- Java Gnome 教程
- Java Gnome 簡介
- Java Gnome 的第一步
- Java Gnome 中的布局管理
- Java Gnome 中的布局管理 II
- Java Gnome 中的菜單
- Java Gnome 中的工具欄
- Java Gnome 中的事件
- Java Gnome 中的小部件
- Java Gnome 中的小部件 II
- Java Gnome 中的高級小部件
- Java Gnome 中的對話框
- Java Gnome 中的 Pango
- 在 Java Gnome 中用 Cairo 繪圖
- Cario 繪圖 II
- Java Gnome 中的貪食蛇
- QtJambi 教程
- QtJambi 簡介
- QtJambi 中的布局管理
- QtJambi 中的小部件
- QtJambi 中的菜單和工具欄
- QtJambi 對話框
- QtJambi 中的繪圖
- QtJambi 中的自定義小部件
- 貪食蛇
- GTK+ 教程
- GTK+ 簡介
- GTK+ 中的第一個程序
- GTK+ 中的菜單和工具欄
- GTK+ 布局管理
- GTK+ 事件和信號
- GTK+ 對話框
- GTK+ 小部件
- GTK+ 小部件 II
- GtkTreeView小部件
- GtkTextView小部件
- 自定義 GTK+ 小部件
- Ruby GTK 教程
- Ruby GTK 簡介
- Ruby GTK 中的布局管理
- Ruby GTK 中的小部件
- Ruby GTK 中的菜單和工具欄
- Ruby GTK 中的對話框
- Ruby GTK Cario 繪圖
- Ruby GTK 中的自定義小部件
- Ruby GTK 中的貪食蛇
- GTK# 教程
- GTK# 簡介
- GTK 的第一步
- GTK# 中的布局管理
- GTK 中的菜單
- GTK# 中的工具欄
- GTK# 中的事件
- GTK# 中的小部件
- GTK 中的小部件 II
- GTK# 中的高級小部件
- GTK# 中的對話框
- Pango
- GTK# 中的 Cario 繪圖
- GTK# 中的 Cario 繪圖 II
- GTK# 中的自定義小部件
- Visual Basic GTK# 教程
- Visual Basic GTK# 簡介
- 布局管理
- 小部件
- 菜單和工具欄
- 對話框
- Cario 繪圖
- 自定義小部件
- 貪食蛇
- PyGTK 教程
- PyGTK 簡介
- PyGTK 的第一步
- PyGTK 中的布局管理
- PyGTK 中的菜單
- PyGTK 中的工具欄
- PyGTK 中的事件和信號
- PyGTK 中的小部件
- PyGTK 中的小部件 II
- PyGTK 中的高級小部件
- PyGTK 中的對話框
- Pango
- Pango II
- PyGTK 中的 Cario 繪圖
- Cario 繪圖 II
- PyGTK 中的貪食蛇游戲
- PyGTK 中的自定義小部件
- PHP GTK 教程
- PHP GTK 簡介
- PHP GTK 中的布局管理
- PHP GTK 中的小部件
- PHP GTK 中的菜單和工具欄
- 對話框
- Cario 繪圖
- 自定義小部件
- 貪食蛇
- C# Qyoto 教程
- Qyoto 介紹
- 布局管理
- Qyoto 中的小部件
- Qyoto 中的菜單和工具欄
- Qyoto 對話框
- Qyoto 中的繪圖
- Qyoto 中的繪圖 II
- Qyoto 中的自定義小部件
- 貪食蛇
- Ruby Qt 教程
- Ruby Qt 簡介
- Ruby Qt 中的布局管理
- Ruby Qt 中的小部件
- 菜單和工具欄
- Ruby Qt 中的對話框
- 用 Ruby Qt 繪圖
- Ruby Qt 中的自定義小部件
- Ruby Qt 中的貪食蛇
- Visual Basic Qyoto 教程
- Qyoto 介紹
- 布局管理
- Qyoto 中的小部件
- Qyoto 中的菜單和工具欄
- Qyoto 對話框
- Qyoto 中的繪圖
- Qyoto 中的自定義小部件
- 貪食蛇
- Mono IronPython Winforms 教程
- 介紹
- IronPython Mono Winforms 中的第一步
- 布局管理
- 菜單和工具欄
- Mono Winforms 中的基本控件
- Mono Winforms 中的基本控件 II
- Mono Winforms 中的高級控件
- 對話框
- Mono Winforms 中的拖放
- 繪圖
- IronPython Mono Winforms 中的繪圖 II
- IronPython Mono Winforms 中的貪食蛇
- IronPython Mono Winforms 中的俄羅斯方塊游戲
- FreeBASIC GTK 教程
- Jython Swing 教程
- Jython Swing 簡介
- Jython Swing 中的布局管理
- Jython Swing 中的組件
- Jython Swing 中的菜單和工具欄
- Jython Swing 中的對話框
- Jython Swing 中的繪圖
- Jython Swing 中的半字節
- JRuby Swing 教程
- JRuby Swing 簡介
- JRuby Swing 中的布局管理
- JRuby Swing 中的組件
- 菜單和工具欄
- JRuby Swing 中的對話框
- 在 JRuby Swing 中繪圖
- JRuby Swing 中的貪食蛇
- Visual Basic Winforms 教程
- Visual Basic Winforms 簡介
- 布局管理
- 基本控制
- 進階控件
- 菜單和工具欄
- 對話框
- 繪圖
- 拖放
- 貪食蛇
- JavaScript GTK 教程
- JavaScript GTK 簡介
- 布局管理
- JavaScript GTK 中的小部件
- JavaScript GTK 中的菜單和工具欄
- JavaScript GTK 中的對話框
- JavaScript GTK 中的 Cario 繪圖
- ZetCode Java 教程
- Java 教程
- Java 語言
- Java 語法結構
- Java 基礎
- Java 數據類型
- Java 數據類型 II
- Java 字符串
- Java 數組
- Java 表達式
- Java 控制流程
- Java 面向對象的編程
- Java 方法
- Java 面向對象編程 II
- Java 包
- Java 中的異常
- Java 集合
- Java 流
- Java Future 教程
- Java Comparable和Comparator
- Java DOM 教程
- Java MVC 教程
- Java SAX 教程
- Java JAXB 教程
- Java JSON 處理教程
- Java H2 教程
- MongoDB Java 教程
- Java 正則表達式教程
- Java PDFBox 教程
- Java 文件教程
- Java Files.list教程
- Java Files.walk教程
- Java DirectoryStream教程
- Java 外部與內部迭代器
- Java 文件大小
- 用 Java 創建目錄
- 用 Java 創建文件
- Java Log4j 教程
- Gson 教程
- Java RequestDispatcher
- Java HTTP GET/POST 請求
- Java InputStream教程
- Java FileOutputStream教程
- Java FileInputStream教程
- Java ZipInputStream教程
- Java FileWriter教程
- EJB 簡介
- Java forEach教程
- Jetty 教程
- Tomcat Derby 教程
- Stripes 介紹
- 使用 Stripes 的 Java webapp,MyBatis,& Derby
- EclipseLink 簡介
- Java 中的數據源
- JSTL 中的 SQL 查詢標記
- Java 驗證過濾器
- Hibernate 驗證器
- 用 Java 顯示圖像
- Play 框架簡介
- Spark Java 簡介
- Java ResourceBundle教程
- Jtwig 教程
- Java Servlet 教程
- Java 套接字教程
- FreeMarker 教程
- Android 教程
- Java EE 5 教程
- JSoup 教程
- JFreeChart 教程
- ImageIcon教程
- 用 Java 復制文件
- Java 文件時間教程
- 如何使用 Java 獲取當前日期時間
- Java 列出目錄內容
- Java 附加到文件
- Java ArrayList教程
- 用 Java 讀寫 ICO 圖像
- Java int到String的轉換
- Java HashSet教程
- Java HashMap教程
- Java static關鍵字
- Java 中的HashMap迭代
- 用 Java 過濾列表
- 在 Java 中讀取網頁
- Java 控制臺應用
- Java 集合的便利工廠方法
- Google Guava 簡介
- OpenCSV 教程
- 用 Java8 的StringJoiner連接字符串
- Java 中元素迭代的歷史
- Java 謂詞
- Java StringBuilder
- Java 分割字串教學
- Java NumberFormat
- Java TemporalAdjusters教程
- Apache FileUtils教程
- Java Stream 過濾器
- Java 流歸約
- Java 流映射
- Java InputStreamReader教程
- 在 Java 中讀取文本文件
- Java Unix 時間
- Java LocalTime
- Java 斐波那契
- Java ProcessBuilder教程
- Java 11 的新功能
- ZetCode JavaScript 教程
- Ramda 教程
- Lodash 教程
- Collect.js 教程
- Node.js 簡介
- Node HTTP 教程
- Node-config 教程
- Dotenv 教程
- Joi 教程
- Liquid.js 教程
- faker.js 教程
- Handsontable 教程
- PouchDB 教程
- Cheerio 教程
- Axios 教程
- Jest 教程
- JavaScript 正則表達式
- 用 JavaScript 創建對象
- Big.js 教程
- Moment.js 教程
- Day.js 教程
- JavaScript Mustache 教程
- Knex.js 教程
- MongoDB JavaScript 教程
- Sequelize 教程
- Bookshelf.js 教程
- Node Postgres 教程
- Node Sass 教程
- Document.querySelector教程
- Document.all教程
- JSON 服務器教程
- JavaScript 貪食蛇教程
- JavaScript 構建器模式教程
- JavaScript 數組
- XMLHttpRequest教程
- 從 JavaScript 中的 URL 讀取 JSON
- 在 JavaScript 中循環遍歷 JSON 數組
- jQuery 教程
- Google 圖表教程
- ZetCode Kotlin 教程
- Kotlin Hello World 教程
- Kotlin 變量
- Kotlin 的運算符
- Kotlin when表達式
- Kotlin 數組
- Kotlin 范圍
- Kotlin Snake
- Kotlin Swing 教程
- Kotlin 字符串
- Kotlin 列表
- Kotlin 映射
- Kotlin 集合
- Kotlin 控制流程
- Kotlin 寫入文件
- Kotlin 讀取文件教程
- Kotlin 正則表達式
- ZetCode 其它教程
- TCL 教程
- Tcl
- Tcl 語法結構
- Tcl 中的基本命令
- Tcl 中的表達式
- Tcl 中的控制流
- Tcl 中的字符串
- Tcl 列表
- Tcl 中的數組
- Tcl 中的過程
- 輸入&輸出
- AWK 教程
- Vaadin 教程
- Vaadin 框架介紹
- Vaadin Grid教程
- Vaadin TextArea教程
- Vaadin ComboBox教程
- Vaadin Slider教程
- Vaadin CheckBox教程
- Vaadin Button教程
- Vaadin DateField教程
- Vaadin Link教程
- ZetCode PHP 教程
- PHP 教程
- PHP
- PHP 語法結構
- PHP 基礎
- PHP 數據類型
- PHP 字符串
- PHP 運算符
- PHP 中的控制流
- PHP 數組
- PHP 數組函數
- PHP 中的函數
- PHP 正則表達式
- PHP 中的面向對象編程
- PHP 中的面向對象編程 II
- PHP Carbon 教程
- PHP Monolog 教程
- PHP 配置教程
- PHP Faker 教程
- Twig 教程
- Valitron 教程
- Doctrine DBAL QueryBuilder 教程
- PHP Respect 驗證教程
- PHP Rakit 驗證教程
- PHP PDO 教程
- CakePHP 數據庫教程
- PHP SQLite3 教程
- PHP 文件系統函數
- ZetCode Python 教程
- Python 教程
- Python 語言
- 交互式 Python
- Python 語法結構
- Python 數據類型
- Python 字符串
- Python 列表
- Python 字典
- Python 運算符
- Python 關鍵字
- Python 函數
- Python 中的文件
- Python 中的面向對象編程
- Python 模塊
- Python 中的包
- Python 異常
- Python 迭代器和生成器
- Python 內省
- Python Faker 教程
- Python f 字符串教程
- Python bcrypt 教程
- Python 套接字教程
- Python smtplib教程
- OpenPyXL 教程
- Python pathlib教程
- Python YAML 教程
- Python 哈希教程
- Python ConfigParser教程
- Python 日志教程
- Python argparse 教程
- Python SQLite 教程
- Python Cerberus 教程
- Python PostgreSQL 教程
- PyMongo 教程
- PyMySQL 教程
- Peewee 教程
- pyDAL 教程
- pytest 教程
- Bottle 教程
- Python Jinja 教程
- PrettyTable 教程
- BeautifulSoup 教程
- pyquery 教程
- Python for循環
- Python 反轉
- Python Lambda 函數
- Python 集合
- Python 映射
- Python CSV 教程-讀寫 CSV
- Python 正則表達式
- Python SimpleJson 教程
- SymPy 教程
- Pandas 教程
- Matplotlib 教程
- Pillow 教程
- Python FTP 教程
- Python Requests 教程
- Python Arrow 教程
- Python 列表推導式
- Python 魔術方法
- PyQt 中的QPropertyAnimation
- PyQt 中的QNetworkAccessManager
- ZetCode Ruby 教程
- Ruby 教程
- Ruby
- Ruby 語法結構
- Ruby 基礎
- Ruby 變量
- Ruby 中的對象
- Ruby 數據類型
- Ruby 字符串
- Ruby 表達式
- Ruby 控制流
- Ruby 數組
- Ruby 哈希
- Ruby 中的面向對象編程
- Ruby 中的面向對象編程 II
- Ruby 正則表達式
- Ruby 輸入&輸出
- Ruby HTTPClient教程
- Ruby Faraday 教程
- Ruby Net::HTTP教程
- ZetCode Servlet 教程
- 從 Java Servlet 提供純文本
- Java Servlet JSON 教程
- Java Servlet HTTP 標頭
- Java Servlet 復選框教程
- Java servlet 發送圖像教程
- Java Servlet JQuery 列表教程
- Servlet FreeMarker JdbcTemplate 教程-CRUD 操作
- jQuery 自動補全教程
- Java servlet PDF 教程
- servlet 從 WAR 內讀取 CSV 文件
- Java HttpServletMapping
- EasyUI datagrid
- Java Servlet RESTFul 客戶端
- Java Servlet Log4j 教程
- Java Servlet 圖表教程
- Java ServletConfig教程
- Java Servlet 讀取網頁
- 嵌入式 Tomcat
- Java Servlet 分頁
- Java Servlet Weld 教程
- Java Servlet 上傳文件
- Java Servlet 提供 XML
- Java Servlet 教程
- JSTL forEach標簽
- 使用 jsGrid 組件
- ZetCode Spring 教程
- Spring @Bean注解教程
- Spring @Autowired教程
- Spring @GetMapping教程
- Spring @PostMapping教程
- Spring @DeleteMapping教程
- Spring @RequestMapping教程
- Spring @PathVariable教程
- Spring @RequestBody教程
- Spring @RequestHeader教程
- Spring Cookies 教程
- Spring 資源教程
- Spring 重定向教程
- Spring 轉發教程
- Spring ModelAndView教程
- Spring MessageSource教程
- Spring AnnotationConfigApplicationContext
- Spring BeanFactoryPostProcessor教程
- Spring BeanFactory教程
- Spring context:property-placeholder教程
- Spring @PropertySource注解教程
- Spring @ComponentScan教程
- Spring @Configuration教程
- Spring C 命名空間教程
- Spring P 命名空間教程
- Spring bean 引用教程
- Spring @Qualifier注解教程
- Spring ClassPathResource教程
- Spring 原型作用域 bean
- Spring Inject List XML 教程
- Spring 概要文件 XML 教程
- Spring BeanDefinitionBuilder教程
- Spring 單例作用域 bean
- 獨立的 Spring 應用
- 經典 Spring 應用中的JdbcTemplate
- Spring EmbeddedDatabaseBuilder教程
- Spring HikariCP 教程
- Spring Web 應用簡介
- Spring BeanPropertyRowMapper教程
- Spring DefaultServlet教程
- Spring WebSocket 教程
- Spring WebJars 教程
- Spring @MatrixVariable教程
- Spring Jetty 教程
- Spring 自定義 404 錯誤頁面教程
- Spring WebApplicationInitializer教程
- Spring BindingResult教程
- Spring FreeMarker 教程
- Spring Thymeleaf 教程
- Spring ResourceHandlerRegistry教程
- SpringRunner 教程
- Spring MockMvc 教程
- ZetCode Spring Boot 教程
- Spring Boot 發送電子郵件教程
- Spring Boot WebFlux 教程
- Spring Boot ViewControllerRegistry教程
- Spring Boot CommandLineRunner教程
- Spring Boot ApplicationReadyEvent 教程
- Spring Boot CORS 教程
- Spring Boot @Order教程
- Spring Boot @Lazy教程
- Spring Boot Flash 屬性
- Spring Boot CrudRepository 教程
- Spring Boot JpaRepository 教程
- Spring Boot findById 教程
- Spring Boot Data JPA @NamedQuery教程
- Spring Boot Data JPA @Query教程
- Spring Boot Querydsl 教程
- Spring Boot Data JPA 排序教程
- Spring Boot @DataJpaTest教程
- Spring Boot TestEntityManager 教程
- Spring Boot Data JPA 派生的查詢
- Spring Boot Data JPA 查詢示例
- Spring Boot Jersey 教程
- Spring Boot CSV 教程
- SpringBootServletInitializer教程
- 在 Spring Boot 中加載資源
- Spring Boot H2 REST 教程
- Spring Boot RestTemplate
- Spring Boot REST XML 教程
- Spring Boot Moustache 教程
- Spring Boot Thymeleaf 配置
- Spring Boot 自動控制器
- Spring Boot FreeMarker 教程
- Spring Boot Environment
- Spring Boot Swing 集成教程
- 在 Spring Boot 中提供圖像文件
- 在 Spring Boot 中創建 PDF 報告
- Spring Boot 基本注解
- Spring Boot @ResponseBody教程
- Spring Boot @PathVariable教程
- Spring Boot REST Data JPA 教程
- Spring Boot @RequestParam教程
- Spring Boot 列出 bean
- Spring Boot @Bean
- Spring Boot @Qualifier教程
- 在 Spring Boot 中提供靜態內容
- Spring Boot Whitelabel 錯誤
- Spring Boot DataSourceBuilder 教程
- Spring Boot H2 教程
- Spring Boot Web JasperReports 集成
- Spring Boot iText 教程
- Spring Boot cmd JasperReports 集成
- Spring Boot RESTFul 應用
- Spring Boot 第一個 Web 應用
- Spring Boot Groovy CLI
- Spring Boot 上傳文件
- Spring Boot @ExceptionHandler
- Spring Boot @ResponseStatus
- Spring Boot ResponseEntity
- Spring Boot @Controller
- Spring Boot @RestController
- Spring Boot @PostConstruct
- Spring Boot @Component
- Spring Boot @ConfigurationProperties教程
- Spring Boot @Repository
- Spring Boot MongoDB 教程
- Spring Boot MongoDB Reactor 教程
- Spring Boot PostgreSQL 教程
- Spring Boot @ModelAttribute
- Spring Boot 提交表單教程
- Spring Boot Model
- Spring Boot MySQL 教程
- Spring Boot GenericApplicationContext
- SpringApplicationBuilder教程
- Spring Boot Undertow 教程
- Spring Boot 登錄頁面教程
- Spring Boot RouterFunction 教程
- ZetCode Symfony 教程
- Symfony DBAL 教程
- Symfony 表單教程
- Symfony CSRF 教程
- Symfony Vue 教程
- Symfony 簡介
- Symfony 請求教程
- Symfony HttpClient教程
- Symfony Flash 消息
- 在 Symfony 中發送郵件
- Symfony 保留表單值
- Symfony @Route注解教程
- Symfony 創建路由
- Symfony 控制臺命令教程
- Symfony 上傳文件
- Symfony 服務教程
- Symfony 驗證教程
- Symfony 翻譯教程
