# wxWidgets 中的對話框
> 原文: [http://zetcode.com/gui/wxwidgets/dialogs/](http://zetcode.com/gui/wxwidgets/dialogs/)
對話框窗口或對話框是大多數現代 GUI 應用必不可少的部分。 對話被定義為兩個或更多人之間的對話。 在計算機應用中,對話框是一個窗口,用于與應用“對話”。 對話框用于輸入數據,修改數據,更改應用設置等。對話框是用戶與計算機程序之間進行通信的重要手段。
對話框本質上有兩種:預定義對話框和自定義對話框。
## 預定義對話框
預定義對話框是 wxWidgets 工具包中可用的對話框。 這些是用于常見編程任務的對話框,例如顯示文本,接收輸入,加載和保存文件等。它們可以節省程序員的時間,并通過使用某些標準行為來增強功能。
## `MessageDialog`
消息對話框用于向用戶顯示消息。 它們是可定制的。 我們可以更改將在對話框中顯示的圖標和按鈕。
`Messages.h`
```cpp
#include <wx/wx.h>
class Messages : public wxFrame
{
public:
Messages(const wxString& title);
void ShowMessage1(wxCommandEvent & event);
void ShowMessage2(wxCommandEvent & event);
void ShowMessage3(wxCommandEvent & event);
void ShowMessage4(wxCommandEvent & event);
};
const int ID_INFO = 1;
const int ID_ERROR = 2;
const int ID_QUESTION = 3;
const int ID_ALERT = 4;
```
`Messages.cpp`
```cpp
#include "Messages.h"
Messages::Messages(const wxString& title)
: wxFrame(NULL, wxID_ANY, title, wxDefaultPosition, wxSize(210, 110))
{
wxPanel *panel = new wxPanel(this, wxID_ANY);
wxBoxSizer *hbox = new wxBoxSizer(wxHORIZONTAL);
wxGridSizer *gs = new wxGridSizer(2, 2, 2, 2);
wxButton *btn1 = new wxButton(panel, ID_INFO, wxT("Info"));
wxButton *btn2 = new wxButton(panel, ID_ERROR, wxT("Error"));
wxButton *btn3 = new wxButton(panel, ID_QUESTION, wxT("Question"));
wxButton *btn4 = new wxButton(panel, ID_ALERT, wxT("Alert"));
Connect(ID_INFO, wxEVT_COMMAND_BUTTON_CLICKED,
wxCommandEventHandler(Messages::ShowMessage1));
Connect(ID_ERROR, wxEVT_COMMAND_BUTTON_CLICKED,
wxCommandEventHandler(Messages::ShowMessage2));
Connect(ID_QUESTION, wxEVT_COMMAND_BUTTON_CLICKED,
wxCommandEventHandler(Messages::ShowMessage3));
Connect(ID_ALERT, wxEVT_COMMAND_BUTTON_CLICKED,
wxCommandEventHandler(Messages::ShowMessage4));
gs->Add(btn1, 1, wxEXPAND);
gs->Add(btn2, 1);
gs->Add(btn3, 1);
gs->Add(btn4, 1);
hbox->Add(gs, 0, wxALL, 15);
panel->SetSizer(hbox);
Center();
}
void Messages::ShowMessage1(wxCommandEvent& event)
{
wxMessageDialog *dial = new wxMessageDialog(NULL,
wxT("Download completed"), wxT("Info"), wxOK);
dial->ShowModal();
}
void Messages::ShowMessage2(wxCommandEvent& event)
{
wxMessageDialog *dial = new wxMessageDialog(NULL,
wxT("Error loading file"), wxT("Error"), wxOK | wxICON_ERROR);
dial->ShowModal();
}
void Messages::ShowMessage3(wxCommandEvent& event)
{
wxMessageDialog *dial = new wxMessageDialog(NULL,
wxT("Are you sure to quit?"), wxT("Question"),
wxYES_NO | wxNO_DEFAULT | wxICON_QUESTION);
dial->ShowModal();
}
void Messages::ShowMessage4(wxCommandEvent& event)
{
wxMessageDialog *dial = new wxMessageDialog(NULL,
wxT("Unallowed operation"), wxT("Exclamation"),
wxOK | wxICON_EXCLAMATION);
dial->ShowModal();
}
```
`main.h`
```cpp
#include <wx/wx.h>
class MyApp : public wxApp
{
public:
virtual bool OnInit();
};
```
`main.cpp`
```cpp
#include "main.h"
#include "Messages.h"
IMPLEMENT_APP(MyApp)
bool MyApp::OnInit()
{
Messages *msgs = new Messages(wxT("Messages"));
msgs->Show(true);
return true;
}
```
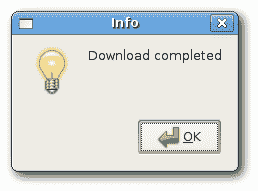
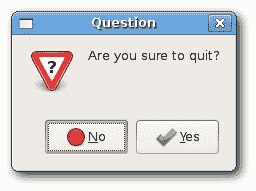
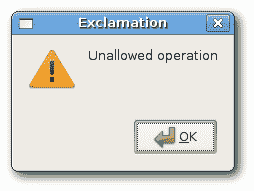
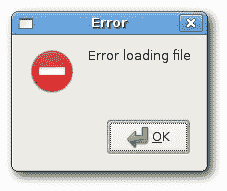
在我們的示例中,我們創建了四個按鈕并將它們放入網格大小調整器中。 這些按鈕將顯示四個不同的對話框窗口。 我們通過指定不同的樣式標志來創建它們。
```cpp
wxMessageDialog *dial = new wxMessageDialog(NULL,
wxT("Error loading file"), wxT("Error"), wxOK | wxICON_ERROR);
dial->ShowModal();
```
消息對話框的創建很簡單。 通過提供`NULL`作為父級,我們將對話框設置為頂級窗口。 這兩個字符串提供了消息文本和對話框標題。 通過指定`wxOK`和`wxICON_ERROR`標志,我們顯示一個 OK 按鈕和一個錯誤圖標。 為了在屏幕上顯示對話框,我們調用`ShowModal()`方法。
## `wxFileDialog`
這是打開和保存文件的常用對話框。
`openfile.h`
```cpp
#include <wx/wx.h>
class Openfile : public wxFrame
{
public:
Openfile(const wxString& title);
void OnOpen(wxCommandEvent& event);
wxTextCtrl *tc;
};
```
`openfile.cpp`
```cpp
#include "openfile.h"
Openfile::Openfile(const wxString & title)
: wxFrame(NULL, wxID_ANY, title, wxDefaultPosition, wxSize(300, 200))
{
wxMenuBar *menubar = new wxMenuBar;
wxMenu *file = new wxMenu;
file->Append(wxID_OPEN, wxT("&Open"));
menubar->Append(file, wxT("&File"));
SetMenuBar(menubar);
Connect(wxID_OPEN, wxEVT_COMMAND_MENU_SELECTED,
wxCommandEventHandler(Openfile::OnOpen));
tc = new wxTextCtrl(this, -1, wxT(""), wxPoint(-1, -1),
wxSize(-1, -1), wxTE_MULTILINE);
Center();
}
void Openfile::OnOpen(wxCommandEvent& event)
{
wxFileDialog * openFileDialog = new wxFileDialog(this);
if (openFileDialog->ShowModal() == wxID_OK){
wxString fileName = openFileDialog->GetPath();
tc->LoadFile(fileName);
}
}
```
`main.h`
```cpp
#include <wx/wx.h>
class MyApp : public wxApp
{
public:
virtual bool OnInit();
};
```
`main.cpp`
```cpp
#include "main.h"
#include "openfile.h"
IMPLEMENT_APP(MyApp)
bool MyApp::OnInit()
{
Openfile *open = new Openfile(wxT("Openfile"));
open->Show(true);
return true;
}
```
在我們的示例中,我們顯示一個打開文件菜單項和一個簡單的多行文本控件。 如果單擊打開文件菜單項,則會顯示`wxFileDialog`。 我們可以將一些簡單的文本文件加載到文本控件中。
```cpp
tc = new wxTextCtrl(this, -1, wxT(""), wxPoint(-1, -1),
wxSize(-1, -1), wxTE_MULTILINE);
```
我們將文本文件加載到此文本控件中。
```cpp
wxFileDialog * openFileDialog = new wxFileDialog(this);
```
在這里,我們創建一個`wxFileDialog`。 我們使用默認參數。 (打開文件對話框是默認對話框。)
```cpp
if (openFileDialog->ShowModal() == wxID_OK){
wxString fileName = openFileDialog->GetPath();
tc->LoadFile(fileName);
}
```
在這里,我們顯示對話框。 我們獲得選定的文件名,并將文件加載到文本控件中。
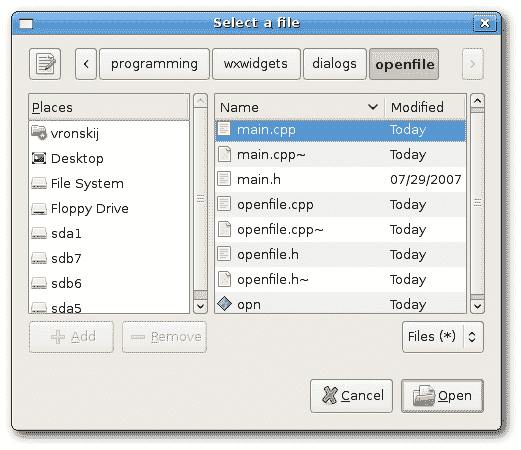
圖:Linux 上的`wxFileDialog`
## `wxFontDialog`
這是選擇字體的常用對話框。
`fontdialog.h`
```cpp
#include <wx/wx.h>
class ChangeFont : public wxFrame
{
public:
ChangeFont(const wxString& title);
void OnOpen(wxCommandEvent& event);
wxStaticText *st;
};
const int ID_FONTDIALOG = 1;
```
`fontdialog.cpp`
```cpp
#include <wx/fontdlg.h>
#include "fontdialog.h"
ChangeFont::ChangeFont(const wxString & title)
: wxFrame(NULL, wxID_ANY, title, wxDefaultPosition, wxSize(300, 200))
{
wxPanel *panel = new wxPanel(this, -1);
wxMenuBar *menubar = new wxMenuBar;
wxMenu *file = new wxMenu;
file->Append(ID_FONTDIALOG, wxT("&Change font"));
menubar->Append(file, wxT("&File"));
SetMenuBar(menubar);
Connect(ID_FONTDIALOG, wxEVT_COMMAND_MENU_SELECTED,
wxCommandEventHandler(ChangeFont::OnOpen));
st = new wxStaticText(panel, wxID_ANY, wxT("The Agoge"),
wxPoint(20, 20));
Center();
}
void ChangeFont::OnOpen(wxCommandEvent& WXUNUSED(event))
{
wxFontDialog *fontDialog = new wxFontDialog(this);
if (fontDialog->ShowModal() == wxID_OK) {
st->SetFont(fontDialog->GetFontData().GetChosenFont());
}
}
```
`main.h`
```cpp
#include <wx/wx.h>
class MyApp : public wxApp
{
public:
virtual bool OnInit();
};
```
`main.cpp`
```cpp
#include "main.h"
#include "fontdialog.h"
IMPLEMENT_APP(MyApp)
bool MyApp::OnInit()
{
ChangeFont *change = new ChangeFont(wxT("Change font"));
change->Show(true);
return true;
}
```
在此示例中,我們將更改靜態文本示例的字體。
```cpp
st = new wxStaticText(panel, wxID_ANY, wxT("The Agoge"),
wxPoint(20, 20));
```
在這里,我們在面板上顯示靜態文本。 我們將使用`wxFontDialog`更改其字體。
```cpp
wxFontDialog *fontDialog = new wxFontDialog(this);
if (fontDialog->ShowModal() == wxID_OK) {
st->SetFont(fontDialog->GetFontData().GetChosenFont());
}
```
在這些代碼行中,我們顯示字體對話框。 然后我們得到選擇的字體。 最后,我們更改之前創建的靜態文本的字體。
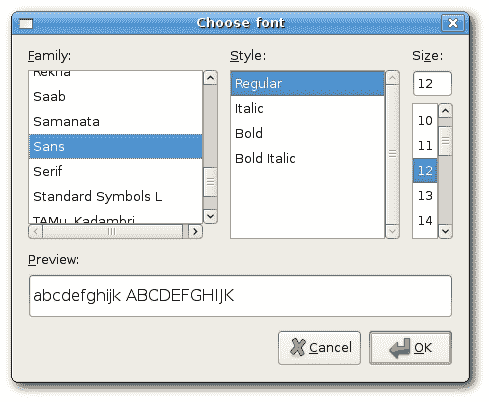
圖:字體對話框
## 自定義對話框
在下一個示例中,我們創建一個自定義對話框。 圖像編輯應用可以更改圖片的顏色深度。 為了提供這種功能,我們可以創建一個合適的自定義對話框。
`customdialog.h`
```cpp
#include <wx/wx.h>
class CustomDialog : public wxDialog
{
public:
CustomDialog(const wxString& title);
};
```
`customdialog.cpp`
```cpp
#include "customdialog.h"
CustomDialog::CustomDialog(const wxString & title)
: wxDialog(NULL, -1, title, wxDefaultPosition, wxSize(250, 230))
{
wxPanel *panel = new wxPanel(this, -1);
wxBoxSizer *vbox = new wxBoxSizer(wxVERTICAL);
wxBoxSizer *hbox = new wxBoxSizer(wxHORIZONTAL);
wxStaticBox *st = new wxStaticBox(panel, -1, wxT("Colors"),
wxPoint(5, 5), wxSize(240, 150));
wxRadioButton *rb = new wxRadioButton(panel, -1,
wxT("256 Colors"), wxPoint(15, 30), wxDefaultSize, wxRB_GROUP);
wxRadioButton *rb1 = new wxRadioButton(panel, -1,
wxT("16 Colors"), wxPoint(15, 55));
wxRadioButton *rb2 = new wxRadioButton(panel, -1,
wxT("2 Colors"), wxPoint(15, 80));
wxRadioButton *rb3 = new wxRadioButton(panel, -1,
wxT("Custom"), wxPoint(15, 105));
wxTextCtrl *tc = new wxTextCtrl(panel, -1, wxT(""),
wxPoint(95, 105));
wxButton *okButton = new wxButton(this, -1, wxT("Ok"),
wxDefaultPosition, wxSize(70, 30));
wxButton *closeButton = new wxButton(this, -1, wxT("Close"),
wxDefaultPosition, wxSize(70, 30));
hbox->Add(okButton, 1);
hbox->Add(closeButton, 1, wxLEFT, 5);
vbox->Add(panel, 1);
vbox->Add(hbox, 0, wxALIGN_CENTER | wxTOP | wxBOTTOM, 10);
SetSizer(vbox);
Centre();
ShowModal();
Destroy();
}
```
`main.h`
```cpp
#include <wx/wx.h>
class MyApp : public wxApp
{
public:
virtual bool OnInit();
};
```
`main.cpp`
```cpp
#include "main.h"
#include "customdialog.h"
IMPLEMENT_APP(MyApp)
bool MyApp::OnInit()
{
CustomDialog *custom = new CustomDialog(wxT("CustomDialog"));
custom->Show(true);
return true;
}
```
本示例是基于對話框的應用。 我們說明了如何創建自定義對話框。
```cpp
class CustomDialog : public wxDialog
```
自定義對話框基于`wxDialog`類。
```cpp
wxStaticBox *st = new wxStaticBox(panel, -1, wxT("Colors"),
wxPoint(5, 5), wxSize(240, 150));
wxRadioButton *rb = new wxRadioButton(panel, -1,
wxT("256 Colors"), wxPoint(15, 30), wxDefaultSize, wxRB_GROUP);
```
請注意,必須先創建`wxStaticBox`小部件,然后再包含該小部件,并且這些小部件應該是靜態框的同級,而不是子級。
```cpp
ShowModal();
Destroy();
```
為了在屏幕上顯示對話框,我們調用`ShowModal()`方法。 要從內存中清除對話框,我們調用`Destroy()`方法。
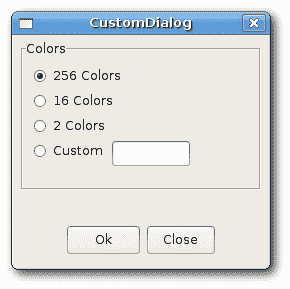
圖:自定義對話框
wxWidgets 教程的這一部分專門用于對話框。
- ZetCode 數據庫教程
- MySQL 教程
- MySQL 簡介
- MySQL 安裝
- MySQL 的第一步
- MySQL 快速教程
- MySQL 存儲引擎
- MySQL 數據類型
- 在 MySQL 中創建,更改和刪除表
- MySQL 表達式
- 在 MySQL 中插入,更新和刪除數據
- MySQL 中的SELECT語句
- MySQL 子查詢
- MySQL 約束
- 在 MySQL 中導出和導入數據
- 在 MySQL 中連接表
- MySQL 函數
- MySQL 中的視圖
- MySQL 中的事務
- MySQL 存儲過程
- MySQL Python 教程
- MySQL Perl 教程
- MySQL & Perl DBI
- 使用 Perl 連接到 MySQL 數據庫
- MySQL 中的 Perl 錯誤處理
- 使用 Perl 進行 MySQL 查詢
- 在 MySQL 中使用 Perl 綁定參數&列
- 在 MySQL 中使用 Perl 處理圖像
- 使用 Perl 獲取 MySQL 元數據
- Perl 的 MySQL 事務
- MySQL C API 編程教程
- MySQL Visual Basic 教程
- MySQL PHP 教程
- MySQL Java 教程
- MySQL Ruby 教程
- MySQL C# 教程
- SQLite 教程
- SQLite 簡介
- sqlite3 命令行工具
- 在 SQLite 中創建,刪除和更改表
- SQLite 表達式
- SQLite 插入,更新,刪除數據
- SQLite SELECT語句
- SQLite 約束
- SQLite 連接表
- SQLite 函數
- SQLite 視圖,觸發器,事務
- SQLite C 教程
- SQLite Python 教程
- SQLite Perl 教程
- Perl DBI
- 使用 Perl 連接到 SQLite 數據庫
- SQLite Perl 錯誤處理
- 使用 Perl 的 SQLite 查詢
- 使用 Perl 綁定 SQLite 參數&列
- 使用 Perl 在 SQLite 中處理圖像
- 使用 Perl 獲取 SQLite 元數據
- 使用 Perl 進行 SQLite 事務
- SQLite Ruby 教程
- 連接到 SQLite 數據庫
- 在 SQLite 中使用 Ruby 進行 SQL 查詢
- 綁定參數
- 處理圖像
- 使用 Ruby 獲取 SQLite 元數據
- Ruby 的 SQLite 事務
- SQLite C# 教程
- SQLite C# 簡介
- 使用SqliteDataReader檢索數據
- ADO.NET 數據集
- 使用 C# 在 SQLite 中處理圖像
- 使用 C# 獲取 SQLite 元數據
- 使用 C# 的 SQLite 事務
- SQLite Visual Basic 教程
- SQLite Visual Basic 簡介
- 使用SqliteDataReader檢索數據
- ADO.NET 的數據集
- 使用 Visual Basic 在 SQLite 中處理圖像
- 使用 Visual Basic 獲取 SQLite 元數據
- 使用 Visual Basic 的 SQLite 事務
- PostgreSQL C 教程
- PostgreSQL Ruby 教程
- PostgreSQL PHP 教程
- PostgreSQL PHP 編程簡介
- 在 PostgreSQL 中使用 PHP 檢索數據
- 在 PostgreSQL 中使用 PHP 處理圖像
- 用 PHP 獲取 PostgreSQL 元數據
- 在 PostgreSQL 中使用 PHP 進行事務
- PostgreSQL Java 教程
- Apache Derby 教程
- Derby 簡介
- Derby 的安裝&配置
- Derby 工具
- ij 工具
- Derby 中的 SQL 查詢
- 在 Derby 中使用 JDBC 進行編程
- Derby 安全
- 使用 Derby & Apache Tomcat
- NetBeans 和 Derby
- SQLAlchemy 教程
- SQLAlchemy 簡介
- 原始 SQL
- 模式定義語言
- SQL 表達式語言
- SQLAlchemy 中的對象關系映射器
- MongoDB PHP 教程
- MongoDB JavaScript 教程
- MongoDB Ruby 教程
- Spring JdbcTemplate 教程
- JDBI 教程
- MyBatis 教程
- Hibernate Derby 教程
- ZetCode .NET 教程
- Visual Basic 教程
- Visual Basic
- Visual Basic 語法結構
- 基本概念
- Visual Basic 數據類型
- Visual Basic 中的字符串
- 運算符
- 控制流
- Visual Basic 數組
- Visual Basic 中的過程&函數
- 在 Visual Basic 中組織代碼
- 面向對象編程
- Visual Basic 中的面向對象編程 II
- Visual Basic 中的集合
- 輸入和輸出
- C# 教程
- C# 語言
- C# 語法結構
- C# 基礎
- C# 數據類型
- C# 中的字符串
- C# 運算符
- C# 中的流控制
- C# 數組
- C# 面向對象編程
- C# 中的方法
- C# 面向對象編程 II
- C# 屬性
- C# 結構
- C# 委托
- 命名空間
- C# 集合
- C# 輸入和輸出
- C# 目錄教程
- C# 字典教程
- 在 C# 中讀取文本文件
- C# 中的日期和時間
- 在 C# 中讀取網頁
- C# HttpClient教程
- ASP.NET Core 教程
- ZetCode 圖形教程
- Java 2D 游戲教程
- Java 游戲基礎
- 動畫
- 移動精靈
- 碰撞檢測
- Java 益智游戲
- Java Snake
- Breakout 游戲
- Java 俄羅斯方塊
- Java 吃豆人
- Java 太空侵略者
- Java 掃雷
- Java 推箱子
- Java 2D 教程
- 介紹
- 基本繪圖
- 形狀和填充
- 透明度
- 合成
- 剪裁
- 變換
- 特效
- 圖像
- 文字和字體
- 命中測試,移動物體
- 俄羅斯方塊
- Cario 圖形教程
- Cario 圖形庫
- Cario 定義
- Cairo 后端
- Cairo 基本圖形
- 形狀和填充
- 漸變
- 透明度
- 合成
- 剪裁和遮罩
- 變換
- Cairo 文字
- Cairo 中的圖像
- 根窗口
- PyCairo 教程
- PyCairo 簡介
- PyCairo 后端
- PyCairo 中的基本繪圖
- PyCairo 形狀和填充
- PyCairo 漸變
- PyCairo 剪裁&遮罩
- PyCairo 的透明度
- PyCairo 中的變換
- PyCairo 中的文字
- PyCairo 中的圖像
- 根窗口
- HTML5 畫布教程
- 介紹
- HTML5 畫布中的直線
- HTML5 畫布形狀
- HTML5 畫布填充
- HTML5 畫布中的透明度
- HTML5 畫布合成
- HTML5 canvas 中的變換
- HTML5 畫布中的文字
- HTML5 畫布中的動畫
- HTML5 畫布中的 Snake
- ZetCode GUI 教程
- Windows API 教程
- Windows API 簡介
- Windows API main函數
- Windows API 中的系統函數
- Windows API 中的字符串
- Windows API 中的日期和時間
- Windows API 中的一個窗口
- UI 的第一步
- Windows API 菜單
- Windows API 對話框
- Windows API 控件 I
- Windows API 控件 II
- Windows API 控件 III
- Windows API 中的高級控件
- Windows API 中的自定義控件
- Windows API 中的 GDI
- PyQt4 教程
- PyQt4 簡介
- PyQt4 中的第一個程序
- PyQt4 中的菜單和工具欄
- PyQt4 中的布局管理
- PyQt4 中的事件和信號
- PyQt4 中的對話框
- PyQt4 小部件
- PyQt4 小部件 II
- PyQt4 中的拖放
- PyQt4 中的繪圖
- PyQt4 中的自定義小部件
- PyQt4 中的俄羅斯方塊游戲
- PyQt5 教程
- PyQt5 簡介
- PyQt5 日期和時間
- PyQt5 中的第一個程序
- PyQt5 中的菜單和工具欄
- PyQt5 中的布局管理
- PyQt5 中的事件和信號
- PyQt5 中的對話框
- PyQt5 小部件
- PyQt5 小部件 II
- PyQt5 拖放
- PyQt5 中的繪圖
- PyQt5 中的自定義小部件
- PyQt5 中的俄羅斯方塊
- Qt4 教程
- Qt4 工具包簡介
- Qt4 工具類
- Qt4 中的字符串
- Qt4 中的日期和時間
- 在 Qt4 中使用文件和目錄
- Qt4 中的第一個程序
- Qt4 中的菜單和工具欄
- Qt4 中的布局管理
- Qt4 中的事件和信號
- Qt4 小部件
- Qt4 小部件 II
- Qt4 中的繪圖
- Qt4 中的自定義小部件
- Qt4 中的打磚塊游戲
- Qt5 教程
- Qt5 工具包簡介
- Qt5 中的字符串
- Qt5 中的日期和時間
- Qt5 中的容器
- 在 Qt5 中處理文件和目錄
- Qt5 中的第一個程序
- Qt5 中的菜單和工具欄
- Qt5 中的布局管理
- Qt5 中的事件和信號
- Qt5 小部件
- Qt5 小部件 II
- Qt5 中的繪圖
- Qt5 中的自定義小部件
- Qt5 中的貪食蛇
- Qt5 中的打磚塊游戲
- PySide 教程
- PySide 工具包簡介
- PySide 中的第一個程序
- PySide 中的菜單和工具欄
- PySide 中的布局管理
- PySide 中的事件和信號
- PySide 中的對話框
- PySide 小部件
- PySide 小部件 II
- 在 PySide 中拖放
- 在 PySide 中繪圖
- PySide 中的自定義小部件
- PySide 中的俄羅斯方塊游戲
- Tkinter 教程
- Tkinter 簡介
- Tkinter 中的布局管理
- Tkinter 標準小部件屬性
- Tkinter 小部件
- Tkinter 中的菜單和工具欄
- Tkinter 中的對話框
- Tkinter 中的繪圖
- Tkinter 中的貪食蛇
- Tcl/Tk 教程
- Tcl/Tk 簡介
- Tcl/Tk 中的布局管理
- Tcl/Tk 小部件
- Tcl/Tk 中的菜單和工具欄
- Tcl/Tk 中的對話框
- Tcl/Tk 繪圖
- 貪食蛇
- Qt 快速教程
- Java Swing 教程
- Java Swing 簡介
- Java Swing 首個程序
- Java Swing 中的菜單和工具欄
- Swing 布局管理
- GroupLayout管理器
- Java Swing 事件
- 基本的 Swing 組件
- 基本的 Swing 組件 II
- Java Swing 對話框
- Java Swing 模型架構
- Swing 中的拖放
- Swing 中的繪圖
- Java Swing 中的可調整大小的組件
- Java Swing 中的益智游戲
- 俄羅斯方塊
- JavaFX 教程
- JavaFX 簡介
- JavaFX 首個程序
- JavaFX 布局窗格
- 基本的 JavaFX 控件
- 基本 JavaFX 控件 II
- JavaFX 事件
- JavaFX 效果
- JavaFX 動畫
- JavaFX 畫布
- JavaFX 圖表
- Java SWT 教程
- Java SWT 簡介
- Java SWT 中的布局管理
- Java SWT 中的菜單和工具欄
- Java SWT 中的小部件
- Table小部件
- Java SWT 中的對話框
- Java SWT 繪圖
- Java SWT 中的貪食蛇
- wxWidgets 教程
- wxWidgets 簡介
- wxWidgets 助手類
- wxWidgets 中的第一個程序
- wxWidgets 中的菜單和工具欄
- wxWidgets 中的布局管理
- wxWidgets 中的事件
- wxWidgets 中的對話框
- wxWidgets 小部件
- wxWidgets 小部件 II
- wxWidgets 中的拖放
- wxWidgets 中的設備上下文
- wxWidgets 中的自定義小部件
- wxWidgets 中的俄羅斯方塊游戲
- wxPython 教程
- wxPython 簡介
- 第一步
- 菜單和工具欄
- wxPython 中的布局管理
- wxPython 中的事件
- wxPython 對話框
- 小部件
- wxPython 中的高級小部件
- wxPython 中的拖放
- wxPython 圖形
- 創建自定義小部件
- wxPython 中的應用框架
- wxPython 中的俄羅斯方塊游戲
- C# Winforms Mono 教程
- Mono Winforms 簡介
- Mono Winforms 中的第一步
- Mono Winforms 中的布局管理
- Mono Winforms 中的菜單和工具欄
- Mono Winforms 中的基本控件
- Mono Winforms 中的高級控件
- 對話框
- Mono Winforms 中的拖放
- Mono Winforms 中的繪圖
- Mono Winforms 中的貪食蛇
- Java Gnome 教程
- Java Gnome 簡介
- Java Gnome 的第一步
- Java Gnome 中的布局管理
- Java Gnome 中的布局管理 II
- Java Gnome 中的菜單
- Java Gnome 中的工具欄
- Java Gnome 中的事件
- Java Gnome 中的小部件
- Java Gnome 中的小部件 II
- Java Gnome 中的高級小部件
- Java Gnome 中的對話框
- Java Gnome 中的 Pango
- 在 Java Gnome 中用 Cairo 繪圖
- Cario 繪圖 II
- Java Gnome 中的貪食蛇
- QtJambi 教程
- QtJambi 簡介
- QtJambi 中的布局管理
- QtJambi 中的小部件
- QtJambi 中的菜單和工具欄
- QtJambi 對話框
- QtJambi 中的繪圖
- QtJambi 中的自定義小部件
- 貪食蛇
- GTK+ 教程
- GTK+ 簡介
- GTK+ 中的第一個程序
- GTK+ 中的菜單和工具欄
- GTK+ 布局管理
- GTK+ 事件和信號
- GTK+ 對話框
- GTK+ 小部件
- GTK+ 小部件 II
- GtkTreeView小部件
- GtkTextView小部件
- 自定義 GTK+ 小部件
- Ruby GTK 教程
- Ruby GTK 簡介
- Ruby GTK 中的布局管理
- Ruby GTK 中的小部件
- Ruby GTK 中的菜單和工具欄
- Ruby GTK 中的對話框
- Ruby GTK Cario 繪圖
- Ruby GTK 中的自定義小部件
- Ruby GTK 中的貪食蛇
- GTK# 教程
- GTK# 簡介
- GTK 的第一步
- GTK# 中的布局管理
- GTK 中的菜單
- GTK# 中的工具欄
- GTK# 中的事件
- GTK# 中的小部件
- GTK 中的小部件 II
- GTK# 中的高級小部件
- GTK# 中的對話框
- Pango
- GTK# 中的 Cario 繪圖
- GTK# 中的 Cario 繪圖 II
- GTK# 中的自定義小部件
- Visual Basic GTK# 教程
- Visual Basic GTK# 簡介
- 布局管理
- 小部件
- 菜單和工具欄
- 對話框
- Cario 繪圖
- 自定義小部件
- 貪食蛇
- PyGTK 教程
- PyGTK 簡介
- PyGTK 的第一步
- PyGTK 中的布局管理
- PyGTK 中的菜單
- PyGTK 中的工具欄
- PyGTK 中的事件和信號
- PyGTK 中的小部件
- PyGTK 中的小部件 II
- PyGTK 中的高級小部件
- PyGTK 中的對話框
- Pango
- Pango II
- PyGTK 中的 Cario 繪圖
- Cario 繪圖 II
- PyGTK 中的貪食蛇游戲
- PyGTK 中的自定義小部件
- PHP GTK 教程
- PHP GTK 簡介
- PHP GTK 中的布局管理
- PHP GTK 中的小部件
- PHP GTK 中的菜單和工具欄
- 對話框
- Cario 繪圖
- 自定義小部件
- 貪食蛇
- C# Qyoto 教程
- Qyoto 介紹
- 布局管理
- Qyoto 中的小部件
- Qyoto 中的菜單和工具欄
- Qyoto 對話框
- Qyoto 中的繪圖
- Qyoto 中的繪圖 II
- Qyoto 中的自定義小部件
- 貪食蛇
- Ruby Qt 教程
- Ruby Qt 簡介
- Ruby Qt 中的布局管理
- Ruby Qt 中的小部件
- 菜單和工具欄
- Ruby Qt 中的對話框
- 用 Ruby Qt 繪圖
- Ruby Qt 中的自定義小部件
- Ruby Qt 中的貪食蛇
- Visual Basic Qyoto 教程
- Qyoto 介紹
- 布局管理
- Qyoto 中的小部件
- Qyoto 中的菜單和工具欄
- Qyoto 對話框
- Qyoto 中的繪圖
- Qyoto 中的自定義小部件
- 貪食蛇
- Mono IronPython Winforms 教程
- 介紹
- IronPython Mono Winforms 中的第一步
- 布局管理
- 菜單和工具欄
- Mono Winforms 中的基本控件
- Mono Winforms 中的基本控件 II
- Mono Winforms 中的高級控件
- 對話框
- Mono Winforms 中的拖放
- 繪圖
- IronPython Mono Winforms 中的繪圖 II
- IronPython Mono Winforms 中的貪食蛇
- IronPython Mono Winforms 中的俄羅斯方塊游戲
- FreeBASIC GTK 教程
- Jython Swing 教程
- Jython Swing 簡介
- Jython Swing 中的布局管理
- Jython Swing 中的組件
- Jython Swing 中的菜單和工具欄
- Jython Swing 中的對話框
- Jython Swing 中的繪圖
- Jython Swing 中的半字節
- JRuby Swing 教程
- JRuby Swing 簡介
- JRuby Swing 中的布局管理
- JRuby Swing 中的組件
- 菜單和工具欄
- JRuby Swing 中的對話框
- 在 JRuby Swing 中繪圖
- JRuby Swing 中的貪食蛇
- Visual Basic Winforms 教程
- Visual Basic Winforms 簡介
- 布局管理
- 基本控制
- 進階控件
- 菜單和工具欄
- 對話框
- 繪圖
- 拖放
- 貪食蛇
- JavaScript GTK 教程
- JavaScript GTK 簡介
- 布局管理
- JavaScript GTK 中的小部件
- JavaScript GTK 中的菜單和工具欄
- JavaScript GTK 中的對話框
- JavaScript GTK 中的 Cario 繪圖
- ZetCode Java 教程
- Java 教程
- Java 語言
- Java 語法結構
- Java 基礎
- Java 數據類型
- Java 數據類型 II
- Java 字符串
- Java 數組
- Java 表達式
- Java 控制流程
- Java 面向對象的編程
- Java 方法
- Java 面向對象編程 II
- Java 包
- Java 中的異常
- Java 集合
- Java 流
- Java Future 教程
- Java Comparable和Comparator
- Java DOM 教程
- Java MVC 教程
- Java SAX 教程
- Java JAXB 教程
- Java JSON 處理教程
- Java H2 教程
- MongoDB Java 教程
- Java 正則表達式教程
- Java PDFBox 教程
- Java 文件教程
- Java Files.list教程
- Java Files.walk教程
- Java DirectoryStream教程
- Java 外部與內部迭代器
- Java 文件大小
- 用 Java 創建目錄
- 用 Java 創建文件
- Java Log4j 教程
- Gson 教程
- Java RequestDispatcher
- Java HTTP GET/POST 請求
- Java InputStream教程
- Java FileOutputStream教程
- Java FileInputStream教程
- Java ZipInputStream教程
- Java FileWriter教程
- EJB 簡介
- Java forEach教程
- Jetty 教程
- Tomcat Derby 教程
- Stripes 介紹
- 使用 Stripes 的 Java webapp,MyBatis,& Derby
- EclipseLink 簡介
- Java 中的數據源
- JSTL 中的 SQL 查詢標記
- Java 驗證過濾器
- Hibernate 驗證器
- 用 Java 顯示圖像
- Play 框架簡介
- Spark Java 簡介
- Java ResourceBundle教程
- Jtwig 教程
- Java Servlet 教程
- Java 套接字教程
- FreeMarker 教程
- Android 教程
- Java EE 5 教程
- JSoup 教程
- JFreeChart 教程
- ImageIcon教程
- 用 Java 復制文件
- Java 文件時間教程
- 如何使用 Java 獲取當前日期時間
- Java 列出目錄內容
- Java 附加到文件
- Java ArrayList教程
- 用 Java 讀寫 ICO 圖像
- Java int到String的轉換
- Java HashSet教程
- Java HashMap教程
- Java static關鍵字
- Java 中的HashMap迭代
- 用 Java 過濾列表
- 在 Java 中讀取網頁
- Java 控制臺應用
- Java 集合的便利工廠方法
- Google Guava 簡介
- OpenCSV 教程
- 用 Java8 的StringJoiner連接字符串
- Java 中元素迭代的歷史
- Java 謂詞
- Java StringBuilder
- Java 分割字串教學
- Java NumberFormat
- Java TemporalAdjusters教程
- Apache FileUtils教程
- Java Stream 過濾器
- Java 流歸約
- Java 流映射
- Java InputStreamReader教程
- 在 Java 中讀取文本文件
- Java Unix 時間
- Java LocalTime
- Java 斐波那契
- Java ProcessBuilder教程
- Java 11 的新功能
- ZetCode JavaScript 教程
- Ramda 教程
- Lodash 教程
- Collect.js 教程
- Node.js 簡介
- Node HTTP 教程
- Node-config 教程
- Dotenv 教程
- Joi 教程
- Liquid.js 教程
- faker.js 教程
- Handsontable 教程
- PouchDB 教程
- Cheerio 教程
- Axios 教程
- Jest 教程
- JavaScript 正則表達式
- 用 JavaScript 創建對象
- Big.js 教程
- Moment.js 教程
- Day.js 教程
- JavaScript Mustache 教程
- Knex.js 教程
- MongoDB JavaScript 教程
- Sequelize 教程
- Bookshelf.js 教程
- Node Postgres 教程
- Node Sass 教程
- Document.querySelector教程
- Document.all教程
- JSON 服務器教程
- JavaScript 貪食蛇教程
- JavaScript 構建器模式教程
- JavaScript 數組
- XMLHttpRequest教程
- 從 JavaScript 中的 URL 讀取 JSON
- 在 JavaScript 中循環遍歷 JSON 數組
- jQuery 教程
- Google 圖表教程
- ZetCode Kotlin 教程
- Kotlin Hello World 教程
- Kotlin 變量
- Kotlin 的運算符
- Kotlin when表達式
- Kotlin 數組
- Kotlin 范圍
- Kotlin Snake
- Kotlin Swing 教程
- Kotlin 字符串
- Kotlin 列表
- Kotlin 映射
- Kotlin 集合
- Kotlin 控制流程
- Kotlin 寫入文件
- Kotlin 讀取文件教程
- Kotlin 正則表達式
- ZetCode 其它教程
- TCL 教程
- Tcl
- Tcl 語法結構
- Tcl 中的基本命令
- Tcl 中的表達式
- Tcl 中的控制流
- Tcl 中的字符串
- Tcl 列表
- Tcl 中的數組
- Tcl 中的過程
- 輸入&輸出
- AWK 教程
- Vaadin 教程
- Vaadin 框架介紹
- Vaadin Grid教程
- Vaadin TextArea教程
- Vaadin ComboBox教程
- Vaadin Slider教程
- Vaadin CheckBox教程
- Vaadin Button教程
- Vaadin DateField教程
- Vaadin Link教程
- ZetCode PHP 教程
- PHP 教程
- PHP
- PHP 語法結構
- PHP 基礎
- PHP 數據類型
- PHP 字符串
- PHP 運算符
- PHP 中的控制流
- PHP 數組
- PHP 數組函數
- PHP 中的函數
- PHP 正則表達式
- PHP 中的面向對象編程
- PHP 中的面向對象編程 II
- PHP Carbon 教程
- PHP Monolog 教程
- PHP 配置教程
- PHP Faker 教程
- Twig 教程
- Valitron 教程
- Doctrine DBAL QueryBuilder 教程
- PHP Respect 驗證教程
- PHP Rakit 驗證教程
- PHP PDO 教程
- CakePHP 數據庫教程
- PHP SQLite3 教程
- PHP 文件系統函數
- ZetCode Python 教程
- Python 教程
- Python 語言
- 交互式 Python
- Python 語法結構
- Python 數據類型
- Python 字符串
- Python 列表
- Python 字典
- Python 運算符
- Python 關鍵字
- Python 函數
- Python 中的文件
- Python 中的面向對象編程
- Python 模塊
- Python 中的包
- Python 異常
- Python 迭代器和生成器
- Python 內省
- Python Faker 教程
- Python f 字符串教程
- Python bcrypt 教程
- Python 套接字教程
- Python smtplib教程
- OpenPyXL 教程
- Python pathlib教程
- Python YAML 教程
- Python 哈希教程
- Python ConfigParser教程
- Python 日志教程
- Python argparse 教程
- Python SQLite 教程
- Python Cerberus 教程
- Python PostgreSQL 教程
- PyMongo 教程
- PyMySQL 教程
- Peewee 教程
- pyDAL 教程
- pytest 教程
- Bottle 教程
- Python Jinja 教程
- PrettyTable 教程
- BeautifulSoup 教程
- pyquery 教程
- Python for循環
- Python 反轉
- Python Lambda 函數
- Python 集合
- Python 映射
- Python CSV 教程-讀寫 CSV
- Python 正則表達式
- Python SimpleJson 教程
- SymPy 教程
- Pandas 教程
- Matplotlib 教程
- Pillow 教程
- Python FTP 教程
- Python Requests 教程
- Python Arrow 教程
- Python 列表推導式
- Python 魔術方法
- PyQt 中的QPropertyAnimation
- PyQt 中的QNetworkAccessManager
- ZetCode Ruby 教程
- Ruby 教程
- Ruby
- Ruby 語法結構
- Ruby 基礎
- Ruby 變量
- Ruby 中的對象
- Ruby 數據類型
- Ruby 字符串
- Ruby 表達式
- Ruby 控制流
- Ruby 數組
- Ruby 哈希
- Ruby 中的面向對象編程
- Ruby 中的面向對象編程 II
- Ruby 正則表達式
- Ruby 輸入&輸出
- Ruby HTTPClient教程
- Ruby Faraday 教程
- Ruby Net::HTTP教程
- ZetCode Servlet 教程
- 從 Java Servlet 提供純文本
- Java Servlet JSON 教程
- Java Servlet HTTP 標頭
- Java Servlet 復選框教程
- Java servlet 發送圖像教程
- Java Servlet JQuery 列表教程
- Servlet FreeMarker JdbcTemplate 教程-CRUD 操作
- jQuery 自動補全教程
- Java servlet PDF 教程
- servlet 從 WAR 內讀取 CSV 文件
- Java HttpServletMapping
- EasyUI datagrid
- Java Servlet RESTFul 客戶端
- Java Servlet Log4j 教程
- Java Servlet 圖表教程
- Java ServletConfig教程
- Java Servlet 讀取網頁
- 嵌入式 Tomcat
- Java Servlet 分頁
- Java Servlet Weld 教程
- Java Servlet 上傳文件
- Java Servlet 提供 XML
- Java Servlet 教程
- JSTL forEach標簽
- 使用 jsGrid 組件
- ZetCode Spring 教程
- Spring @Bean注解教程
- Spring @Autowired教程
- Spring @GetMapping教程
- Spring @PostMapping教程
- Spring @DeleteMapping教程
- Spring @RequestMapping教程
- Spring @PathVariable教程
- Spring @RequestBody教程
- Spring @RequestHeader教程
- Spring Cookies 教程
- Spring 資源教程
- Spring 重定向教程
- Spring 轉發教程
- Spring ModelAndView教程
- Spring MessageSource教程
- Spring AnnotationConfigApplicationContext
- Spring BeanFactoryPostProcessor教程
- Spring BeanFactory教程
- Spring context:property-placeholder教程
- Spring @PropertySource注解教程
- Spring @ComponentScan教程
- Spring @Configuration教程
- Spring C 命名空間教程
- Spring P 命名空間教程
- Spring bean 引用教程
- Spring @Qualifier注解教程
- Spring ClassPathResource教程
- Spring 原型作用域 bean
- Spring Inject List XML 教程
- Spring 概要文件 XML 教程
- Spring BeanDefinitionBuilder教程
- Spring 單例作用域 bean
- 獨立的 Spring 應用
- 經典 Spring 應用中的JdbcTemplate
- Spring EmbeddedDatabaseBuilder教程
- Spring HikariCP 教程
- Spring Web 應用簡介
- Spring BeanPropertyRowMapper教程
- Spring DefaultServlet教程
- Spring WebSocket 教程
- Spring WebJars 教程
- Spring @MatrixVariable教程
- Spring Jetty 教程
- Spring 自定義 404 錯誤頁面教程
- Spring WebApplicationInitializer教程
- Spring BindingResult教程
- Spring FreeMarker 教程
- Spring Thymeleaf 教程
- Spring ResourceHandlerRegistry教程
- SpringRunner 教程
- Spring MockMvc 教程
- ZetCode Spring Boot 教程
- Spring Boot 發送電子郵件教程
- Spring Boot WebFlux 教程
- Spring Boot ViewControllerRegistry教程
- Spring Boot CommandLineRunner教程
- Spring Boot ApplicationReadyEvent 教程
- Spring Boot CORS 教程
- Spring Boot @Order教程
- Spring Boot @Lazy教程
- Spring Boot Flash 屬性
- Spring Boot CrudRepository 教程
- Spring Boot JpaRepository 教程
- Spring Boot findById 教程
- Spring Boot Data JPA @NamedQuery教程
- Spring Boot Data JPA @Query教程
- Spring Boot Querydsl 教程
- Spring Boot Data JPA 排序教程
- Spring Boot @DataJpaTest教程
- Spring Boot TestEntityManager 教程
- Spring Boot Data JPA 派生的查詢
- Spring Boot Data JPA 查詢示例
- Spring Boot Jersey 教程
- Spring Boot CSV 教程
- SpringBootServletInitializer教程
- 在 Spring Boot 中加載資源
- Spring Boot H2 REST 教程
- Spring Boot RestTemplate
- Spring Boot REST XML 教程
- Spring Boot Moustache 教程
- Spring Boot Thymeleaf 配置
- Spring Boot 自動控制器
- Spring Boot FreeMarker 教程
- Spring Boot Environment
- Spring Boot Swing 集成教程
- 在 Spring Boot 中提供圖像文件
- 在 Spring Boot 中創建 PDF 報告
- Spring Boot 基本注解
- Spring Boot @ResponseBody教程
- Spring Boot @PathVariable教程
- Spring Boot REST Data JPA 教程
- Spring Boot @RequestParam教程
- Spring Boot 列出 bean
- Spring Boot @Bean
- Spring Boot @Qualifier教程
- 在 Spring Boot 中提供靜態內容
- Spring Boot Whitelabel 錯誤
- Spring Boot DataSourceBuilder 教程
- Spring Boot H2 教程
- Spring Boot Web JasperReports 集成
- Spring Boot iText 教程
- Spring Boot cmd JasperReports 集成
- Spring Boot RESTFul 應用
- Spring Boot 第一個 Web 應用
- Spring Boot Groovy CLI
- Spring Boot 上傳文件
- Spring Boot @ExceptionHandler
- Spring Boot @ResponseStatus
- Spring Boot ResponseEntity
- Spring Boot @Controller
- Spring Boot @RestController
- Spring Boot @PostConstruct
- Spring Boot @Component
- Spring Boot @ConfigurationProperties教程
- Spring Boot @Repository
- Spring Boot MongoDB 教程
- Spring Boot MongoDB Reactor 教程
- Spring Boot PostgreSQL 教程
- Spring Boot @ModelAttribute
- Spring Boot 提交表單教程
- Spring Boot Model
- Spring Boot MySQL 教程
- Spring Boot GenericApplicationContext
- SpringApplicationBuilder教程
- Spring Boot Undertow 教程
- Spring Boot 登錄頁面教程
- Spring Boot RouterFunction 教程
- ZetCode Symfony 教程
- Symfony DBAL 教程
- Symfony 表單教程
- Symfony CSRF 教程
- Symfony Vue 教程
- Symfony 簡介
- Symfony 請求教程
- Symfony HttpClient教程
- Symfony Flash 消息
- 在 Symfony 中發送郵件
- Symfony 保留表單值
- Symfony @Route注解教程
- Symfony 創建路由
- Symfony 控制臺命令教程
- Symfony 上傳文件
- Symfony 服務教程
- Symfony 驗證教程
- Symfony 翻譯教程
