
# Mono Winforms 中的第一步
> 原文: [http://zetcode.com/gui/csharpwinforms/firststeps/](http://zetcode.com/gui/csharpwinforms/firststeps/)
在 Mono Winforms 教程的這一部分中,我們介紹 Winforms 編程庫中的一些基本程序。
## 簡單
這是一個簡單的 Winforms 應用。
`simple.cs`
```cs
using System.Windows.Forms;
using System.Drawing;
public class Simple : Form
{
public Simple()
{
Text = "Simple";
Size = new Size(250, 200);
CenterToScreen();
}
static public void Main()
{
Application.Run(new Simple());
}
}
```
此代碼示例在屏幕上顯示一個小窗口。
```cs
using System.Windows.Forms;
using System.Drawing;
```
在這里,我們使用`using`指令,該指令允許我們使用適當名稱空間中的類型,而無需使用完全限定的名稱。 例如,我們現在可以編寫`Form`而不是`System.Windows.Forms.Form`。
```cs
public class Simple : Form
{
...
}
```
在 Winforms 中,任何窗口或對話框都是`Form`。 該控件是一個基本容器,其目的是顯示其他子控件。 我們的類`Simple`繼承自表單。 這樣,它本身就成為一種形式。
```cs
Text = "Simple";
Size = new Size(250, 200);
```
`Text`和`Size`是表單的屬性。 更改這些屬性,我們將修改表單控件。 第一行在表單控件的標題欄中顯示文本`"Simple"`。 第二行將表單的大小設置為`250x200px`。
```cs
CenterToScreen();
```
這種方法將我們的應用集中在屏幕上。
```cs
static public void Main()
{
Application.Run(new Simple());
}
```
編譯并運行后,將首先執行`Main`方法。 該代碼實例化`Simple`類并運行它。
```cs
$ gmcs -r:System.Windows.Forms.dll -r:System.Drawing.dll simple.cs
```
這是我們編譯源代碼的方式。 如果沒有犯任何錯誤,則應在當前工作目錄中包含`simple.exe`文件。
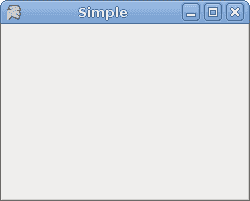
圖:簡單
## 圖標
Mono 在西班牙語中意為猴子。 如果我們不為應用提供圖標,則默認情況下,我們的頭是猴子。 下一個示例顯示如何更改此設置。
`icon.cs`
```cs
using System.Windows.Forms;
using System.Drawing;
using System;
public class MForm : Form
{
public MForm()
{
Text = "Icon";
Size = new Size(250, 200);
try {
Icon = new Icon("web.ico");
} catch (Exception e) {
Console.WriteLine(e.Message);
Environment.Exit(1);
}
CenterToScreen();
}
static public void Main()
{
Application.Run(new MForm());
}
}
```
該代碼示例在窗體的左上角顯示一個圖標。 表單的圖標是代表任務欄中表單的圖片以及為表單的控制框顯示的圖標。
```cs
try {
Icon = new Icon("web.ico");
} catch (Exception e) {
Console.WriteLine(e.Message);
Environment.Exit(1);
}
```
最好將所有輸入輸出工作放在`try/catch`關鍵字之間。 `web.ico`文件必須在當前工作目錄中可用。 這是我們執行(`./icon.exe`)應用的目錄。
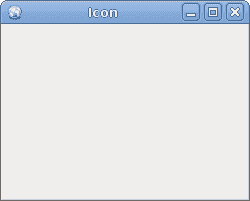
圖:圖標
## 工具提示
工具提示是一個小的矩形彈出窗口,當用戶將指針放在控件上時,它會顯示控件目的的簡短說明。
`tooltips.cs`
```cs
using System;
using System.Drawing;
using System.Windows.Forms;
class MForm : Form {
public MForm() {
Text = "Tooltips";
Size = new Size(250, 200);
ToolTip btnTlp = new ToolTip();
btnTlp.SetToolTip(this, "This is a Form");
Button button = new Button();
btnTlp.SetToolTip(button, "This is a Button Control");
button.Text = "Button";
button.Location = new Point(30, 70);
button.Parent = this;
CenterToScreen();
}
}
class MApplication {
static void Main() {
Application.Run(new MForm());
}
}
```
我們的代碼示例為兩個控件創建一個工具提示。 `Button`控件和`Form`控件。
```cs
ToolTip btnTlp = new ToolTip();
```
在這里,我們創建`ToolTip`控件。 此實例用于為兩個控件提供工具提示。
```cs
btnTlp.SetToolTip(this, "This is a Form");
```
在這里,我們為表單設置工具提示。
```cs
btnTlp.SetToolTip(button, "This is a Button Control");
```
這里是我們的按鈕。
```cs
Button button = new Button();
btnTlp.SetToolTip(button, "This is a Button Control");
button.Text = "Button";
button.Location = new Point(30, 70);
button.Parent = this;
```
注意`Button`控件的創建。 `Text`屬性是按鈕的標簽。 `Location`屬性將按鈕放在`x = 30`,`y = 70px`坐標的表單上。 最后,`Parent`屬性確定按鈕所在的容器。
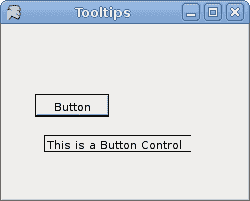
圖:工具提示 s
## 按鈕
我們的最后一個代碼示例顯示了一個有效的按鈕控件。
`button.cs`
```cs
using System;
using System.Drawing;
using System.Windows.Forms;
class MForm : Form {
public MForm() {
Text = "Button";
Size = new Size(250, 200);
Button button = new Button();
button.Location = new Point(30, 20);
button.Text = "Quit";
button.Click += new EventHandler(OnClick);
button.MouseEnter += new EventHandler(OnEnter);
Controls.Add(button);
CenterToScreen();
}
void OnClick(object sender, EventArgs e) {
Close();
}
void OnEnter(object sender, EventArgs e) {
Console.WriteLine("Button Entered");
}
}
class MApplication {
public static void Main() {
Application.Run(new MForm());
}
}
```
所有 GUI 編程都是事件驅動的編程。 在我們的示例中,我們在表單容器上顯示了一個按鈕控件。 該按鈕將收聽兩個事件。 `Click`和`MouseEnter`事件。
```cs
button.Click += new EventHandler(OnClick);
```
此代碼行將事件處理器插入`Click`事件。 當我們單擊按鈕時,將調用`OnClick()`方法。
```cs
button.MouseEnter += new EventHandler(OnEnter);
```
當我們使用鼠標指針進入按鈕區域時,將觸發`MouseEnter`事件。 在這種情況下,我們的代碼將調用`OnEnter()`方法。
```cs
void OnClick(object sender, EventArgs e) {
Close();
}
```
該方法關閉應用。
```cs
void OnEnter(object sender, EventArgs e) {
Console.WriteLine("Button Entered");
}
```
當我們使用鼠標指針進入按鈕控制區域時,終端中將顯示`"Button Entered"`文本。
Mono Winforms 教程的這一部分顯示了一些入門代碼示例,以幫助您開始使用 Winforms 編程庫。
- ZetCode 數據庫教程
- MySQL 教程
- MySQL 簡介
- MySQL 安裝
- MySQL 的第一步
- MySQL 快速教程
- MySQL 存儲引擎
- MySQL 數據類型
- 在 MySQL 中創建,更改和刪除表
- MySQL 表達式
- 在 MySQL 中插入,更新和刪除數據
- MySQL 中的SELECT語句
- MySQL 子查詢
- MySQL 約束
- 在 MySQL 中導出和導入數據
- 在 MySQL 中連接表
- MySQL 函數
- MySQL 中的視圖
- MySQL 中的事務
- MySQL 存儲過程
- MySQL Python 教程
- MySQL Perl 教程
- MySQL & Perl DBI
- 使用 Perl 連接到 MySQL 數據庫
- MySQL 中的 Perl 錯誤處理
- 使用 Perl 進行 MySQL 查詢
- 在 MySQL 中使用 Perl 綁定參數&列
- 在 MySQL 中使用 Perl 處理圖像
- 使用 Perl 獲取 MySQL 元數據
- Perl 的 MySQL 事務
- MySQL C API 編程教程
- MySQL Visual Basic 教程
- MySQL PHP 教程
- MySQL Java 教程
- MySQL Ruby 教程
- MySQL C# 教程
- SQLite 教程
- SQLite 簡介
- sqlite3 命令行工具
- 在 SQLite 中創建,刪除和更改表
- SQLite 表達式
- SQLite 插入,更新,刪除數據
- SQLite SELECT語句
- SQLite 約束
- SQLite 連接表
- SQLite 函數
- SQLite 視圖,觸發器,事務
- SQLite C 教程
- SQLite Python 教程
- SQLite Perl 教程
- Perl DBI
- 使用 Perl 連接到 SQLite 數據庫
- SQLite Perl 錯誤處理
- 使用 Perl 的 SQLite 查詢
- 使用 Perl 綁定 SQLite 參數&列
- 使用 Perl 在 SQLite 中處理圖像
- 使用 Perl 獲取 SQLite 元數據
- 使用 Perl 進行 SQLite 事務
- SQLite Ruby 教程
- 連接到 SQLite 數據庫
- 在 SQLite 中使用 Ruby 進行 SQL 查詢
- 綁定參數
- 處理圖像
- 使用 Ruby 獲取 SQLite 元數據
- Ruby 的 SQLite 事務
- SQLite C# 教程
- SQLite C# 簡介
- 使用SqliteDataReader檢索數據
- ADO.NET 數據集
- 使用 C# 在 SQLite 中處理圖像
- 使用 C# 獲取 SQLite 元數據
- 使用 C# 的 SQLite 事務
- SQLite Visual Basic 教程
- SQLite Visual Basic 簡介
- 使用SqliteDataReader檢索數據
- ADO.NET 的數據集
- 使用 Visual Basic 在 SQLite 中處理圖像
- 使用 Visual Basic 獲取 SQLite 元數據
- 使用 Visual Basic 的 SQLite 事務
- PostgreSQL C 教程
- PostgreSQL Ruby 教程
- PostgreSQL PHP 教程
- PostgreSQL PHP 編程簡介
- 在 PostgreSQL 中使用 PHP 檢索數據
- 在 PostgreSQL 中使用 PHP 處理圖像
- 用 PHP 獲取 PostgreSQL 元數據
- 在 PostgreSQL 中使用 PHP 進行事務
- PostgreSQL Java 教程
- Apache Derby 教程
- Derby 簡介
- Derby 的安裝&配置
- Derby 工具
- ij 工具
- Derby 中的 SQL 查詢
- 在 Derby 中使用 JDBC 進行編程
- Derby 安全
- 使用 Derby & Apache Tomcat
- NetBeans 和 Derby
- SQLAlchemy 教程
- SQLAlchemy 簡介
- 原始 SQL
- 模式定義語言
- SQL 表達式語言
- SQLAlchemy 中的對象關系映射器
- MongoDB PHP 教程
- MongoDB JavaScript 教程
- MongoDB Ruby 教程
- Spring JdbcTemplate 教程
- JDBI 教程
- MyBatis 教程
- Hibernate Derby 教程
- ZetCode .NET 教程
- Visual Basic 教程
- Visual Basic
- Visual Basic 語法結構
- 基本概念
- Visual Basic 數據類型
- Visual Basic 中的字符串
- 運算符
- 控制流
- Visual Basic 數組
- Visual Basic 中的過程&函數
- 在 Visual Basic 中組織代碼
- 面向對象編程
- Visual Basic 中的面向對象編程 II
- Visual Basic 中的集合
- 輸入和輸出
- C# 教程
- C# 語言
- C# 語法結構
- C# 基礎
- C# 數據類型
- C# 中的字符串
- C# 運算符
- C# 中的流控制
- C# 數組
- C# 面向對象編程
- C# 中的方法
- C# 面向對象編程 II
- C# 屬性
- C# 結構
- C# 委托
- 命名空間
- C# 集合
- C# 輸入和輸出
- C# 目錄教程
- C# 字典教程
- 在 C# 中讀取文本文件
- C# 中的日期和時間
- 在 C# 中讀取網頁
- C# HttpClient教程
- ASP.NET Core 教程
- ZetCode 圖形教程
- Java 2D 游戲教程
- Java 游戲基礎
- 動畫
- 移動精靈
- 碰撞檢測
- Java 益智游戲
- Java Snake
- Breakout 游戲
- Java 俄羅斯方塊
- Java 吃豆人
- Java 太空侵略者
- Java 掃雷
- Java 推箱子
- Java 2D 教程
- 介紹
- 基本繪圖
- 形狀和填充
- 透明度
- 合成
- 剪裁
- 變換
- 特效
- 圖像
- 文字和字體
- 命中測試,移動物體
- 俄羅斯方塊
- Cario 圖形教程
- Cario 圖形庫
- Cario 定義
- Cairo 后端
- Cairo 基本圖形
- 形狀和填充
- 漸變
- 透明度
- 合成
- 剪裁和遮罩
- 變換
- Cairo 文字
- Cairo 中的圖像
- 根窗口
- PyCairo 教程
- PyCairo 簡介
- PyCairo 后端
- PyCairo 中的基本繪圖
- PyCairo 形狀和填充
- PyCairo 漸變
- PyCairo 剪裁&遮罩
- PyCairo 的透明度
- PyCairo 中的變換
- PyCairo 中的文字
- PyCairo 中的圖像
- 根窗口
- HTML5 畫布教程
- 介紹
- HTML5 畫布中的直線
- HTML5 畫布形狀
- HTML5 畫布填充
- HTML5 畫布中的透明度
- HTML5 畫布合成
- HTML5 canvas 中的變換
- HTML5 畫布中的文字
- HTML5 畫布中的動畫
- HTML5 畫布中的 Snake
- ZetCode GUI 教程
- Windows API 教程
- Windows API 簡介
- Windows API main函數
- Windows API 中的系統函數
- Windows API 中的字符串
- Windows API 中的日期和時間
- Windows API 中的一個窗口
- UI 的第一步
- Windows API 菜單
- Windows API 對話框
- Windows API 控件 I
- Windows API 控件 II
- Windows API 控件 III
- Windows API 中的高級控件
- Windows API 中的自定義控件
- Windows API 中的 GDI
- PyQt4 教程
- PyQt4 簡介
- PyQt4 中的第一個程序
- PyQt4 中的菜單和工具欄
- PyQt4 中的布局管理
- PyQt4 中的事件和信號
- PyQt4 中的對話框
- PyQt4 小部件
- PyQt4 小部件 II
- PyQt4 中的拖放
- PyQt4 中的繪圖
- PyQt4 中的自定義小部件
- PyQt4 中的俄羅斯方塊游戲
- PyQt5 教程
- PyQt5 簡介
- PyQt5 日期和時間
- PyQt5 中的第一個程序
- PyQt5 中的菜單和工具欄
- PyQt5 中的布局管理
- PyQt5 中的事件和信號
- PyQt5 中的對話框
- PyQt5 小部件
- PyQt5 小部件 II
- PyQt5 拖放
- PyQt5 中的繪圖
- PyQt5 中的自定義小部件
- PyQt5 中的俄羅斯方塊
- Qt4 教程
- Qt4 工具包簡介
- Qt4 工具類
- Qt4 中的字符串
- Qt4 中的日期和時間
- 在 Qt4 中使用文件和目錄
- Qt4 中的第一個程序
- Qt4 中的菜單和工具欄
- Qt4 中的布局管理
- Qt4 中的事件和信號
- Qt4 小部件
- Qt4 小部件 II
- Qt4 中的繪圖
- Qt4 中的自定義小部件
- Qt4 中的打磚塊游戲
- Qt5 教程
- Qt5 工具包簡介
- Qt5 中的字符串
- Qt5 中的日期和時間
- Qt5 中的容器
- 在 Qt5 中處理文件和目錄
- Qt5 中的第一個程序
- Qt5 中的菜單和工具欄
- Qt5 中的布局管理
- Qt5 中的事件和信號
- Qt5 小部件
- Qt5 小部件 II
- Qt5 中的繪圖
- Qt5 中的自定義小部件
- Qt5 中的貪食蛇
- Qt5 中的打磚塊游戲
- PySide 教程
- PySide 工具包簡介
- PySide 中的第一個程序
- PySide 中的菜單和工具欄
- PySide 中的布局管理
- PySide 中的事件和信號
- PySide 中的對話框
- PySide 小部件
- PySide 小部件 II
- 在 PySide 中拖放
- 在 PySide 中繪圖
- PySide 中的自定義小部件
- PySide 中的俄羅斯方塊游戲
- Tkinter 教程
- Tkinter 簡介
- Tkinter 中的布局管理
- Tkinter 標準小部件屬性
- Tkinter 小部件
- Tkinter 中的菜單和工具欄
- Tkinter 中的對話框
- Tkinter 中的繪圖
- Tkinter 中的貪食蛇
- Tcl/Tk 教程
- Tcl/Tk 簡介
- Tcl/Tk 中的布局管理
- Tcl/Tk 小部件
- Tcl/Tk 中的菜單和工具欄
- Tcl/Tk 中的對話框
- Tcl/Tk 繪圖
- 貪食蛇
- Qt 快速教程
- Java Swing 教程
- Java Swing 簡介
- Java Swing 首個程序
- Java Swing 中的菜單和工具欄
- Swing 布局管理
- GroupLayout管理器
- Java Swing 事件
- 基本的 Swing 組件
- 基本的 Swing 組件 II
- Java Swing 對話框
- Java Swing 模型架構
- Swing 中的拖放
- Swing 中的繪圖
- Java Swing 中的可調整大小的組件
- Java Swing 中的益智游戲
- 俄羅斯方塊
- JavaFX 教程
- JavaFX 簡介
- JavaFX 首個程序
- JavaFX 布局窗格
- 基本的 JavaFX 控件
- 基本 JavaFX 控件 II
- JavaFX 事件
- JavaFX 效果
- JavaFX 動畫
- JavaFX 畫布
- JavaFX 圖表
- Java SWT 教程
- Java SWT 簡介
- Java SWT 中的布局管理
- Java SWT 中的菜單和工具欄
- Java SWT 中的小部件
- Table小部件
- Java SWT 中的對話框
- Java SWT 繪圖
- Java SWT 中的貪食蛇
- wxWidgets 教程
- wxWidgets 簡介
- wxWidgets 助手類
- wxWidgets 中的第一個程序
- wxWidgets 中的菜單和工具欄
- wxWidgets 中的布局管理
- wxWidgets 中的事件
- wxWidgets 中的對話框
- wxWidgets 小部件
- wxWidgets 小部件 II
- wxWidgets 中的拖放
- wxWidgets 中的設備上下文
- wxWidgets 中的自定義小部件
- wxWidgets 中的俄羅斯方塊游戲
- wxPython 教程
- wxPython 簡介
- 第一步
- 菜單和工具欄
- wxPython 中的布局管理
- wxPython 中的事件
- wxPython 對話框
- 小部件
- wxPython 中的高級小部件
- wxPython 中的拖放
- wxPython 圖形
- 創建自定義小部件
- wxPython 中的應用框架
- wxPython 中的俄羅斯方塊游戲
- C# Winforms Mono 教程
- Mono Winforms 簡介
- Mono Winforms 中的第一步
- Mono Winforms 中的布局管理
- Mono Winforms 中的菜單和工具欄
- Mono Winforms 中的基本控件
- Mono Winforms 中的高級控件
- 對話框
- Mono Winforms 中的拖放
- Mono Winforms 中的繪圖
- Mono Winforms 中的貪食蛇
- Java Gnome 教程
- Java Gnome 簡介
- Java Gnome 的第一步
- Java Gnome 中的布局管理
- Java Gnome 中的布局管理 II
- Java Gnome 中的菜單
- Java Gnome 中的工具欄
- Java Gnome 中的事件
- Java Gnome 中的小部件
- Java Gnome 中的小部件 II
- Java Gnome 中的高級小部件
- Java Gnome 中的對話框
- Java Gnome 中的 Pango
- 在 Java Gnome 中用 Cairo 繪圖
- Cario 繪圖 II
- Java Gnome 中的貪食蛇
- QtJambi 教程
- QtJambi 簡介
- QtJambi 中的布局管理
- QtJambi 中的小部件
- QtJambi 中的菜單和工具欄
- QtJambi 對話框
- QtJambi 中的繪圖
- QtJambi 中的自定義小部件
- 貪食蛇
- GTK+ 教程
- GTK+ 簡介
- GTK+ 中的第一個程序
- GTK+ 中的菜單和工具欄
- GTK+ 布局管理
- GTK+ 事件和信號
- GTK+ 對話框
- GTK+ 小部件
- GTK+ 小部件 II
- GtkTreeView小部件
- GtkTextView小部件
- 自定義 GTK+ 小部件
- Ruby GTK 教程
- Ruby GTK 簡介
- Ruby GTK 中的布局管理
- Ruby GTK 中的小部件
- Ruby GTK 中的菜單和工具欄
- Ruby GTK 中的對話框
- Ruby GTK Cario 繪圖
- Ruby GTK 中的自定義小部件
- Ruby GTK 中的貪食蛇
- GTK# 教程
- GTK# 簡介
- GTK 的第一步
- GTK# 中的布局管理
- GTK 中的菜單
- GTK# 中的工具欄
- GTK# 中的事件
- GTK# 中的小部件
- GTK 中的小部件 II
- GTK# 中的高級小部件
- GTK# 中的對話框
- Pango
- GTK# 中的 Cario 繪圖
- GTK# 中的 Cario 繪圖 II
- GTK# 中的自定義小部件
- Visual Basic GTK# 教程
- Visual Basic GTK# 簡介
- 布局管理
- 小部件
- 菜單和工具欄
- 對話框
- Cario 繪圖
- 自定義小部件
- 貪食蛇
- PyGTK 教程
- PyGTK 簡介
- PyGTK 的第一步
- PyGTK 中的布局管理
- PyGTK 中的菜單
- PyGTK 中的工具欄
- PyGTK 中的事件和信號
- PyGTK 中的小部件
- PyGTK 中的小部件 II
- PyGTK 中的高級小部件
- PyGTK 中的對話框
- Pango
- Pango II
- PyGTK 中的 Cario 繪圖
- Cario 繪圖 II
- PyGTK 中的貪食蛇游戲
- PyGTK 中的自定義小部件
- PHP GTK 教程
- PHP GTK 簡介
- PHP GTK 中的布局管理
- PHP GTK 中的小部件
- PHP GTK 中的菜單和工具欄
- 對話框
- Cario 繪圖
- 自定義小部件
- 貪食蛇
- C# Qyoto 教程
- Qyoto 介紹
- 布局管理
- Qyoto 中的小部件
- Qyoto 中的菜單和工具欄
- Qyoto 對話框
- Qyoto 中的繪圖
- Qyoto 中的繪圖 II
- Qyoto 中的自定義小部件
- 貪食蛇
- Ruby Qt 教程
- Ruby Qt 簡介
- Ruby Qt 中的布局管理
- Ruby Qt 中的小部件
- 菜單和工具欄
- Ruby Qt 中的對話框
- 用 Ruby Qt 繪圖
- Ruby Qt 中的自定義小部件
- Ruby Qt 中的貪食蛇
- Visual Basic Qyoto 教程
- Qyoto 介紹
- 布局管理
- Qyoto 中的小部件
- Qyoto 中的菜單和工具欄
- Qyoto 對話框
- Qyoto 中的繪圖
- Qyoto 中的自定義小部件
- 貪食蛇
- Mono IronPython Winforms 教程
- 介紹
- IronPython Mono Winforms 中的第一步
- 布局管理
- 菜單和工具欄
- Mono Winforms 中的基本控件
- Mono Winforms 中的基本控件 II
- Mono Winforms 中的高級控件
- 對話框
- Mono Winforms 中的拖放
- 繪圖
- IronPython Mono Winforms 中的繪圖 II
- IronPython Mono Winforms 中的貪食蛇
- IronPython Mono Winforms 中的俄羅斯方塊游戲
- FreeBASIC GTK 教程
- Jython Swing 教程
- Jython Swing 簡介
- Jython Swing 中的布局管理
- Jython Swing 中的組件
- Jython Swing 中的菜單和工具欄
- Jython Swing 中的對話框
- Jython Swing 中的繪圖
- Jython Swing 中的半字節
- JRuby Swing 教程
- JRuby Swing 簡介
- JRuby Swing 中的布局管理
- JRuby Swing 中的組件
- 菜單和工具欄
- JRuby Swing 中的對話框
- 在 JRuby Swing 中繪圖
- JRuby Swing 中的貪食蛇
- Visual Basic Winforms 教程
- Visual Basic Winforms 簡介
- 布局管理
- 基本控制
- 進階控件
- 菜單和工具欄
- 對話框
- 繪圖
- 拖放
- 貪食蛇
- JavaScript GTK 教程
- JavaScript GTK 簡介
- 布局管理
- JavaScript GTK 中的小部件
- JavaScript GTK 中的菜單和工具欄
- JavaScript GTK 中的對話框
- JavaScript GTK 中的 Cario 繪圖
- ZetCode Java 教程
- Java 教程
- Java 語言
- Java 語法結構
- Java 基礎
- Java 數據類型
- Java 數據類型 II
- Java 字符串
- Java 數組
- Java 表達式
- Java 控制流程
- Java 面向對象的編程
- Java 方法
- Java 面向對象編程 II
- Java 包
- Java 中的異常
- Java 集合
- Java 流
- Java Future 教程
- Java Comparable和Comparator
- Java DOM 教程
- Java MVC 教程
- Java SAX 教程
- Java JAXB 教程
- Java JSON 處理教程
- Java H2 教程
- MongoDB Java 教程
- Java 正則表達式教程
- Java PDFBox 教程
- Java 文件教程
- Java Files.list教程
- Java Files.walk教程
- Java DirectoryStream教程
- Java 外部與內部迭代器
- Java 文件大小
- 用 Java 創建目錄
- 用 Java 創建文件
- Java Log4j 教程
- Gson 教程
- Java RequestDispatcher
- Java HTTP GET/POST 請求
- Java InputStream教程
- Java FileOutputStream教程
- Java FileInputStream教程
- Java ZipInputStream教程
- Java FileWriter教程
- EJB 簡介
- Java forEach教程
- Jetty 教程
- Tomcat Derby 教程
- Stripes 介紹
- 使用 Stripes 的 Java webapp,MyBatis,& Derby
- EclipseLink 簡介
- Java 中的數據源
- JSTL 中的 SQL 查詢標記
- Java 驗證過濾器
- Hibernate 驗證器
- 用 Java 顯示圖像
- Play 框架簡介
- Spark Java 簡介
- Java ResourceBundle教程
- Jtwig 教程
- Java Servlet 教程
- Java 套接字教程
- FreeMarker 教程
- Android 教程
- Java EE 5 教程
- JSoup 教程
- JFreeChart 教程
- ImageIcon教程
- 用 Java 復制文件
- Java 文件時間教程
- 如何使用 Java 獲取當前日期時間
- Java 列出目錄內容
- Java 附加到文件
- Java ArrayList教程
- 用 Java 讀寫 ICO 圖像
- Java int到String的轉換
- Java HashSet教程
- Java HashMap教程
- Java static關鍵字
- Java 中的HashMap迭代
- 用 Java 過濾列表
- 在 Java 中讀取網頁
- Java 控制臺應用
- Java 集合的便利工廠方法
- Google Guava 簡介
- OpenCSV 教程
- 用 Java8 的StringJoiner連接字符串
- Java 中元素迭代的歷史
- Java 謂詞
- Java StringBuilder
- Java 分割字串教學
- Java NumberFormat
- Java TemporalAdjusters教程
- Apache FileUtils教程
- Java Stream 過濾器
- Java 流歸約
- Java 流映射
- Java InputStreamReader教程
- 在 Java 中讀取文本文件
- Java Unix 時間
- Java LocalTime
- Java 斐波那契
- Java ProcessBuilder教程
- Java 11 的新功能
- ZetCode JavaScript 教程
- Ramda 教程
- Lodash 教程
- Collect.js 教程
- Node.js 簡介
- Node HTTP 教程
- Node-config 教程
- Dotenv 教程
- Joi 教程
- Liquid.js 教程
- faker.js 教程
- Handsontable 教程
- PouchDB 教程
- Cheerio 教程
- Axios 教程
- Jest 教程
- JavaScript 正則表達式
- 用 JavaScript 創建對象
- Big.js 教程
- Moment.js 教程
- Day.js 教程
- JavaScript Mustache 教程
- Knex.js 教程
- MongoDB JavaScript 教程
- Sequelize 教程
- Bookshelf.js 教程
- Node Postgres 教程
- Node Sass 教程
- Document.querySelector教程
- Document.all教程
- JSON 服務器教程
- JavaScript 貪食蛇教程
- JavaScript 構建器模式教程
- JavaScript 數組
- XMLHttpRequest教程
- 從 JavaScript 中的 URL 讀取 JSON
- 在 JavaScript 中循環遍歷 JSON 數組
- jQuery 教程
- Google 圖表教程
- ZetCode Kotlin 教程
- Kotlin Hello World 教程
- Kotlin 變量
- Kotlin 的運算符
- Kotlin when表達式
- Kotlin 數組
- Kotlin 范圍
- Kotlin Snake
- Kotlin Swing 教程
- Kotlin 字符串
- Kotlin 列表
- Kotlin 映射
- Kotlin 集合
- Kotlin 控制流程
- Kotlin 寫入文件
- Kotlin 讀取文件教程
- Kotlin 正則表達式
- ZetCode 其它教程
- TCL 教程
- Tcl
- Tcl 語法結構
- Tcl 中的基本命令
- Tcl 中的表達式
- Tcl 中的控制流
- Tcl 中的字符串
- Tcl 列表
- Tcl 中的數組
- Tcl 中的過程
- 輸入&輸出
- AWK 教程
- Vaadin 教程
- Vaadin 框架介紹
- Vaadin Grid教程
- Vaadin TextArea教程
- Vaadin ComboBox教程
- Vaadin Slider教程
- Vaadin CheckBox教程
- Vaadin Button教程
- Vaadin DateField教程
- Vaadin Link教程
- ZetCode PHP 教程
- PHP 教程
- PHP
- PHP 語法結構
- PHP 基礎
- PHP 數據類型
- PHP 字符串
- PHP 運算符
- PHP 中的控制流
- PHP 數組
- PHP 數組函數
- PHP 中的函數
- PHP 正則表達式
- PHP 中的面向對象編程
- PHP 中的面向對象編程 II
- PHP Carbon 教程
- PHP Monolog 教程
- PHP 配置教程
- PHP Faker 教程
- Twig 教程
- Valitron 教程
- Doctrine DBAL QueryBuilder 教程
- PHP Respect 驗證教程
- PHP Rakit 驗證教程
- PHP PDO 教程
- CakePHP 數據庫教程
- PHP SQLite3 教程
- PHP 文件系統函數
- ZetCode Python 教程
- Python 教程
- Python 語言
- 交互式 Python
- Python 語法結構
- Python 數據類型
- Python 字符串
- Python 列表
- Python 字典
- Python 運算符
- Python 關鍵字
- Python 函數
- Python 中的文件
- Python 中的面向對象編程
- Python 模塊
- Python 中的包
- Python 異常
- Python 迭代器和生成器
- Python 內省
- Python Faker 教程
- Python f 字符串教程
- Python bcrypt 教程
- Python 套接字教程
- Python smtplib教程
- OpenPyXL 教程
- Python pathlib教程
- Python YAML 教程
- Python 哈希教程
- Python ConfigParser教程
- Python 日志教程
- Python argparse 教程
- Python SQLite 教程
- Python Cerberus 教程
- Python PostgreSQL 教程
- PyMongo 教程
- PyMySQL 教程
- Peewee 教程
- pyDAL 教程
- pytest 教程
- Bottle 教程
- Python Jinja 教程
- PrettyTable 教程
- BeautifulSoup 教程
- pyquery 教程
- Python for循環
- Python 反轉
- Python Lambda 函數
- Python 集合
- Python 映射
- Python CSV 教程-讀寫 CSV
- Python 正則表達式
- Python SimpleJson 教程
- SymPy 教程
- Pandas 教程
- Matplotlib 教程
- Pillow 教程
- Python FTP 教程
- Python Requests 教程
- Python Arrow 教程
- Python 列表推導式
- Python 魔術方法
- PyQt 中的QPropertyAnimation
- PyQt 中的QNetworkAccessManager
- ZetCode Ruby 教程
- Ruby 教程
- Ruby
- Ruby 語法結構
- Ruby 基礎
- Ruby 變量
- Ruby 中的對象
- Ruby 數據類型
- Ruby 字符串
- Ruby 表達式
- Ruby 控制流
- Ruby 數組
- Ruby 哈希
- Ruby 中的面向對象編程
- Ruby 中的面向對象編程 II
- Ruby 正則表達式
- Ruby 輸入&輸出
- Ruby HTTPClient教程
- Ruby Faraday 教程
- Ruby Net::HTTP教程
- ZetCode Servlet 教程
- 從 Java Servlet 提供純文本
- Java Servlet JSON 教程
- Java Servlet HTTP 標頭
- Java Servlet 復選框教程
- Java servlet 發送圖像教程
- Java Servlet JQuery 列表教程
- Servlet FreeMarker JdbcTemplate 教程-CRUD 操作
- jQuery 自動補全教程
- Java servlet PDF 教程
- servlet 從 WAR 內讀取 CSV 文件
- Java HttpServletMapping
- EasyUI datagrid
- Java Servlet RESTFul 客戶端
- Java Servlet Log4j 教程
- Java Servlet 圖表教程
- Java ServletConfig教程
- Java Servlet 讀取網頁
- 嵌入式 Tomcat
- Java Servlet 分頁
- Java Servlet Weld 教程
- Java Servlet 上傳文件
- Java Servlet 提供 XML
- Java Servlet 教程
- JSTL forEach標簽
- 使用 jsGrid 組件
- ZetCode Spring 教程
- Spring @Bean注解教程
- Spring @Autowired教程
- Spring @GetMapping教程
- Spring @PostMapping教程
- Spring @DeleteMapping教程
- Spring @RequestMapping教程
- Spring @PathVariable教程
- Spring @RequestBody教程
- Spring @RequestHeader教程
- Spring Cookies 教程
- Spring 資源教程
- Spring 重定向教程
- Spring 轉發教程
- Spring ModelAndView教程
- Spring MessageSource教程
- Spring AnnotationConfigApplicationContext
- Spring BeanFactoryPostProcessor教程
- Spring BeanFactory教程
- Spring context:property-placeholder教程
- Spring @PropertySource注解教程
- Spring @ComponentScan教程
- Spring @Configuration教程
- Spring C 命名空間教程
- Spring P 命名空間教程
- Spring bean 引用教程
- Spring @Qualifier注解教程
- Spring ClassPathResource教程
- Spring 原型作用域 bean
- Spring Inject List XML 教程
- Spring 概要文件 XML 教程
- Spring BeanDefinitionBuilder教程
- Spring 單例作用域 bean
- 獨立的 Spring 應用
- 經典 Spring 應用中的JdbcTemplate
- Spring EmbeddedDatabaseBuilder教程
- Spring HikariCP 教程
- Spring Web 應用簡介
- Spring BeanPropertyRowMapper教程
- Spring DefaultServlet教程
- Spring WebSocket 教程
- Spring WebJars 教程
- Spring @MatrixVariable教程
- Spring Jetty 教程
- Spring 自定義 404 錯誤頁面教程
- Spring WebApplicationInitializer教程
- Spring BindingResult教程
- Spring FreeMarker 教程
- Spring Thymeleaf 教程
- Spring ResourceHandlerRegistry教程
- SpringRunner 教程
- Spring MockMvc 教程
- ZetCode Spring Boot 教程
- Spring Boot 發送電子郵件教程
- Spring Boot WebFlux 教程
- Spring Boot ViewControllerRegistry教程
- Spring Boot CommandLineRunner教程
- Spring Boot ApplicationReadyEvent 教程
- Spring Boot CORS 教程
- Spring Boot @Order教程
- Spring Boot @Lazy教程
- Spring Boot Flash 屬性
- Spring Boot CrudRepository 教程
- Spring Boot JpaRepository 教程
- Spring Boot findById 教程
- Spring Boot Data JPA @NamedQuery教程
- Spring Boot Data JPA @Query教程
- Spring Boot Querydsl 教程
- Spring Boot Data JPA 排序教程
- Spring Boot @DataJpaTest教程
- Spring Boot TestEntityManager 教程
- Spring Boot Data JPA 派生的查詢
- Spring Boot Data JPA 查詢示例
- Spring Boot Jersey 教程
- Spring Boot CSV 教程
- SpringBootServletInitializer教程
- 在 Spring Boot 中加載資源
- Spring Boot H2 REST 教程
- Spring Boot RestTemplate
- Spring Boot REST XML 教程
- Spring Boot Moustache 教程
- Spring Boot Thymeleaf 配置
- Spring Boot 自動控制器
- Spring Boot FreeMarker 教程
- Spring Boot Environment
- Spring Boot Swing 集成教程
- 在 Spring Boot 中提供圖像文件
- 在 Spring Boot 中創建 PDF 報告
- Spring Boot 基本注解
- Spring Boot @ResponseBody教程
- Spring Boot @PathVariable教程
- Spring Boot REST Data JPA 教程
- Spring Boot @RequestParam教程
- Spring Boot 列出 bean
- Spring Boot @Bean
- Spring Boot @Qualifier教程
- 在 Spring Boot 中提供靜態內容
- Spring Boot Whitelabel 錯誤
- Spring Boot DataSourceBuilder 教程
- Spring Boot H2 教程
- Spring Boot Web JasperReports 集成
- Spring Boot iText 教程
- Spring Boot cmd JasperReports 集成
- Spring Boot RESTFul 應用
- Spring Boot 第一個 Web 應用
- Spring Boot Groovy CLI
- Spring Boot 上傳文件
- Spring Boot @ExceptionHandler
- Spring Boot @ResponseStatus
- Spring Boot ResponseEntity
- Spring Boot @Controller
- Spring Boot @RestController
- Spring Boot @PostConstruct
- Spring Boot @Component
- Spring Boot @ConfigurationProperties教程
- Spring Boot @Repository
- Spring Boot MongoDB 教程
- Spring Boot MongoDB Reactor 教程
- Spring Boot PostgreSQL 教程
- Spring Boot @ModelAttribute
- Spring Boot 提交表單教程
- Spring Boot Model
- Spring Boot MySQL 教程
- Spring Boot GenericApplicationContext
- SpringApplicationBuilder教程
- Spring Boot Undertow 教程
- Spring Boot 登錄頁面教程
- Spring Boot RouterFunction 教程
- ZetCode Symfony 教程
- Symfony DBAL 教程
- Symfony 表單教程
- Symfony CSRF 教程
- Symfony Vue 教程
- Symfony 簡介
- Symfony 請求教程
- Symfony HttpClient教程
- Symfony Flash 消息
- 在 Symfony 中發送郵件
- Symfony 保留表單值
- Symfony @Route注解教程
- Symfony 創建路由
- Symfony 控制臺命令教程
- Symfony 上傳文件
- Symfony 服務教程
- Symfony 驗證教程
- Symfony 翻譯教程