# 軟件管家
在Windows系統中,各種軟件管家(360軟件軟件、騰訊的軟件管家等)為我們解決了大多數軟件安裝的問題,它甚至強大到能夠為我們重新安裝或升級操作系統。
`Node.js`可以理解為一個安裝在操作系統上的另一個小的系統,類似于我們安裝虛擬機在電腦上同時運行其它系統,不同的是`Node.js`與當前操作系統結合的更加緊密,使用起來也更便捷。
`Node.js`貼心的為我們原廠自帶了軟件管理器,名字叫做`npm`,全稱是`Node.js Package Mananger`,直譯成中文為:`Node.js包管理器`,也就是`Node.js`下的軟件管家,以后我們會使用這個軟件管家來安裝在Node.js這個小系統下的各種軟件。
# angular-cli
Angular為我們提供了一個名為 `Angular CLI` 的小軟件,我們在該小軟件的幫助下,可以輕松完成一些`樣本操作`。`Angular CLI`是眾多被`npm`包管理器管理包(軟件)之一,可以使用`npm install -g @angular/cli`來安裝。在教程中為了保持版本統一,避免一些由于新舊版本帶來的**異常**,我們使用以下命令來安裝`11.0.7`版本的`Angular CLI`。
```bash
# npm install -g @angular/cli@11.0.7
```
在網絡暢通的情況下,我們不需要等太長的時間便會安裝成功。如果你的網絡環境不是特別好,則需在執行上述命令之前,首先執行`npm config set registry http://registry.npm.taobao.org`命令,該命令使原本需要去訪問國外下載資源改為由國內下載,這大大加快了下載的速度。
```bash
# npm config set registry http://registry.npm.taobao.org
# npm install -g @angular/cli@11.0.7
```
安裝日志如下:
```bash
panjiedeMac-Pro:~ panjie$ npm install -g @angular/cli@11.0.7
npm WARN deprecated debug@4.2.0: Debug versions >=3.2.0 <3.2.7 || >=4 <4.3.1 have a low-severity ReDos regression when used in a Node.js environment. It is recommended you upgrade to 3.2.7 or 4.3.1. (https://github.com/visionmedia/debug/issues/797)
npm WARN deprecated request@2.88.2: request has been deprecated, see https://github.com/request/request/issues/3142
npm WARN deprecated har-validator@5.1.5: this library is no longer supported
/usr/local/bin/ng -> /usr/local/lib/node_modules/@angular/cli/bin/ng
> @angular/cli@11.0.7 postinstall /usr/local/lib/node_modules/@angular/cli
> node ./bin/postinstall/script.js
+ @angular/cli@11.0.7
added 253 packages from 201 contributors and updated 1 package in 63.955s
```
>[success] 感謝淘寶為廣大開發者提供的[淘寶 NPM 鏡像](https://developer.aliyun.com/mirror/NPM)!
## 驗證
輸入`ng version`驗證是否成功安裝了`11.0.7`版本:
```bash
panjiedeMac-Pro:~ panjie$ ng version
_ _ ____ _ ___
/ \ _ __ __ _ _ _| | __ _ _ __ / ___| | |_ _|
/ △ \ | '_ \ / _` | | | | |/ _` | '__| | | | | | |
/ ___ \| | | | (_| | |_| | | (_| | | | |___| |___ | |
/_/ \_\_| |_|\__, |\__,_|_|\__,_|_| \____|_____|___|
|___/
Angular CLI: 11.0.7
Node: 14.15.4
OS: darwin x64
Angular:
...
Ivy Workspace:
Package Version
------------------------------------------------------
@angular-devkit/architect 0.1100.7 (cli-only)
@angular-devkit/core 11.0.7 (cli-only)
@angular-devkit/schematics 11.0.7 (cli-only)
@schematics/angular 11.0.7 (cli-only)
@schematics/update 0.1100.7 (cli-only)
```
>[info] 如果在學習教程前你已經安裝了其它版本的Angular CLI,可以使用`npm uninstall -g @angular/cli`卸載歷史版本后重新安裝。
# Hello Angular
打開系統終端,并進入到任意自己喜歡的文件夾,執行`ng new first-app`初始化一個`angular`應用:
```bash
panjiedeMac-Pro:angular11-guild panjie$ ng new first-app
? Do you want to enforce stricter type checking and stricter bundle budgets in t
he workspace?
This setting helps improve maintainability and catch bugs ahead of time.
For more information, see https://angular.io/strict (y/N) y ?
? Would you like to add Angular routing? (y/N) y? ?
Which stylesheet format would you like to use? (Use arrow keys)
? CSS ?
SCSS [ https://sass-lang.com/documentation/syntax#scss ]
Sass [ https://sass-lang.com/documentation/syntax#the-indented-syntax ]
Less [ http://lesscss.org ]
Stylus [ https://stylus-lang.com ]
等待安裝,視網速不同表現不同。
CREATE first-app/e2e/src/app.e2e-spec.ts (660 bytes)
CREATE first-app/e2e/src/app.po.ts (274 bytes)
? Packages installed successfully.
```
* ? 輸入y后按回車,表示:啟用更嚴格的語法檢查
* ? 輸入y后按回車,表示:啟用路由
* ? 默認是CSS,直接按回車
>[danger] **注意:** 在后續的教程中,你應該時刻關注我們給出的終端提示,該提示中包含的當前執行命令的位置非常重要,你要確保在執行相關命令時與教程保持一致。比如`panjiedeMac-Pro:angular11-guild?? panjie$`表示當前命令的執行路徑為`angular11-guild`??。 `angular11-guild`只是個文件夾名字,是我任意選擇的文件夾,在該文件夾下我使用 `ng new first-app` 命令初始化了第一個`angular`應用。
該命令將為我們創建一個first-app文件夾,并且自動為我們在該文件夾中初始化一系列的文件。first-app文件夾中內容如下:
```bash
├── README.md
├── angular.json
├── e2e
├── karma.conf.js
├── node_modules
├── package-lock.json
├── package.json
├── src
├── tsconfig.app.json
├── tsconfig.json
├── tsconfig.spec.json
└── tslint.json
```
我們共同**了解**一下這些被自動生成的文件(夾):
```bash
├── README.md 項目介紹文件,后期我們可以變更為對當前項目的介紹,比如項目完成了什么功能,在開發時需要什么
├── angular.json Angular項目的配置文件
├── e2e 專門放集成測試文件的文件夾
├── karma.conf.js Karma對應的配置文件
├── node_modules 本項目依賴的其它npm包
├── package-lock.json 本項目依賴于其它包(庫)的具體安裝情況(版本、下載地址等)
├── package.json 本項目依賴于其它包(庫)的情況
├── src 源代碼文件夾
├── tsconfig.app.json typescript相關的配置文件
├── tsconfig.json typescript相關的配置文件
├── tsconfig.spec.json typescript測試相關的配置文件
└── tslint.json 語法校驗配置文件
```
>[success] **了解**=**看看**,表示該部分內容不需要記憶。
## 啟動應用
在項目根目錄`first-app`下執行`ng serve`即可啟動項目:
```bash
panjiedeMac-Pro:first-app?? panjie$ ng serve
? Browser application bundle generation complete.
Initial Chunk Files | Names | Size
vendor.js | vendor | 2.66 MB
polyfills.js | polyfills | 141.32 kB
main.js | main | 59.58 kB
runtime.js | runtime | 6.15 kB
styles.css | styles | 119 bytes
| Initial Total | 2.87 MB
Build at: 2021-01-20T10:18:35.573Z - Hash: 838fc9c37ac2f2622e90 - Time: 7198ms
** Angular Live Development Server is listening on localhost:4200, open your browser on http://localhost:4200/ **
? Compiled successfully.
```
* ?? 注意當前文件夾位置為`first-app`
接下來我們打開瀏覽器訪問:[http://localhost:4200/](http://localhost:4200/)
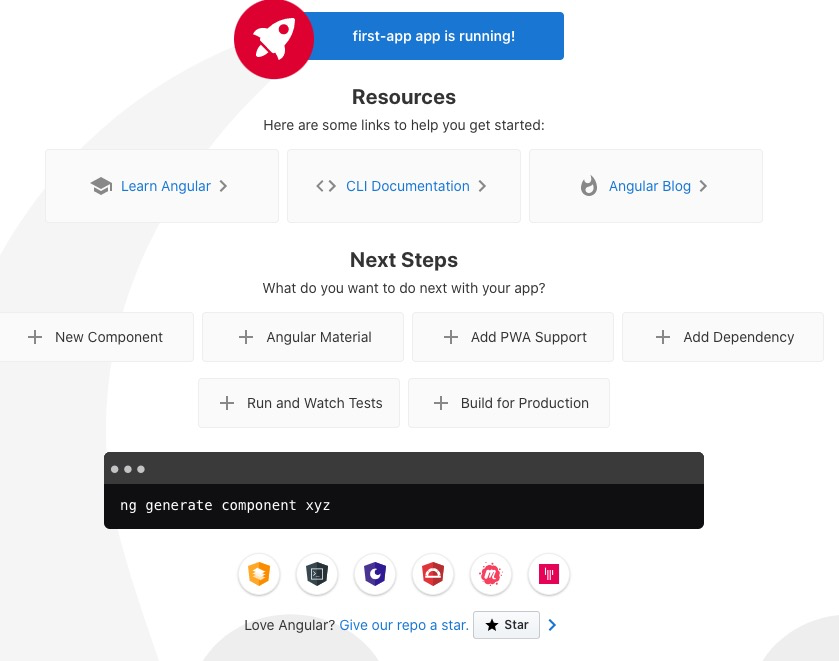
至此,Angular啟動成功。
>[info] 你還可以使用`ng serve -o`來啟動Angular應用,看看會發生什么。
## 停止
關閉終端或是在終端中使用`ctrl+c`組合鍵來終止Angular項目。
# 本節作業
* 除[Angular CLI](https://www.npmjs.com/package/@angular/cli)外,npm還管理著很多優秀的包,[http-server](https://www.npmjs.com/package/http-server)便是優秀的一個,請參考文檔嘗試安裝并使用。
* 請參考[Vue CLI的官方文檔](https://cli.vuejs.org/),初始化一個Vue項目。
# 資源列表
* [搭建環境](https://www.angular.cn/guide/setup-local)
* [CLI 概覽與命令參考手冊](https://www.angular.cn/cli)
* [本節源碼](https://github.com/mengyunzhi/angular11-guild/archive/step1.2.zip)
- 序言
- 第一章 Hello World
- 1.1 環境安裝
- 1.2 Hello Angular
- 1.3 Hello World!
- 第二章 教師管理
- 2.1 教師列表
- 2.1.1 初始化原型
- 2.1.2 組件生命周期之初始化
- 2.1.3 ngFor
- 2.1.4 ngIf、ngTemplate
- 2.1.5 引用 Bootstrap
- 2.2 請求后臺數據
- 2.2.1 HttpClient
- 2.2.2 請求數據
- 2.2.3 模塊與依賴注入
- 2.2.4 異步與回調函數
- 2.2.5 集成測試
- 2.2.6 本章小節
- 2.3 新增教師
- 2.3.1 組件初始化
- 2.3.2 [(ngModel)]
- 2.3.3 對接后臺
- 2.3.4 路由
- 2.4 編輯教師
- 2.4.1 組件初始化
- 2.4.2 獲取路由參數
- 2.4.3 插值與模板表達式
- 2.4.4 初識泛型
- 2.4.5 更新教師
- 2.4.6 測試中的路由
- 2.5 刪除教師
- 2.6 收尾工作
- 2.6.1 RouterLink
- 2.6.2 fontawesome圖標庫
- 2.6.3 firefox
- 2.7 總結
- 第三章 用戶登錄
- 3.1 初識單元測試
- 3.2 http概述
- 3.3 Basic access authentication
- 3.4 著陸組件
- 3.5 @Output
- 3.6 TypeScript 類
- 3.7 瀏覽器緩存
- 3.8 總結
- 第四章 個人中心
- 4.1 原型
- 4.2 管道
- 4.3 對接后臺
- 4.4 x-auth-token認證
- 4.5 攔截器
- 4.6 小結
- 第五章 系統菜單
- 5.1 延遲及測試
- 5.2 手動創建組件
- 5.3 隱藏測試信息
- 5.4 規劃路由
- 5.5 定義菜單
- 5.6 注銷
- 5.7 小結
- 第六章 班級管理
- 6.1 新增班級
- 6.1.1 組件初始化
- 6.1.2 MockApi 新建班級
- 6.1.3 ApiInterceptor
- 6.1.4 數據驗證
- 6.1.5 教師選擇列表
- 6.1.6 MockApi 教師列表
- 6.1.7 代碼重構
- 6.1.8 小結
- 6.2 教師列表組件
- 6.2.1 初始化
- 6.2.2 響應式表單
- 6.2.3 getTestScheduler()
- 6.2.4 應用組件
- 6.2.5 小結
- 6.3 班級列表
- 6.3.1 原型設計
- 6.3.2 初始化分頁
- 6.3.3 MockApi
- 6.3.4 靜態分頁
- 6.3.5 動態分頁
- 6.3.6 @Input()
- 6.4 編輯班級
- 6.4.1 測試模塊
- 6.4.2 響應式表單驗證
- 6.4.3 @Input()
- 6.4.4 FormGroup
- 6.4.5 自定義FormControl
- 6.4.6 代碼重構
- 6.4.7 小結
- 6.5 刪除班級
- 6.6 集成測試
- 6.6.1 惰性加載
- 6.6.2 API攔截器
- 6.6.3 路由與跳轉
- 6.6.4 ngStyle
- 6.7 初識Service
- 6.7.1 catchError
- 6.7.2 單例服務
- 6.7.3 單元測試
- 6.8 小結
- 第七章 學生管理
- 7.1 班級列表組件
- 7.2 新增學生
- 7.2.1 exports
- 7.2.2 自定義驗證器
- 7.2.3 異步驗證器
- 7.2.4 再識DI
- 7.2.5 屬性型指令
- 7.2.6 完成功能
- 7.2.7 小結
- 7.3 單元測試進階
- 7.4 學生列表
- 7.4.1 JSON對象與對象
- 7.4.2 單元測試
- 7.4.3 分頁模塊
- 7.4.4 子組件測試
- 7.4.5 重構分頁
- 7.5 刪除學生
- 7.5.1 第三方dialog
- 7.5.2 批量刪除
- 7.5.3 面向對象
- 7.6 集成測試
- 7.7 編輯學生
- 7.7.1 初始化
- 7.7.2 自定義provider
- 7.7.3 更新學生
- 7.7.4 集成測試
- 7.7.5 可訂閱的路由參數
- 7.7.6 小結
- 7.8 總結
- 第八章 其它
- 8.1 打包構建
- 8.2 發布部署
- 第九章 總結