# 規劃路由
本節我們重新對路由進行規劃,將當前所開發的各個模塊向著生產環境再邁進一步。
## Welcome
系統登錄后,我們先顯示一個welcome組件,則應該將Welcome組件加入到路由中。為此,我們先刪除原來不合理的路由信息:
```typescript
+++ b/first-app/src/app/app-routing.module.ts
@@ -5,18 +5,7 @@ import {EditComponent} from './edit/edit.component';
import {PersonalCenterComponent} from './personal-center/personal-center.component';
const routes: Routes = [
- {
- path: 'add',
- component: AddComponent
- },
- {
- path: 'edit/:id',
- component: EditComponent
- },
- {
- path: 'personal-center',#
- component: PersonalCenterComponent
- }
+
];
@NgModule({
```
然后在首頁上加入Welcome組件:
```typescript
+++ b/first-app/src/app/app-routing.module.ts
@@ -3,9 +3,13 @@ import {Routes, RouterModule} from '@angular/router';
import {AddComponent} from './add/add.component';
import {EditComponent} from './edit/edit.component';
import {PersonalCenterComponent} from './personal-center/personal-center.component';
+import {WelcomeComponent} from './welcome.component';
const routes: Routes = [
-
+ {
+ path: '',
+ component: WelcomeComponent
+ }
];
@NgModule({
```
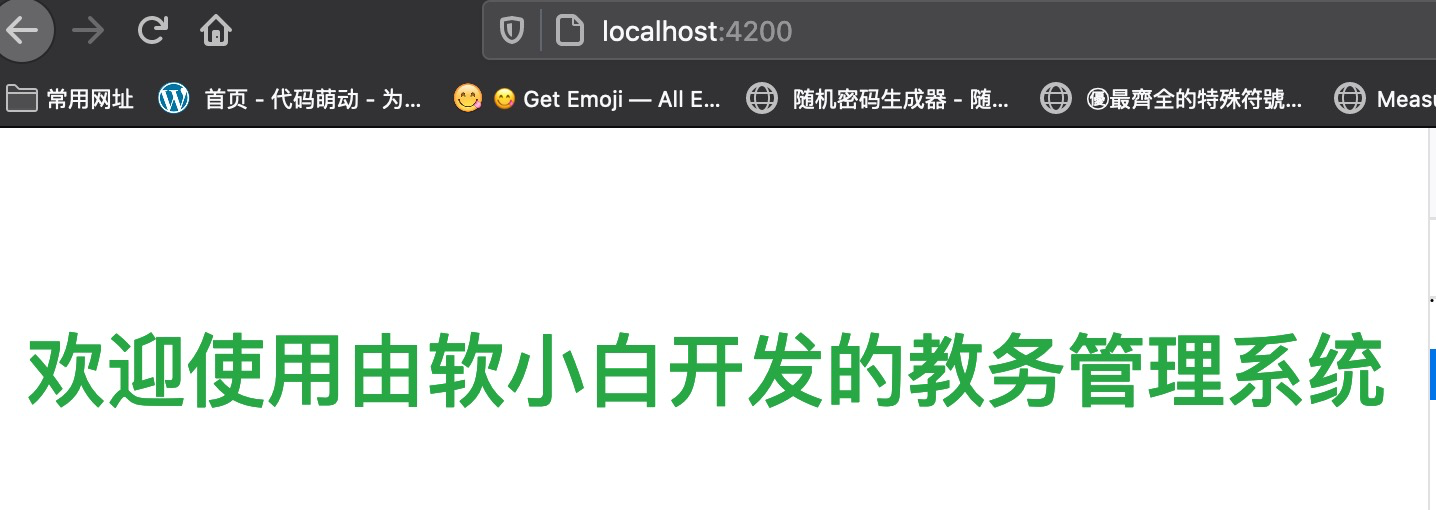
使用`ng s`啟動項目,輸入正確的用戶密碼后跳轉到首頁:

## <router-outlet>
前面我們說`<router-outlet></router-outlet>`是個路由出口,所有并聲明在路由的組件最終將顯示在這里,而當前的組件嵌套結構如下:

那么Welcome組件當然要顯示在app教師列表組件中了,我們可以改變`<router-outlet>`的位置來達到僅顯示Welcome組件的目的:
```html
+++ b/first-app/src/app/app.component.html
@@ -1,4 +1,3 @@
-<router-outlet></router-outlet>
<div class="row">
<div class="col-12 text-right">
<a class="btn btn-primary mr-2" routerLink="add"><i class="fas fa-plus"></i>新增</a>
```
```html
+++ b/first-app/src/app/index/index.component.html
@@ -1,2 +1,2 @@
-<app-root *ngIf="login"></app-root>
+<router-outlet *ngIf="login"></router-outlet>
<app-login *ngIf="!login" (beLogin)="onLogin($event)" ></app-login>
```

## 定義其它路由
接下來按照該思路,我們定義教師列表、新增、編輯組件、個人中心對應的路由。
```typescript
+++ b/first-app/src/app/app-routing.module.ts
@@ -4,11 +4,28 @@ import {AddComponent} from './add/add.component';
import {EditComponent} from './edit/edit.component';
import {PersonalCenterComponent} from './personal-center/personal-center.component';
import {WelcomeComponent} from './welcome.component';
+import {AppComponent} from './app.component';
const routes: Routes = [
{
path: '',
component: WelcomeComponent
+ },
+ {
+ path: 'teacher',
+ component: AppComponent
+ },
+ {
+ path: 'teacher/add',
+ component: AddComponent
+ },
+ {
+ path: 'teacher/edit/:id',
+ component: EditComponent
+ },
+ {
+ path: 'personal-center',
+ component: PersonalCenterComponent
}
];
```
通過url訪問http://localhost:4200,http://localhost:4200/teacher,http://localhost:4200/teacher/add,http://localhost:4200/personal-center均成功了,但唯獨http://localhost:4200/teacher/edit/1不行。控制臺顯示錯誤如下:

## 坑隊友
這便是前面在寫編輯組件時與APP耦合在一起的坑。
有人說我們在開發教師編輯組件時并不能夠預測到將來系統還有修改路由的需求,修改路由的需求導致了原來可以獲取到的App組件依賴不在了。所以這并不能說自己在坑隊友。但是我想說,我們在開發教師編輯組件時雖然預計不到將來的路由的變更情況,但我們卻違背了**不能在一個組件注入另一個組件**的原則,違背了**高內聚、低耦合**的原則。
上述問題的出現,并不在于我們考慮的多與少,而在于在我們實踐還不夠豐富的情況下,盲目自信地將**原則、規范**拋在了一邊。最佳實踐往往是一些比我們更牛、比我們閱歷更深的前輩們總結的防坑寶典,所以如果你所在的團隊有**規范**,有**原則**,那么請愉快的遵守吧,因為這意味著你所處的環境中,被坑的概率并不高。
## 本節作業
請結果搜索引擎,在教師編輯組件中刪除對App組件的應用,并在編輯成功后跳回教師列表頁面。同時,修改教師列表組件的路由錯誤。
| 名稱 | 鏈接 |
| ------------------ | ------------------------------------------------------------ |
| 訪問查詢參數和片段 | [https://angular.cn/guide/router#accessing-query-parameters-and-fragments](https://angular.cn/guide/router#accessing-query-parameters-and-fragments) |
| 路由出口 | [https://angular.cn/guide/router#router-outlet](https://angular.cn/guide/router#router-outlet) |
| 路由鏈接 | [https://angular.cn/guide/router#router-links](https://angular.cn/guide/router#router-links) |
| 本節源碼 | [https://github.com/mengyunzhi/angular11-guild/archive/step5.4.zip](https://github.com/mengyunzhi/angular11-guild/archive/step5.4.zip) |
- 序言
- 第一章 Hello World
- 1.1 環境安裝
- 1.2 Hello Angular
- 1.3 Hello World!
- 第二章 教師管理
- 2.1 教師列表
- 2.1.1 初始化原型
- 2.1.2 組件生命周期之初始化
- 2.1.3 ngFor
- 2.1.4 ngIf、ngTemplate
- 2.1.5 引用 Bootstrap
- 2.2 請求后臺數據
- 2.2.1 HttpClient
- 2.2.2 請求數據
- 2.2.3 模塊與依賴注入
- 2.2.4 異步與回調函數
- 2.2.5 集成測試
- 2.2.6 本章小節
- 2.3 新增教師
- 2.3.1 組件初始化
- 2.3.2 [(ngModel)]
- 2.3.3 對接后臺
- 2.3.4 路由
- 2.4 編輯教師
- 2.4.1 組件初始化
- 2.4.2 獲取路由參數
- 2.4.3 插值與模板表達式
- 2.4.4 初識泛型
- 2.4.5 更新教師
- 2.4.6 測試中的路由
- 2.5 刪除教師
- 2.6 收尾工作
- 2.6.1 RouterLink
- 2.6.2 fontawesome圖標庫
- 2.6.3 firefox
- 2.7 總結
- 第三章 用戶登錄
- 3.1 初識單元測試
- 3.2 http概述
- 3.3 Basic access authentication
- 3.4 著陸組件
- 3.5 @Output
- 3.6 TypeScript 類
- 3.7 瀏覽器緩存
- 3.8 總結
- 第四章 個人中心
- 4.1 原型
- 4.2 管道
- 4.3 對接后臺
- 4.4 x-auth-token認證
- 4.5 攔截器
- 4.6 小結
- 第五章 系統菜單
- 5.1 延遲及測試
- 5.2 手動創建組件
- 5.3 隱藏測試信息
- 5.4 規劃路由
- 5.5 定義菜單
- 5.6 注銷
- 5.7 小結
- 第六章 班級管理
- 6.1 新增班級
- 6.1.1 組件初始化
- 6.1.2 MockApi 新建班級
- 6.1.3 ApiInterceptor
- 6.1.4 數據驗證
- 6.1.5 教師選擇列表
- 6.1.6 MockApi 教師列表
- 6.1.7 代碼重構
- 6.1.8 小結
- 6.2 教師列表組件
- 6.2.1 初始化
- 6.2.2 響應式表單
- 6.2.3 getTestScheduler()
- 6.2.4 應用組件
- 6.2.5 小結
- 6.3 班級列表
- 6.3.1 原型設計
- 6.3.2 初始化分頁
- 6.3.3 MockApi
- 6.3.4 靜態分頁
- 6.3.5 動態分頁
- 6.3.6 @Input()
- 6.4 編輯班級
- 6.4.1 測試模塊
- 6.4.2 響應式表單驗證
- 6.4.3 @Input()
- 6.4.4 FormGroup
- 6.4.5 自定義FormControl
- 6.4.6 代碼重構
- 6.4.7 小結
- 6.5 刪除班級
- 6.6 集成測試
- 6.6.1 惰性加載
- 6.6.2 API攔截器
- 6.6.3 路由與跳轉
- 6.6.4 ngStyle
- 6.7 初識Service
- 6.7.1 catchError
- 6.7.2 單例服務
- 6.7.3 單元測試
- 6.8 小結
- 第七章 學生管理
- 7.1 班級列表組件
- 7.2 新增學生
- 7.2.1 exports
- 7.2.2 自定義驗證器
- 7.2.3 異步驗證器
- 7.2.4 再識DI
- 7.2.5 屬性型指令
- 7.2.6 完成功能
- 7.2.7 小結
- 7.3 單元測試進階
- 7.4 學生列表
- 7.4.1 JSON對象與對象
- 7.4.2 單元測試
- 7.4.3 分頁模塊
- 7.4.4 子組件測試
- 7.4.5 重構分頁
- 7.5 刪除學生
- 7.5.1 第三方dialog
- 7.5.2 批量刪除
- 7.5.3 面向對象
- 7.6 集成測試
- 7.7 編輯學生
- 7.7.1 初始化
- 7.7.2 自定義provider
- 7.7.3 更新學生
- 7.7.4 集成測試
- 7.7.5 可訂閱的路由參數
- 7.7.6 小結
- 7.8 總結
- 第八章 其它
- 8.1 打包構建
- 8.2 發布部署
- 第九章 總結