# 初始單元測試
原型永遠是第一位的!本節中我們快速的對登錄組件進行初始化,并嘗試使用代碼來測試登錄按鈕的綁定狀態。
## 初始化
打開shell并進行`src/app`文件夾,使用`ng g c login`初始化登錄組件:
```bash
panjiedeMacBook-Pro:app panjie$ ng g c login
CREATE src/app/login/login.component.css (0 bytes)
CREATE src/app/login/login.component.html (20 bytes)
CREATE src/app/login/login.component.spec.ts (619 bytes)
CREATE src/app/login/login.component.ts (271 bytes)
UPDATE src/app/app.module.ts (806 bytes)
```
然后,我們參考[bootstrap示例登錄界面](https://getbootstrap.com/docs/5.0/forms/overview/)對原型初始化如下:
```html
<form class="container-sm">
<div class="mb-3">
<label for="username" class="form-label">用戶名</label>
<input type="text" class="form-control" id="username" aria-describedby="usernameHelp">
<div id="usernameHelp" class="form-text">我們不會分享你的登錄信息</div>
</div>
<div class="mb-3">
<label for="exampleInputPassword1" class="form-label">密碼</label>
<input type="password" class="form-control" id="exampleInputPassword1">
</div>
<button type="submit" class="btn btn-primary">登錄</button>
</form>
```
## 屬性與方法
```typescript
+++ b/first-app/src/app/login/login.component.ts
@@ -1,4 +1,4 @@
-import { Component, OnInit } from '@angular/core';
+import {Component, OnInit} from '@angular/core';
@Component({
selector: 'app-login',
@@ -6,10 +6,18 @@ import { Component, OnInit } from '@angular/core';
styleUrls: ['./login.component.css']
})
export class LoginComponent implements OnInit {
+ teacher = {} as {
+ username: string,
+ password: string
+ };
- constructor() { }
+ constructor() {
+ }
ngOnInit(): void {
}
+ onSubmit(): void {
+ console.log('點擊了登錄按鈕');
+ }
}
```
V層綁定:
```html
+++ b/first-app/src/app/login/login.component.html
@@ -1,12 +1,14 @@
-<form class="container-sm">
+<form class="container-sm" (ngSubmit)="onSubmit()">
<div class="mb-3">
<label for="username" class="form-label">用戶名</label>
- <input type="text" class="form-control" id="username" aria-describedby="usernameHelp">
+ <input type="text" class="form-control" id="username" aria-describedby="usernameHelp"
+ [(ngModel)]="teacher.username" name="username">
<div id="usernameHelp" class="form-text">我們不會分享你的登錄信息</div>
</div>
<div class="mb-3">
<label for="exampleInputPassword1" class="form-label">密碼</label>
- <input type="password" class="form-control" id="exampleInputPassword1">
+ <input type="password" class="form-control" id="exampleInputPassword1"
+ [(ngModel)]="teacher.password" name="password">
</div>
<button type="submit" class="btn btn-primary">登錄</button>
</form>
```
## 測試
軟件工程相比于交通、土木工程等其它實體工程有著先天的優勢 ---- 幾乎可以忽略不計的測試成本。所以我們在開發中,要摒棄**我認為**、**應該**等字眼,當不太清楚自己的代碼是否正確運行時,最簡單的方法就是測試一下。
加入測試代碼:
```html
+++ b/first-app/src/app/login/login.component.html
@@ -1,3 +1,4 @@
+{{teacher | json}}
<form class="container-sm" (ngSubmit)="onSubmit()">
<div class="mb-3">
<label for="username" class="form-label">用戶名</label>
```
在單元測試中:
1. 加入FormModule以支持`[(ngModel)]`
2. 啟用自動檢測變更以便捷觀察數據的時實變更情況
```typescript
+++ b/first-app/src/app/login/login.component.spec.ts
@@ -1,6 +1,7 @@
import {ComponentFixture, TestBed} from '@angular/core/testing';
import {LoginComponent} from './login.component';
+import {FormsModule} from '@angular/forms';
fdescribe('LoginComponent', () => {
let component: LoginComponent;
@@ -8,7 +9,10 @@ fdescribe('LoginComponent', () => {
beforeEach(async () => {
await TestBed.configureTestingModule({
- declarations: [LoginComponent]
+ declarations: [LoginComponent],
+ imports: [
+ FormsModule
+ ]
})
.compileComponents();
});
@@ -21,5 +25,6 @@ fdescribe('LoginComponent', () => {
it('should create', () => {
expect(component).toBeTruthy();
+ fixture.autoDetectChanges();
});
});
```
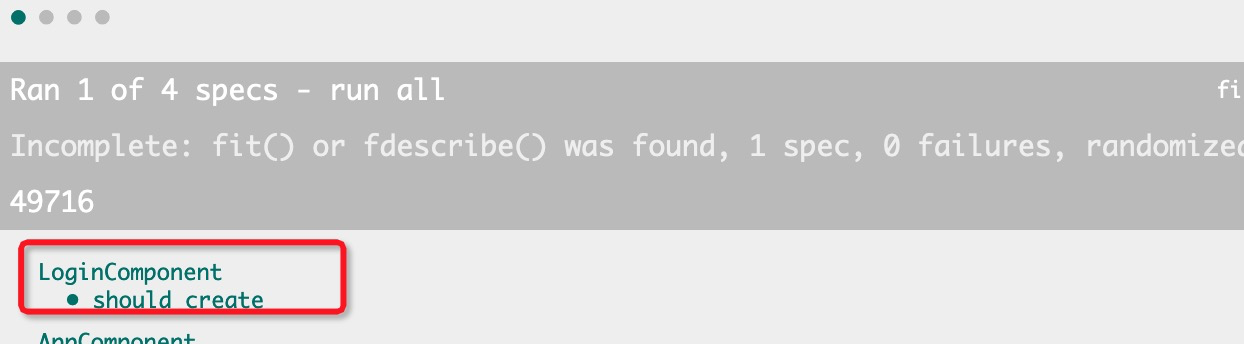
使用`ng t `快速啟動組件:
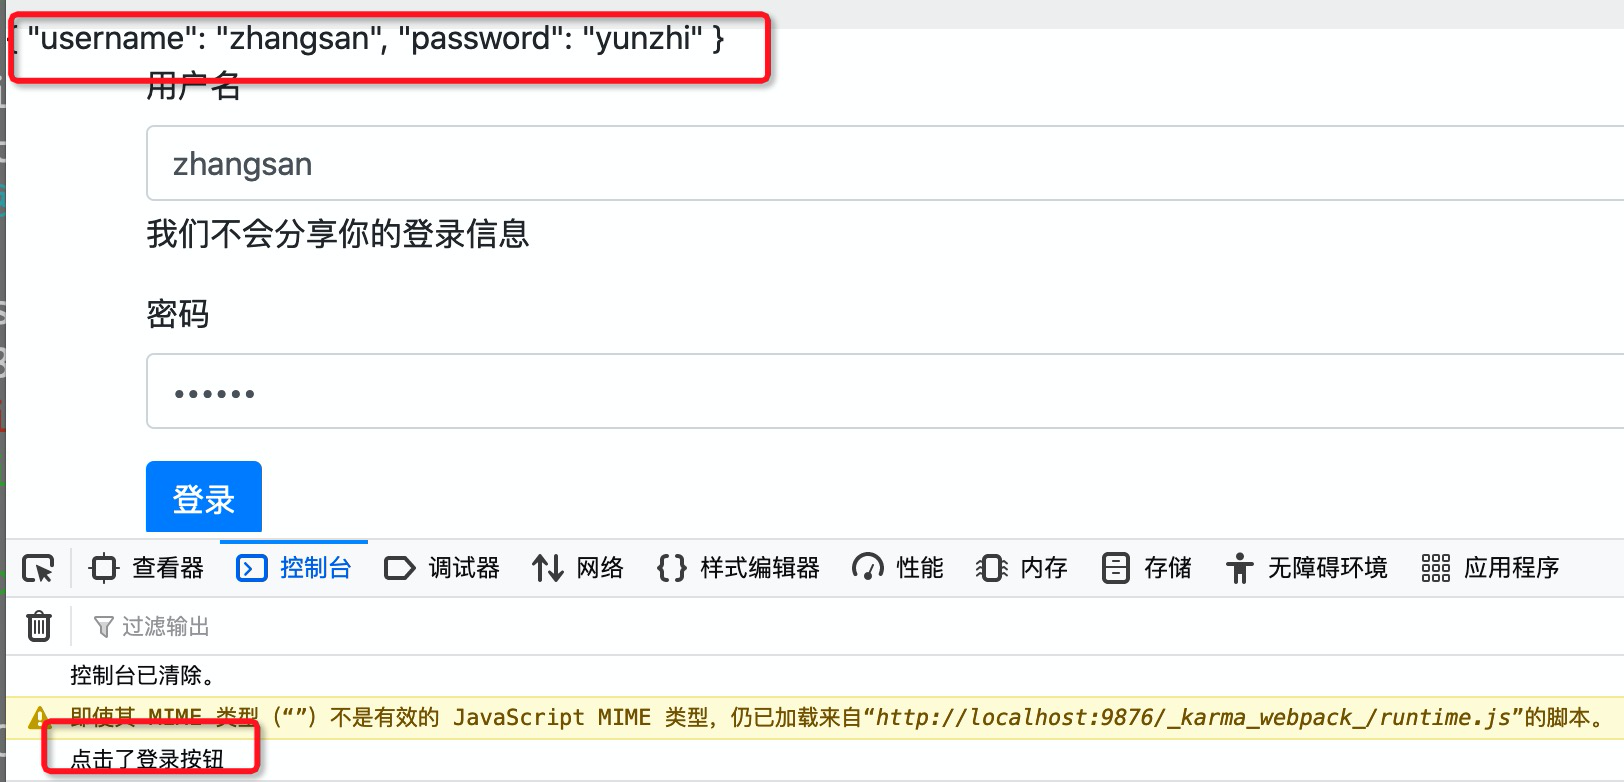
- 測試一:數據綁定成功
- 測試二:按鈕綁定生效
## 單元測試
在一般的項目中,用人眼來對代碼進行測試是不可靠的。它的不可靠主要體現在兩個方面:
* 隨著組件功能的增多,人眼同時檢測多種測試信息,免不了顧此失彼。開發了一個新功能同時,也可能破壞了一個原有的正常的功能。
* 由于**應該看什么**并沒有形成文檔。和合作開發中,張三在接手了李四的組件后,完全不知道應該看什么,哪是對的,哪又是錯的。
鑒于此,我們可以采用使用代碼來測試代碼的方法,由于這種方法是針對功能點的某個小的功能單元進行測試,所以又被稱為**單元測試**,英文關鍵字為**Unit Test**。
在此,我們簡單介紹下如何使用單元測試來驗證登錄按鈕與C層的`onSubmit`方法是否綁定成功。
### 流程
此測試在思想上大概分為以下幾步:
1. 獲取V層中的登錄按鈕
2. 使用代碼來點擊這個按鈕
3. 查看C層中的方法是否被觸發
接下來,我們分別介紹上述步驟的實現方法。
### 獲取V層的登錄按鈕
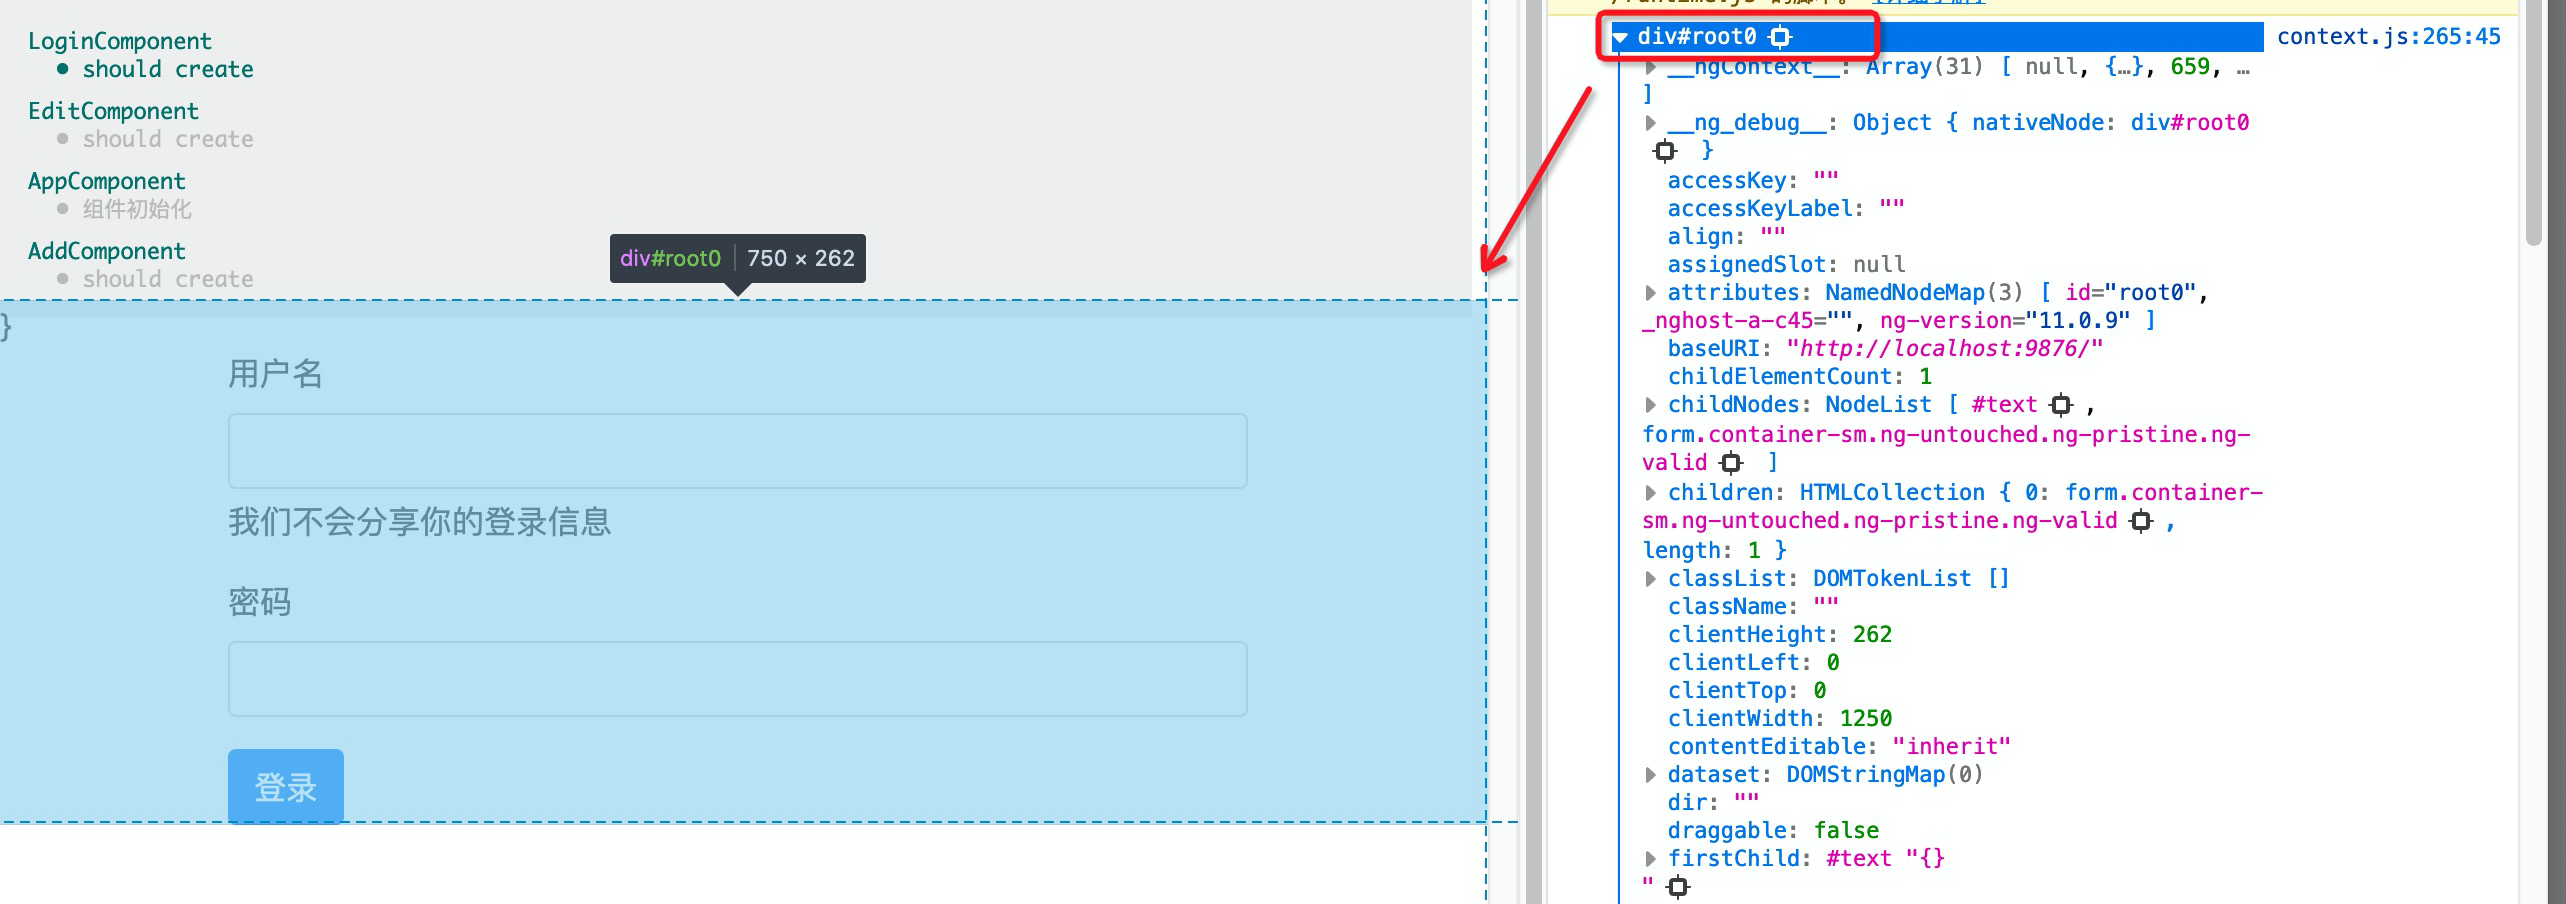
在單元測試中,我們可以使用`fixture`來獲取組件V層相關的數據,比如可以使用如下代碼來獲取當前V層對應的`dom`節點:
```typescript
+++ b/first-app/src/app/login/login.component.spec.ts
@@ -26,5 +26,7 @@ fdescribe('LoginComponent', () => {
it('should create', () => {
expect(component).toBeTruthy();
fixture.autoDetectChanges();
+
+ console.log(fixture.elementRef.nativeElement);
});
});
```
來到控制臺點擊對應的日志內容,對應當前組件的`dom`。
HTML中的每個元素都對應一個對象,該對象被稱為**文檔對象模型(Document Object Model)**。我們使用JS來操作HTML頁面的便是通過操作這個**文檔對象模型**。這樣一來,相較于傳統的直接編寫html代碼,網頁的生成便又多了一種方法:javascript 操作 dom。
獲取到組件dom后,我們在根據`dom`知識來獲取當前`dom`下的子`dom` ---- 登錄按鈕。
```typescript
+++ b/first-app/src/app/login/login.component.spec.ts
@@ -2,6 +2,7 @@ import {ComponentFixture, TestBed} from '@angular/core/testing';
import {LoginComponent} from './login.component';
import {FormsModule} from '@angular/forms';
+import {root} from 'rxjs/internal-compatibility';
fdescribe('LoginComponent', () => {
let component: LoginComponent;
@@ -28,5 +29,8 @@ fdescribe('LoginComponent', () => {
fixture.autoDetectChanges();
console.log(fixture.elementRef.nativeElement);
+ const rootDivElement = fixture.elementRef.nativeElement as HTMLDivElement; ??
+ const submitButtonElement = rootDivElement.querySelector('button') as HTMLButtonElement; ??
+ console.log(submitButtonElement);
});
});
```
- 根據實際情況,使用`as`來為變量指定一個類型。 ??
## 使用代碼點擊登錄按鈕
使用代碼對按鈕進行點擊非常簡單,僅僅需要調用該對象的`click()`方法即可:
```typescript
+++ b/first-app/src/app/login/login.component.spec.ts
@@ -32,5 +32,7 @@ fdescribe('LoginComponent', () => {
const rootDivElement = fixture.elementRef.nativeElement as HTMLDivElement;
const submitButtonElement = rootDivElement.querySelector('button') as HTMLButtonElement;
console.log(submitButtonElement);
+
+ submitButtonElement.click();
});
});
```
此時在控制臺中成功的打印了相關日志,說明C層的`onSubmit`方法被成功的觸發了,從而證明了綁定是成功的。
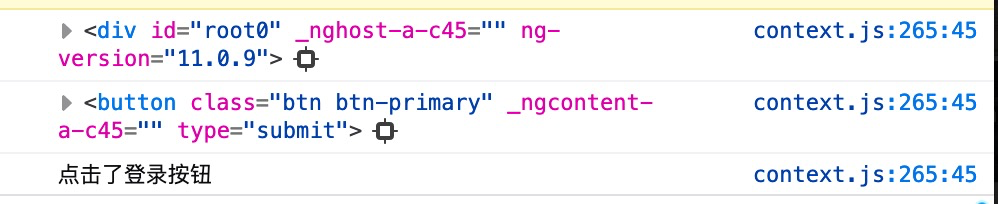
上述過程中,我們成功的實現了:使用代碼來點擊**登錄按鈕**,但在最后的驗證環節仍然是使用人眼進行觀察的,這仍然沒有消除人眼觀察的**不可靠性**。
### 驗證C層方法被觸發
遺憾的是,除了觀察,我們是沒有辦法直接驗證某個C層的方法是否被成功的調用的。為了實現這種驗證,我們采用:建造模擬C層的方法來間接達到這個目的。
所謂的模擬C層,就是在根據當前的C層,建立一個外表看起來一模一樣的C層。原C層有什么方法,我們的模擬C層就會有什么方法;原C層的方法中有什么樣的參數,我們的模擬C層的方法中也會有什么參數。
如果我們僅僅是為了驗證某一個方法,則還可以在這個方法上安排一個間諜。這像極了我們在電視劇中看到的諜戰片。為了獲取一手的情況,我們在在敵方的情報部門安排一個間諜。此時,敵方在我方間諜發送信息時,實際的信息卻被我方獲取了。
Jasmie提供的`spyOn`方法提供了這種放置間諜的功能:
```typescript
+++ b/first-app/src/app/login/login.component.spec.ts
@@ -32,7 +32,8 @@ fdescribe('LoginComponent', () => {
const rootDivElement = fixture.elementRef.nativeElement as HTMLDivElement;
const submitButtonElement = rootDivElement.querySelector('button') as HTMLButtonElement;
console.log(submitButtonElement);
-
+
+ spyOn(component, 'onSubmit');
submitButtonElement.click();
});
});
```
此時再次運行單元測試代碼,發現控制臺的日志不見了:
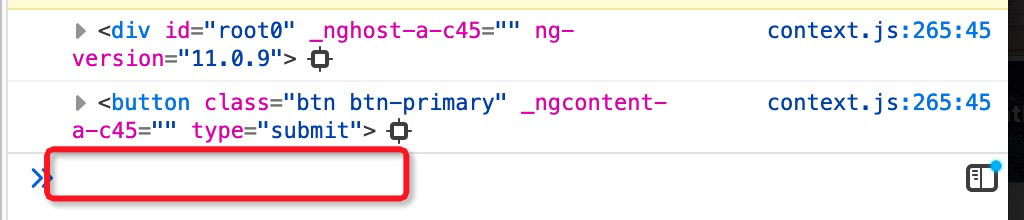
為了近一步確認的確是間諜方法被調用了,我們還可以補充下`spyOn`方法:
```typescript
+++ b/first-app/src/app/login/login.component.spec.ts
@@ -33,7 +33,7 @@ fdescribe('LoginComponent', () => {
const submitButtonElement = rootDivElement.querySelector('button') as HTMLButtonElement;
console.log(submitButtonElement);
- spyOn(component, 'onSubmit');
+ spyOn(component, 'onSubmit').and.callFake(() => console.log('間諜方法被調用'));
submitButtonElement.click();
});
});
```

最后,我們加入以下驗證代碼,來間諜來替我們驗證`onSubmit`方法的確是被調用了。
```typescript
+++ b/first-app/src/app/login/login.component.spec.ts
@@ -34,6 +34,10 @@ fdescribe('LoginComponent', () => {
console.log(submitButtonElement);
spyOn(component, 'onSubmit').and.callFake(() => console.log('間諜方法被調用'));
+ // 點擊按鈕以前,onSubmit方法應該被調用了0次。
+ expect??(component.onSubmit).toHaveBeenCalledTimes(0);
submitButtonElement.click();
+ // 點擊按鈕以后,onSubmit方法應該被調用了1次。
+ expect??(component.onSubmit).toHaveBeenCalledTimes(1);
});
});
```
**expect**??代表期望,就是說我們預計組件的方法是被調用了0次或是1次,如果實際的情況與我們預計的相同,則該代碼將正確運行;如果實際情況與我們預計的不同,則該處代碼將會觸發異常。
此時,如果我們刪除V層中關于觸發C層的代碼,則會得到如下異常。

該異常提示我們:點擊了V層的登錄按鈕后,并沒有調用C層的`onSubmit`方法。而這種情況是不正確的。
## 本節作業
嘗試刪除V層中關于觸發C層的代碼來觸發異常。
| 名稱 | 地址 | 備注 |
| ----------------------- | ------------------------------------------------------------ | --------------------------- |
| html dom | [https://www.runoob.com/htmldom/htmldom-tutorial.html](https://www.runoob.com/htmldom/htmldom-tutorial.html) | |
| HtmlDivElement | [https://developer.mozilla.org/zh-CN/docs/Web/API/HTMLElement](https://developer.mozilla.org/zh-CN/docs/Web/API/HTMLElement) | 建議將語言切換為English查看 |
| HtmlButtonElement | [https://developer.mozilla.org/zh-CN/docs/Web/API/HTMLButtonElement](https://developer.mozilla.org/zh-CN/docs/Web/API/HTMLButtonElement) | 建議將語言切換為English查看 |
| Element.querySelector() | [https://developer.mozilla.org/en-US/docs/Web/API/Element/querySelector](https://developer.mozilla.org/en-US/docs/Web/API/Element/querySelector) | 看不太懂時,再切回中文查看 |
| click() | [https://developer.mozilla.org/en-US/docs/Web/API/HTMLElement/click](https://developer.mozilla.org/en-US/docs/Web/API/HTMLElement/click) | |
| spyOn | [https://jasmine.github.io/api/edge/global.html#spyOn](https://jasmine.github.io/api/edge/global.html#spyOn) | |
| Expect | [https://jasmine.github.io/api/edge/global.html#expect](https://jasmine.github.io/api/edge/global.html#expect) | |
| 本節源碼 | [https://github.com/mengyunzhi/angular11-guild/archive/step3.1.zip](https://github.com/mengyunzhi/angular11-guild/archive/step3.1.zip) | |
- 序言
- 第一章 Hello World
- 1.1 環境安裝
- 1.2 Hello Angular
- 1.3 Hello World!
- 第二章 教師管理
- 2.1 教師列表
- 2.1.1 初始化原型
- 2.1.2 組件生命周期之初始化
- 2.1.3 ngFor
- 2.1.4 ngIf、ngTemplate
- 2.1.5 引用 Bootstrap
- 2.2 請求后臺數據
- 2.2.1 HttpClient
- 2.2.2 請求數據
- 2.2.3 模塊與依賴注入
- 2.2.4 異步與回調函數
- 2.2.5 集成測試
- 2.2.6 本章小節
- 2.3 新增教師
- 2.3.1 組件初始化
- 2.3.2 [(ngModel)]
- 2.3.3 對接后臺
- 2.3.4 路由
- 2.4 編輯教師
- 2.4.1 組件初始化
- 2.4.2 獲取路由參數
- 2.4.3 插值與模板表達式
- 2.4.4 初識泛型
- 2.4.5 更新教師
- 2.4.6 測試中的路由
- 2.5 刪除教師
- 2.6 收尾工作
- 2.6.1 RouterLink
- 2.6.2 fontawesome圖標庫
- 2.6.3 firefox
- 2.7 總結
- 第三章 用戶登錄
- 3.1 初識單元測試
- 3.2 http概述
- 3.3 Basic access authentication
- 3.4 著陸組件
- 3.5 @Output
- 3.6 TypeScript 類
- 3.7 瀏覽器緩存
- 3.8 總結
- 第四章 個人中心
- 4.1 原型
- 4.2 管道
- 4.3 對接后臺
- 4.4 x-auth-token認證
- 4.5 攔截器
- 4.6 小結
- 第五章 系統菜單
- 5.1 延遲及測試
- 5.2 手動創建組件
- 5.3 隱藏測試信息
- 5.4 規劃路由
- 5.5 定義菜單
- 5.6 注銷
- 5.7 小結
- 第六章 班級管理
- 6.1 新增班級
- 6.1.1 組件初始化
- 6.1.2 MockApi 新建班級
- 6.1.3 ApiInterceptor
- 6.1.4 數據驗證
- 6.1.5 教師選擇列表
- 6.1.6 MockApi 教師列表
- 6.1.7 代碼重構
- 6.1.8 小結
- 6.2 教師列表組件
- 6.2.1 初始化
- 6.2.2 響應式表單
- 6.2.3 getTestScheduler()
- 6.2.4 應用組件
- 6.2.5 小結
- 6.3 班級列表
- 6.3.1 原型設計
- 6.3.2 初始化分頁
- 6.3.3 MockApi
- 6.3.4 靜態分頁
- 6.3.5 動態分頁
- 6.3.6 @Input()
- 6.4 編輯班級
- 6.4.1 測試模塊
- 6.4.2 響應式表單驗證
- 6.4.3 @Input()
- 6.4.4 FormGroup
- 6.4.5 自定義FormControl
- 6.4.6 代碼重構
- 6.4.7 小結
- 6.5 刪除班級
- 6.6 集成測試
- 6.6.1 惰性加載
- 6.6.2 API攔截器
- 6.6.3 路由與跳轉
- 6.6.4 ngStyle
- 6.7 初識Service
- 6.7.1 catchError
- 6.7.2 單例服務
- 6.7.3 單元測試
- 6.8 小結
- 第七章 學生管理
- 7.1 班級列表組件
- 7.2 新增學生
- 7.2.1 exports
- 7.2.2 自定義驗證器
- 7.2.3 異步驗證器
- 7.2.4 再識DI
- 7.2.5 屬性型指令
- 7.2.6 完成功能
- 7.2.7 小結
- 7.3 單元測試進階
- 7.4 學生列表
- 7.4.1 JSON對象與對象
- 7.4.2 單元測試
- 7.4.3 分頁模塊
- 7.4.4 子組件測試
- 7.4.5 重構分頁
- 7.5 刪除學生
- 7.5.1 第三方dialog
- 7.5.2 批量刪除
- 7.5.3 面向對象
- 7.6 集成測試
- 7.7 編輯學生
- 7.7.1 初始化
- 7.7.2 自定義provider
- 7.7.3 更新學生
- 7.7.4 集成測試
- 7.7.5 可訂閱的路由參數
- 7.7.6 小結
- 7.8 總結
- 第八章 其它
- 8.1 打包構建
- 8.2 發布部署
- 第九章 總結