最后我們將Bootstrap樣式庫添加到當前的Angular項目。我們將引用Bootstrap的最新版本4.6.0。
# 傳統模式引入
傳統引入Bootstrap的方法相對比較簡單,下載幾個類庫或是直接引用相關的cdn即可。可靠的cdn有很多,在此我們使用`jsdelivr`提供的cdn服務。
需要注意的是傳統模式下的引入的范圍是:全局。而這個全局生效依賴于Angular項目在的整體啟動,所以在傳統模式下我們需要使用`ng serve`或`ng s`來啟動項目。
按相關文檔[https://getbootstrap.net/docs/getting-started/introduction/](https://getbootstrap.net/docs/getting-started/introduction/)、[https://v4.bootcss.com/docs/getting-started/introduction/](https://v4.bootcss.com/docs/getting-started/introduction/)的說明,我們打開位于項目根目錄下的`src`文件夾中的`index.html`。

在`head`的部分加入` <link rel="stylesheet" href="https://cdn.jsdelivr.net/npm/bootstrap@4.6.0/dist/css/bootstrap.min.css" integrity="sha384-B0vP5xmATw1+K9KRQjQERJvTumQW0nPEzvF6L/Z6nronJ3oUOFUFpCjEUQouq2+l" crossorigin="anonymous">`
在`</body>`前加入:
```html
<script src="https://cdn.jsdelivr.net/npm/jquery@3.5.1/dist/jquery.slim.min.js"
integrity="sha384-DfXdz2htPH0lsSSs5nCTpuj/zy4C+OGpamoFVy38MVBnE+IbbVYUew+OrCXaRkfj"
crossorigin="anonymous"></script>
<script src="https://cdn.jsdelivr.net/npm/bootstrap@4.6.0/dist/js/bootstrap.bundle.min.js"
integrity="sha384-Piv4xVNRyMGpqkS2by6br4gNJ7DXjqk09RmUpJ8jgGtD7zP9yug3goQfGII0yAns"
crossorigin="anonymous"></script>
```
最終整體代碼如下:
```html
<!doctype html>
<html lang="en">
<head>
<meta charset="utf-8">
<title>FirstApp</title>
<base href="/">
<meta name="viewport" content="width=device-width, initial-scale=1">
<link rel="icon" type="image/x-icon" href="favicon.ico">
<!-- Bootstrap CSS -->
<link rel="stylesheet" href="https://cdn.jsdelivr.net/npm/bootstrap@4.6.0/dist/css/bootstrap.min.css" integrity="sha384-B0vP5xmATw1+K9KRQjQERJvTumQW0nPEzvF6L/Z6nronJ3oUOFUFpCjEUQouq2+l" crossorigin="anonymous">
</head>
<body>
<app-root></app-root>
<!-- Option 1: jQuery and Bootstrap Bundle (includes Popper) -->
<script src="https://cdn.jsdelivr.net/npm/jquery@3.5.1/dist/jquery.slim.min.js"
integrity="sha384-DfXdz2htPH0lsSSs5nCTpuj/zy4C+OGpamoFVy38MVBnE+IbbVYUew+OrCXaRkfj"
crossorigin="anonymous"></script>
<script src="https://cdn.jsdelivr.net/npm/bootstrap@4.6.0/dist/js/bootstrap.bundle.min.js"
integrity="sha384-Piv4xVNRyMGpqkS2by6br4gNJ7DXjqk09RmUpJ8jgGtD7zP9yug3goQfGII0yAns"
crossorigin="anonymous"></script>
</body>
</html>
```
在這我們修正個語言問題,當前頁面的語言設置為`en`,我們將其修正為`zh-Hans`以表示該頁為一個**簡體中文官方普通話**頁面。
```html
<!doctype html>
<html lang="zh-Hans">
```
## 測試
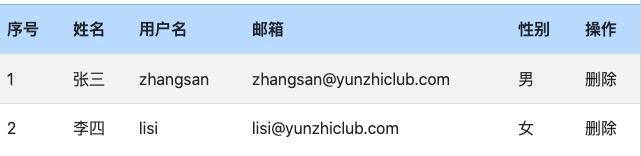
將V層中的**部分**代碼按Bootstrap的規范重構如下:
```html
<table class="table table-striped"> ?
<thead> ?
<tr class="table-primary?">
<th>序號</th>
<th>姓名</th>
<th>用戶名</th>
<th>郵箱</th>
<th>性別</th>
<th>操作</th>
</tr>
</thead>
<tbody> ?
<tr *ngFor="let teacher of teachers; index as i">
<td>{{ i + 1 }}</td>
<td>{{ teacher.name }}</td>
<td>{{ teacher.username }}</td>
<td>{{ teacher.email }}</td>
<td *ngIf="teacher.sex; else femaleBlock">男</td>
<td>刪除</td>
</tr>
</tbody>
</table>
```
* ? 加入表格樣式、隔行隔色樣式
* ? 加入thead、tbody規范table以符合bootstrap的規范
* ? 將表頭設置為淺藍背景
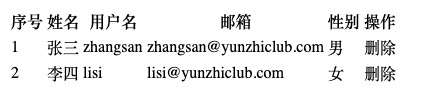
但遺憾的是我們使用`ng t`啟動的瀏覽器中查看,仍然沒有任何效果:
# Angular模式
使用傳統的模式引入雖然快捷有效,但并不符合Angular模式。雖然可以通過[其它的方式](https://github.com/karma-runner/karma/issues/421)來解決單元測試中引用cdn資源的問題,但這并不是官方推薦的。
在學習一門的新的語言時,努力的向官方推薦的用法靠齊絕對是最佳實踐。在學習的過程中,你對自己以前的開發習慣、開發思想的摒棄效率也會直接影響著學習新知識的效率。相信隨著我們日后對Angular的理解,我們將對Angular模式有越來越深的認同感。
在繼續學習之前,我們保留前面對模板的修改部分,保存對`index.html`文件lang修改的部分,刪除其對`bootstrap`相關資源的引用。最終`index.html`代碼如下:
```html
<!doctype html>
<html lang="zh-Hans">
<head>
<meta charset="utf-8">
<title>FirstApp</title>
<base href="/">
<meta name="viewport" content="width=device-width, initial-scale=1">
<link rel="icon" type="image/x-icon" href="favicon.ico">
</head>
<body>
<app-root></app-root>
</body>
</html>
```
## 項目依賴管理
當前我們想實現引入`bootstrap`,在傳統模式下我們發現在引入去`JS`庫前,需要提前引入`jquery`。我們把`bootstrap`與`jquery`這種關系稱為`依賴`。
那么當前我們可見的**依賴**就有兩個:第一個是`bootstrap`依賴于`jquery`;第二個是我們的項目依賴于`bootstrap`。
我們在第一章的時候講過了軟件管家**NPM**,使用它可以快速的為我們安裝某些軟件。比如我們使用`npm install -g @angular/cli@11.0.7`安裝了`Angular-cli`。我們在本章開始的時候,提示大家為了避免一些小版本問題,下載壓縮包后執行`npm install`來自動安裝依賴,`npm install`之所以能夠自動的安裝依賴,是由于我們的項目根目錄中存在一個名為`package.json`的文件:
```bash
.
├── README.md
├── angular.json
├── e2e
├── karma.conf.js
├── node_modules
├── package-lock.json
├── package.json ??
├── src
├── tsconfig.app.json
├── tsconfig.json
├── tsconfig.spec.json
└── tslint.json
```
打開該文件將發現有個`dependencies`以及`devDependencies`屬性,這兩個屬性中存放的便是當前項目的所有依賴:
```json
"dependencies??": {
"@angular/animations": "~11.0.9",
"@angular/common": "~11.0.9",
"@angular/compiler": "~11.0.9",
"@angular/core": "~11.0.9",
"@angular/forms": "~11.0.9",
"@angular/platform-browser": "~11.0.9",
"@angular/platform-browser-dynamic": "~11.0.9",
"@angular/router": "~11.0.9",
"rxjs": "~6.6.0",
"tslib": "^2.0.0",
"zone.js": "~0.10.2"
},
"devDependencies??": {
"@angular-devkit/build-angular": "~0.1100.7",
"@angular/cli": "~11.0.7",
"@angular/compiler-cli": "~11.0.9",
"@types/jasmine": "~3.6.0",
"@types/node": "^12.11.1",
"codelyzer": "^6.0.0",
"jasmine-core": "~3.6.0",
"jasmine-spec-reporter": "~5.0.0",
"karma": "~5.1.0",
"karma-chrome-launcher": "~3.1.0",
"karma-coverage": "~2.0.3",
"karma-jasmine": "~4.0.0",
"karma-jasmine-html-reporter": "^1.5.0",
"protractor": "~7.0.0",
"ts-node": "~8.3.0",
"tslint": "~6.1.0",
"typescript": "~4.0.2"
}
```
當前我們想安裝`bootstrap`的`4.6.0`版本有兩種選擇:
一、我們可以將`bootstrap`以及版本號`4.6.0`寫入到`package.json`的`dependencies`屬性中,然后在項目根目錄中執行`npm install`時`npm`將自動為我們下載安裝`bootstrap`的`4.6.0`版本。
二、除此以外,我們還可以在項目根目錄中直接執行`npm install -save bootstrap@4.6.0`來安裝`bootstrap`,由于`-save`的存在,`bootstrap`的`4.6.0`版本信息將自動被寫入`package.json`的`dependencies`屬性中。
第二種方法更常用一些,我們在此使用第二種,使用shell進入項目根路徑,執行:`npm install -save bootstrap@4.6.0`
```bash
panjiedeMac-Pro:first-app?? panjie$ npm install -save bootstrap@4.6.0
npm WARN bootstrap@4.6.0 requires a peer of jquery@1.9.1 - 3 but none is installed. You must install peer dependencies yourself. ??
npm WARN bootstrap@4.6.0 requires a peer of popper.js@^1.16.1 but none is installed. You must install peer dependencies yourself. ??
+ bootstrap@4.6.0
added 1 package from 2 contributors, removed 1 package and audited 1465 packages in 13.857s
83 packages are looking for funding
run `npm fund` for details
found 0 vulnerabilities
```
* ?? 在輸入命令時,需要隨時注意當前路徑是否與教程一致。
* ?? 安裝信息中提示要想使bootstrap正常工作,還需要安裝一個版本為1.9.1的jquery以及一個最低版本1.16.1的popper.js。
>[success] 隨著時間的推移,你最終的執行結果可能會存在更多關于安全方面的提醒。在學習過程中可以忽略。
接下來我們繼續安裝`jquery`的`3.5.1`版本,執行:`npm install -save jquery@3.5.1`
```bash
panjiedeMac-Pro:first-app panjie$ npm install -save jquery@3.5.1
npm WARN bootstrap@4.6.0 requires a peer of popper.js@^1.16.1 but none is installed. You must install peer dependencies yourself.
+ jquery@3.5.1
added 1 package from 1 contributor and audited 1466 packages in 9.874s
83 packages are looking for funding
run `npm fund` for details
found 0 vulnerabilities
```
一個`popper.js`的`1.16.1`版本,執行:`npm install -save popper.js@1.16.1`
```bash
panjiedeMac-Pro:first-app panjie$ npm install -save popper.js@1.16.1
npm WARN deprecated popper.js@1.16.1: You can find the new Popper v2 at @popperjs/core, this package is dedicated to the legacy v1
+ popper.js@1.16.1
added 1 package from 2 contributors and audited 1467 packages in 10.526s
84 packages are looking for funding
run `npm fund` for details
found 0 vulnerabilities
```
上述命令安裝的三個依賴均被自動下載至根目錄下的`node_modules`文件中,并對應以依賴的名字做為文件夾名,我們可以在`node_modules`分別找到`bootstrap`、`jquery`以及`popper.js`文件夾。
```bash
.
├── README.md
├── angular.json
├── e2e
├── karma.conf.js
├── node_modules ??
├── package-lock.json
├── package.json
├── src
├── tsconfig.app.json
├── tsconfig.json
├── tsconfig.spec.json
└── tslint.json
```
## 引用依賴
`npm install`按照相關依賴后,僅僅是保障了當前項目中**有**可用的依賴,并沒有實現將其添加到`Angular`項目中。而是否被添加到`Angular`項目中則由`angular.json`來決定。
```bash
.
├── README.md
├── angular.json ??
├── e2e
├── karma.conf.js
├── node_modules
├── package-lock.json
├── package.json
├── src
├── tsconfig.app.json
├── tsconfig.json
├── tsconfig.spec.json
└── tslint.json
```
我們打開該文件后繼續學習。
### ng serve
若要使第三方資源在`ng serve`時生效,則需要把對應的資源地址寫入到`projects -> first0app -> architect -> build`中的`style`、`scripts`屬性:
```json
"styles": [
"src/styles.css"
],
"scripts": []
```
上述屬性位于angular.json的第30-33行,我們將其中的內容補充如下:
```json
"styles": [
"src/styles.css",
"./node_modules/bootstrap/dist/css/bootstrap.css"
],
"scripts": [
"./node_modules/jquery/dist/jquery.slim.min.js",
"./node_modules/popper.js/dist/umd/popper.min.js",
"./node_modules/bootstrap/dist/js/bootstrap.min.js"
]
```
* 注意引入js的順序保持與bootstrap要求的一致
* 注意引入的是`jquery.slim.min.js`而非`jquery.min.js`
此時我們**重新運行**`ng s`以查看效果:

>[warning] 如果你照著敲代碼后啟動報錯,請直接復制上述代碼至指定的位置
### ng t
若要使第三方資源在`ng t`時生效,則需要把對應的資源地址寫入到`projects -> first0app -> architect -> test`中的`style`、`scripts`屬性:
```json
"styles": [
"src/styles.css",
"./node_modules/bootstrap/dist/css/bootstrap.css"
],
"scripts": [
"./node_modules/jquery/dist/jquery.slim.min.js",
"./node_modules/popper.js/dist/umd/popper.min.js",
"./node_modules/bootstrap/dist/js/bootstrap.min.js"
]
```
上述屬性位于angular.json的第98-101行,我們將其中的內容補充如下:
此時我們**重新運行**`ng t`以查看效果:

>[warning] 如果你照著敲代碼后啟動報錯,請直接復制上述代碼至指定的位置
# 收尾
最后讓我們刪除V層中用于測試的代碼:
```html
<pre> ?
{{ teachers | json }} ?
</pre> ?
```
簡單回顧一樣本章的內容,然后休息一會吧。
# 本節作業
* 使用`npm install -save bootstrap@4.6.0`會將`bootstrap`的`4.6.0`版本信息寫入`package.json`的`dependencies`屬性中;請嘗試查詢下,如何將某個第三方資源添加到`devDependencies`屬性中?
* 從名稱上猜一猜`dependencies`與`devDependencies`有哪些不同?
# 資源列表
| 名稱 | 地址 |
|---- | ---- |
| ISO Language Codes | [https://www.w3schools.com/tags/ref_language_codes.asp](https://www.w3schools.com/tags/ref_language_codes.asp) |
| Bootstrap4 快速開始 | [https://v4.bootcss.com/docs/getting-started/introduction/#starter-template](https://v4.bootcss.com/docs/getting-started/introduction/#starter-template) |
| Bootstrap4 表格 | [https://v4.bootcss.com/docs/content/tables/#striped-rows](https://v4.bootcss.com/docs/content/tables/#striped-rows) |
| npm-install | [https://docs.npmjs.com/cli/v6/commands/npm-install](https://docs.npmjs.com/cli/v6/commands/npm-install) |
| 本節源碼 | [https://github.com/mengyunzhi/angular11-guild/archive/step2.1.5.zip](https://github.com/mengyunzhi/angular11-guild/archive/step2.1.5.zip) |
- 序言
- 第一章 Hello World
- 1.1 環境安裝
- 1.2 Hello Angular
- 1.3 Hello World!
- 第二章 教師管理
- 2.1 教師列表
- 2.1.1 初始化原型
- 2.1.2 組件生命周期之初始化
- 2.1.3 ngFor
- 2.1.4 ngIf、ngTemplate
- 2.1.5 引用 Bootstrap
- 2.2 請求后臺數據
- 2.2.1 HttpClient
- 2.2.2 請求數據
- 2.2.3 模塊與依賴注入
- 2.2.4 異步與回調函數
- 2.2.5 集成測試
- 2.2.6 本章小節
- 2.3 新增教師
- 2.3.1 組件初始化
- 2.3.2 [(ngModel)]
- 2.3.3 對接后臺
- 2.3.4 路由
- 2.4 編輯教師
- 2.4.1 組件初始化
- 2.4.2 獲取路由參數
- 2.4.3 插值與模板表達式
- 2.4.4 初識泛型
- 2.4.5 更新教師
- 2.4.6 測試中的路由
- 2.5 刪除教師
- 2.6 收尾工作
- 2.6.1 RouterLink
- 2.6.2 fontawesome圖標庫
- 2.6.3 firefox
- 2.7 總結
- 第三章 用戶登錄
- 3.1 初識單元測試
- 3.2 http概述
- 3.3 Basic access authentication
- 3.4 著陸組件
- 3.5 @Output
- 3.6 TypeScript 類
- 3.7 瀏覽器緩存
- 3.8 總結
- 第四章 個人中心
- 4.1 原型
- 4.2 管道
- 4.3 對接后臺
- 4.4 x-auth-token認證
- 4.5 攔截器
- 4.6 小結
- 第五章 系統菜單
- 5.1 延遲及測試
- 5.2 手動創建組件
- 5.3 隱藏測試信息
- 5.4 規劃路由
- 5.5 定義菜單
- 5.6 注銷
- 5.7 小結
- 第六章 班級管理
- 6.1 新增班級
- 6.1.1 組件初始化
- 6.1.2 MockApi 新建班級
- 6.1.3 ApiInterceptor
- 6.1.4 數據驗證
- 6.1.5 教師選擇列表
- 6.1.6 MockApi 教師列表
- 6.1.7 代碼重構
- 6.1.8 小結
- 6.2 教師列表組件
- 6.2.1 初始化
- 6.2.2 響應式表單
- 6.2.3 getTestScheduler()
- 6.2.4 應用組件
- 6.2.5 小結
- 6.3 班級列表
- 6.3.1 原型設計
- 6.3.2 初始化分頁
- 6.3.3 MockApi
- 6.3.4 靜態分頁
- 6.3.5 動態分頁
- 6.3.6 @Input()
- 6.4 編輯班級
- 6.4.1 測試模塊
- 6.4.2 響應式表單驗證
- 6.4.3 @Input()
- 6.4.4 FormGroup
- 6.4.5 自定義FormControl
- 6.4.6 代碼重構
- 6.4.7 小結
- 6.5 刪除班級
- 6.6 集成測試
- 6.6.1 惰性加載
- 6.6.2 API攔截器
- 6.6.3 路由與跳轉
- 6.6.4 ngStyle
- 6.7 初識Service
- 6.7.1 catchError
- 6.7.2 單例服務
- 6.7.3 單元測試
- 6.8 小結
- 第七章 學生管理
- 7.1 班級列表組件
- 7.2 新增學生
- 7.2.1 exports
- 7.2.2 自定義驗證器
- 7.2.3 異步驗證器
- 7.2.4 再識DI
- 7.2.5 屬性型指令
- 7.2.6 完成功能
- 7.2.7 小結
- 7.3 單元測試進階
- 7.4 學生列表
- 7.4.1 JSON對象與對象
- 7.4.2 單元測試
- 7.4.3 分頁模塊
- 7.4.4 子組件測試
- 7.4.5 重構分頁
- 7.5 刪除學生
- 7.5.1 第三方dialog
- 7.5.2 批量刪除
- 7.5.3 面向對象
- 7.6 集成測試
- 7.7 編輯學生
- 7.7.1 初始化
- 7.7.2 自定義provider
- 7.7.3 更新學生
- 7.7.4 集成測試
- 7.7.5 可訂閱的路由參數
- 7.7.6 小結
- 7.8 總結
- 第八章 其它
- 8.1 打包構建
- 8.2 發布部署
- 第九章 總結